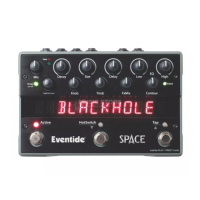
Space User Guide Expression Pedal
25
Expression Pedal
An external Expression Pedal can be connected to the rear panel ¼” phone jack. The
Expression Pedal can be set up to control any combination of the ten parameters. For proper
operation the Expression Pedal should be a simple linear resistive potentiometer (“pot”) with
a maximum value of between 5k Ohms and 25k Ohms. Refer to
www.eventide.com/AudioDivision.aspx for information on recommended expression pedals.
Because different pedals can have different electrical characteristics, it is a good idea to
“calibrate” your Stompbox to match the pedal. This can be done automatically, either all the
time, or only when wanted. To turn calibration On/Off:
1) Press and hold the Encoder and Right Footswitch simultaneously for a few
seconds to enter System Mode. Release the Encoder.
2) Turn the Encoder until [UTILITY] is displayed.
3) Momentarily press the Encoder.
4) Turn the Encoder until [PEDAL CAL] is displayed.
5) Momentarily press the Encoder.
6) Turn the Encoder to select either ON or OFF.
7) Press and hold the Encoder and Right Footswitch simultaneously for a few
seconds to exit System Mode.
When Calibration is ON, the unit will remember the highest and lowest values it sees and will
use these as pedal up and pedal down. Typically you will turn it ON, move the pedal between
its maximum and minimum values a few times, then turn it OFF. Be aware that some pedals
can be a bit quirky and pressing hard and pressing gently may give different values. For this
reason we suggest turning calibration OFF when you’re happy with the setting. When
Calibration is OFF, the values will be remembered and will not be changed by moving the
pedal.
The Expression Pedal settings can be adjusted simply by pressing the Pedal to the full heel or
full toe position and turning the Control Knobs. You’ll notice afterwards that whenever you
move the Pedal, the green “Edited” LED in the upper right corner blinks. This indicates that
Pedal programming is “live.” To program, press the heel completely down and adjust the
knobs to get the sound that you want for the heel down position. You must turn the knobs
to create the assignment. Knobs that are not turned are not assigned. Now, press the toe
completely down and change the settings of any or all of the knobs. Parameters associated
with any knobs that are moved will be mapped to the Pedal. Now, when you rock the pedal
back and forth, you’ll hear the sound change between the two settings.
After a few seconds of pedal and knob inactivity, the green “Edited” LED will stop flashing.
When the LED is solidly lit, you can turn any of the Parameter Control Knobs to change the
sound without changing the Expression Pedal mapping.
When the Expression Pedal is used, the Billboard will display the changing value. If the
Expression Pedal has been set up to control a single parameter, the display will show the
parameter name and value in the same way as if you were turning the Control Knob. If the
Expression Pedal has been set up to control multiple parameters, the display is a graphic
representation of the Control Knobs. Control Knobs that are controlled by the Expression
Pedal are represented as circles while unassigned Control Knobs are indicated by a solid line
(dash). The 2
nd
character from the left indicates the position of the Expression Pedal with a
value from 0-9 (0 = heel, 9 = toe).