34000 Autry Street, Livonia, MI 48150 • 800.968.5530 • Fax 734.419.0209 • www.hamiltonengineering.com • LIT91127 REV 3/09
Page 21 of 50
or when openings around pipes are not protected by non-combustible materials. On an EVO installed above
radiation level, some state and local codes require a low water cut off device at the time of installation by the
installer. A water ow switch is provided as standard and will take the place of a low water cut-off. If the EVO
supplies hot water to heating coils in air handler units, ow control valves or other devices must be installed to
prevent gravity circulation of boiler water in the coils during the cooling cycle.
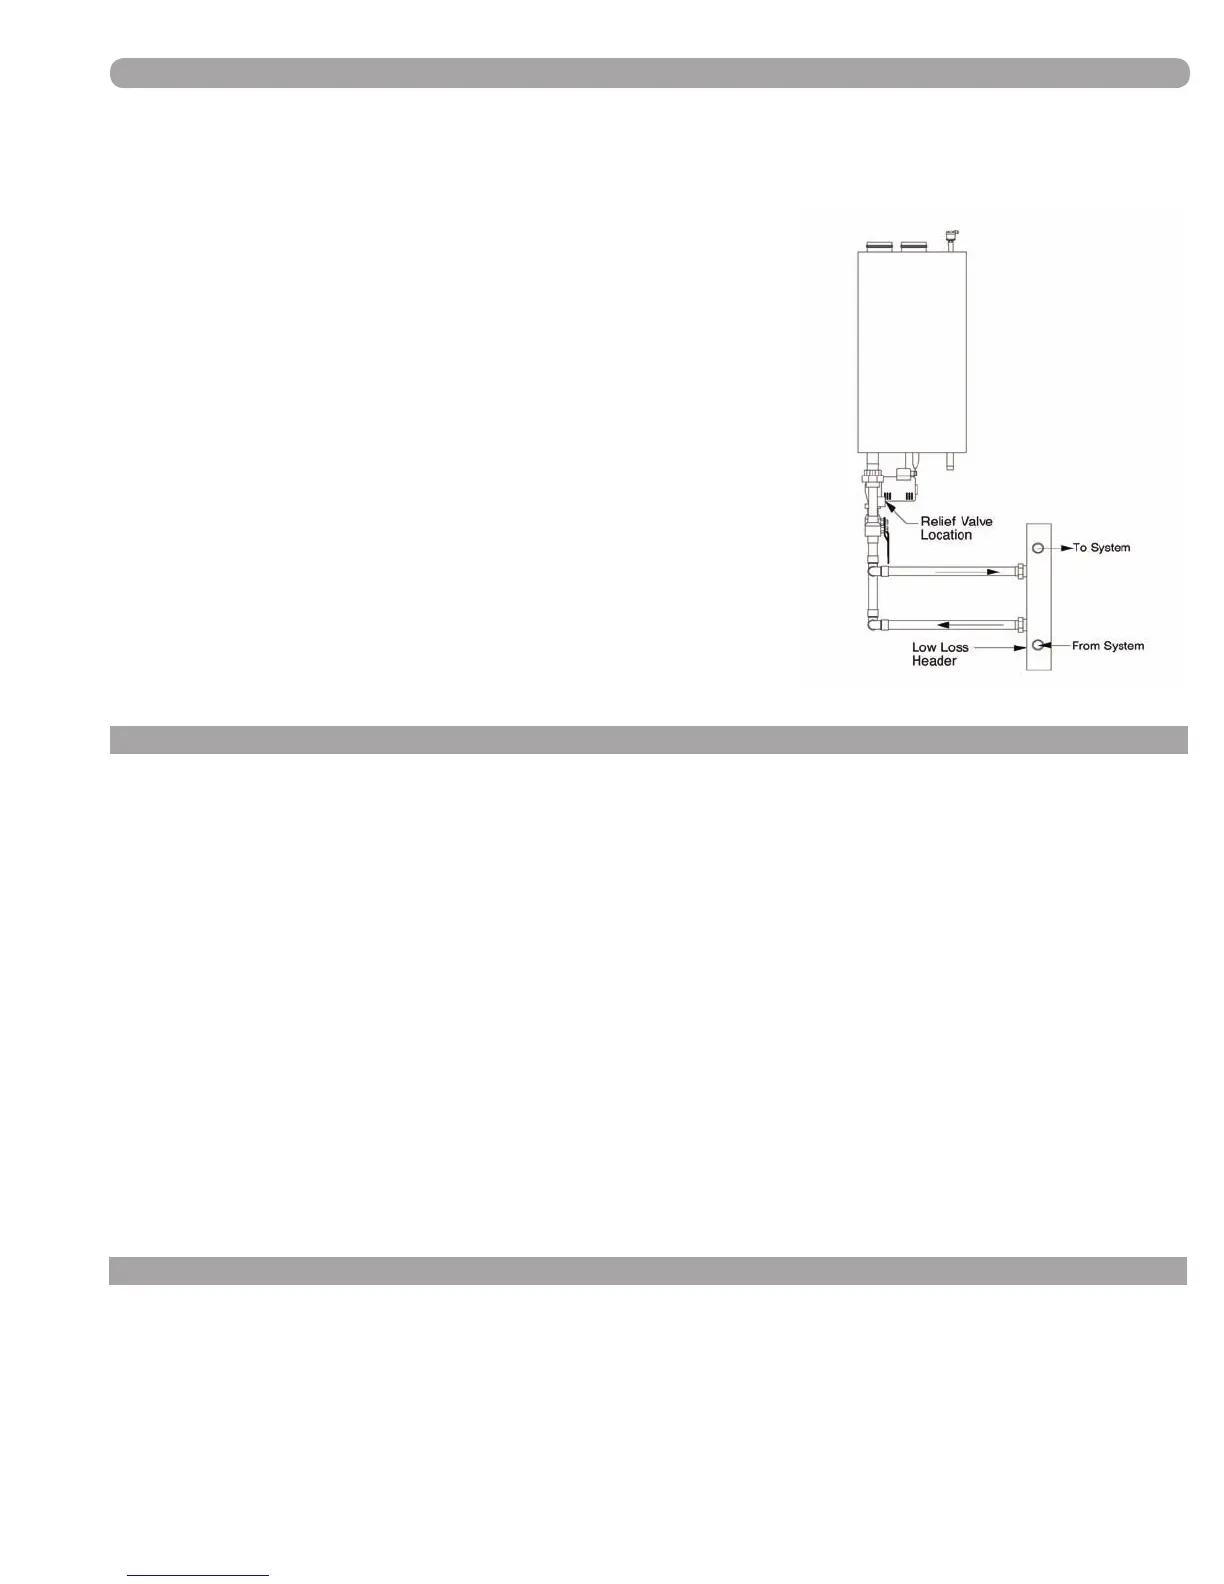
Basic piping connection steps are listed below. A drawing,
specic to your application can be obtained from your distributor or
Hamilton Engineering, Inc., which will guide you through proper
installation of the EVO.
1) Pipe properly, in accordance with generally accepted
piping principals or Hamilton Engineering
specic documents.
2) Connect system return to the pipe leaving the EVO
closest to the back.
3) Connect system supply to the pipe leaving the EVO
containing the Relief Valve.
4) Install Drain Valve on system supply.
Note: the EVO can not be drained of water without purging the unit
with air pressure, 15 PSI minimum. The system’s air vent must be
closed during this process.
(FIGURE 5-1) BOILER PIPING
B. FILL & PURGE HEATING SYSTEM
1) Attach hose to balance and purge hose connector and run to drain.
2) Close the other side of the balance and purge valve.
3) Open rst zone balance and purge valve, so as to let the water ow out of the hose. If zone valves
are used, open zone valves one at a time, manually. (NOTE: please check manufacturer’s
instructions prior to opening valves manually, so as not to damage the valve.)
4) Manually operate ll valve regulator. When water runs out of hose, connected to the balance and
purge valve, in steady stream (with no air bubbles), close balance and purge valve to stop the
water from owing. Disconnect hose and connect to next zone to be purged.
5) Repeat procedure for additional zones (one at a time).
Upon completion, make sure that the ll valve is in automatic position and each zone balance and purge valve
is in the open position and zone valves are positioned for automatic operation.
NOTE: Installations that incorporate Standing Iron Radiation and systems with manual vents high points:
Follow the above procedure, then starting with nearest manual air vent, open vent until water ows out; close
vent. Repeat procedure, working your way toward furthest air vent. It may be necessary to install basket strainer
in an older hydronic system where larger amounts of sediment may be present. Annual cleaning of the strainer
may be necessary.
C. REMOVING AIR FROM THE HEAT EXCHANGER
The EVO DUO (it is not necessary on an EVO MICRO) has an automatic air vent on the top of the appliance and
the air vent cap must be loosened to allow trapped air to escape when the appliance is initially lled and put into
operation. If this air vent should start to leak, there are two possible solutions:
a. Close the cap – the air vent is not needed anymore after the heat exchanger has been purged of air.
This air vent MUST be operable if the appliance is drained and relled.
b. Replace the air vent. When replacing the air vent, the water must be shut off and pressure released rst.
PIPING
 Loading...