34000 Autry Street, Livonia, MI 48150 • 800.968.5530 • Fax 734.419.0209 • www.hamiltonengineering.com • LIT91127 REV 3/09
MAINTENANCE
f. Turn the EVO back on** and monitor the condensate drain until ow has been
established.
g. Re-connect the condensate hose to the outside connection.
clears up. This is caused by water still present in the combustion chamber.
E. EVO CONTROLS
DANGER
It is extremely important that you check for leaks when reconnecting the gas
valve and make sure the exhaust vent is no longer blocked. Failure to do so may
result in severe personal injury or death.
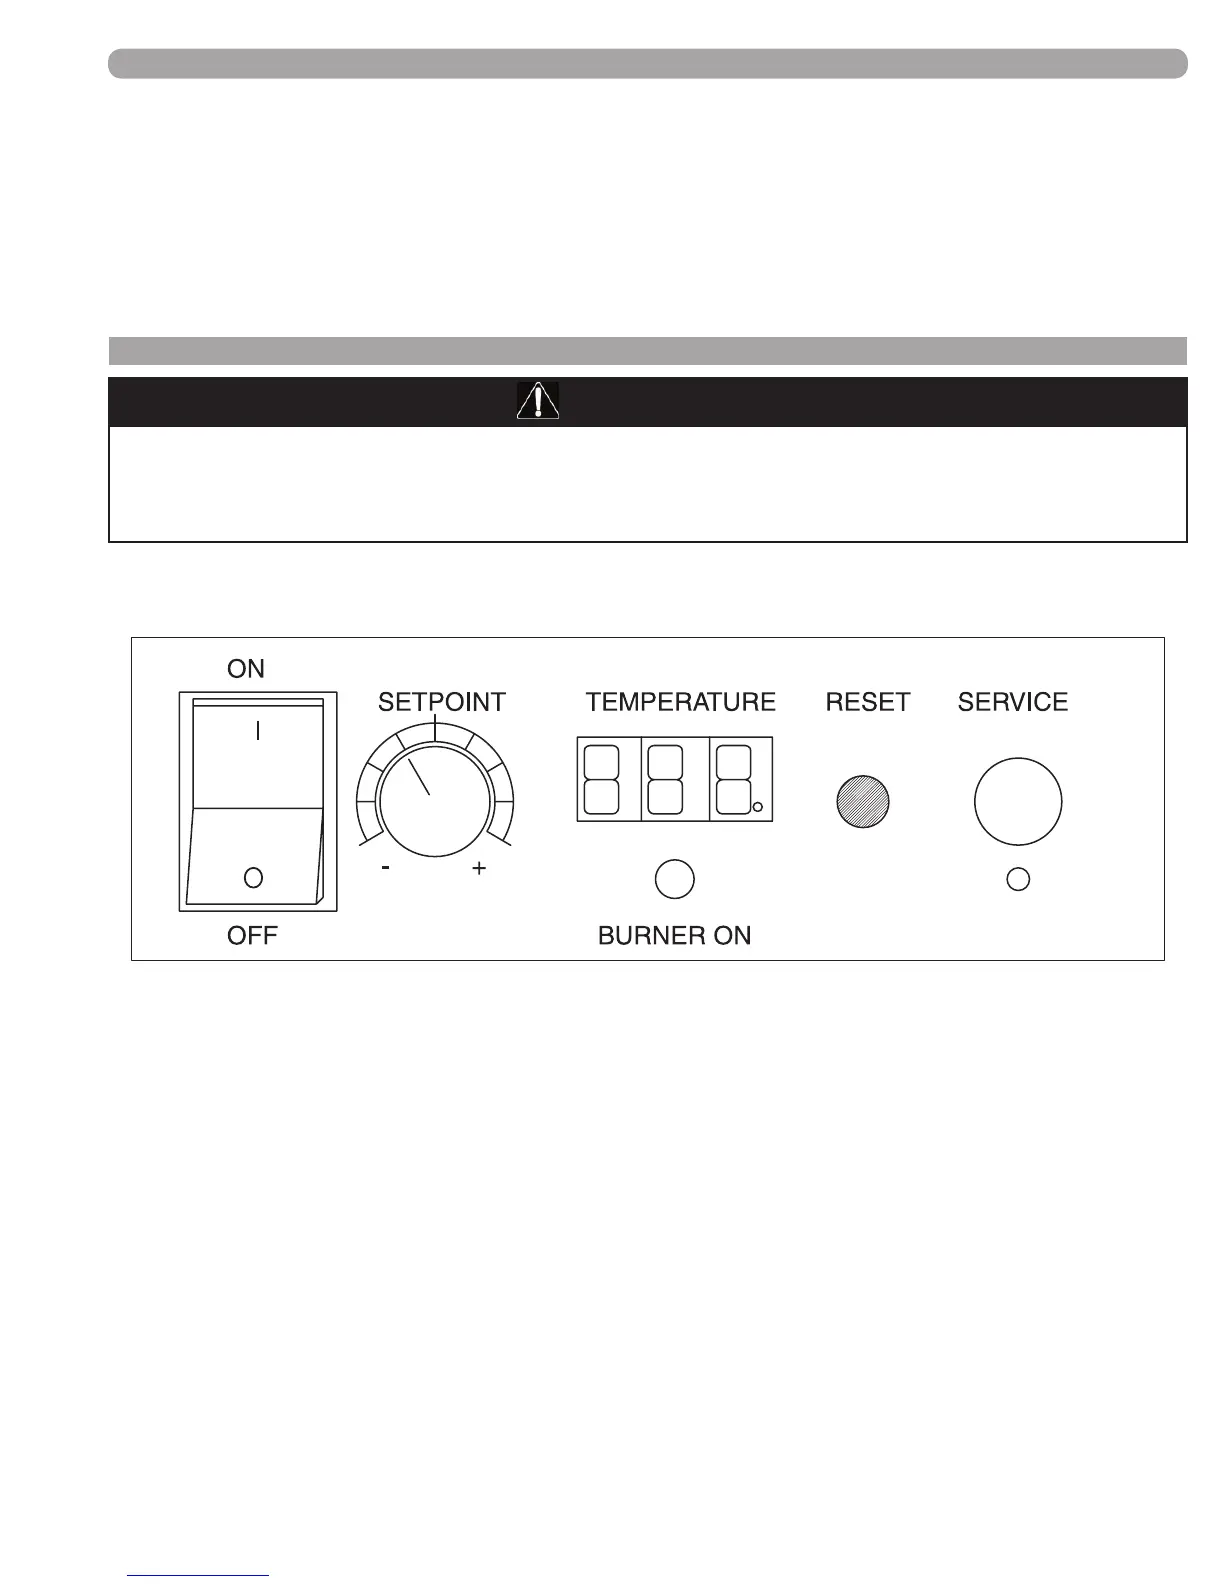
The following components are found on the control panel on the front of the appliance.
(FIGURE 8-3) EVO CONTROL PANEL
Looking at the controls on the front of the appliance,
1) POWER on/off switch
2) SETPOINT knob, temperature control (and fan speed control knob during service mode)
3) TEMPERATURE setpoint display
a. Temperature in °F, corresponding to the SETPOINT knob
b. Display will always read temperature setpoint unless there is a fault code displayed.
c. Cascade indicator light, found in the lower right hand corner of the Temperature display.
This dot will be ashing when this appliance is part of a properly-connected, commonly-
controlled group of EVO products and reading temperature sensors.
d. Display code, not ashing indicates a Soft Lockout
e. When this display is ashing a code, the appliance is in a Hard Lockout and the reset
must be pushed to re-start the appliance.
4) Green indicating light labeled BURNER ON; when this is light is on, the burner is ring.
5) RESET button, used as described in 3e above, as well as to view sensors and set altitude
(see pages 32 & 36 respectively for details).
6) SERVICE port, used for connecting a computer to the appliance to download the service fault
history, as well as factory setting of control board parameters. There is a service button located
just below the service port that must be pressed with a pointed object to get to the service mode.
Page 35 of 50