34000 Autry Street, Livonia, MI 48150 • 800.968.5530 • Fax 734.419.0209 • www.hamiltonengineering.com • LIT91127 REV 3/09
MAINTENANCE
DANGER
It is extremely important to make sure the exhaust vent is no longer blocked.
Failure to do so may result in personal injury or death.
C. CONDENSATE TRAP CLEANING INSTRUCTIONS
1/2"=1'
Dwg. By:
34000 Autry
Livonia, MI 48150
PH: (800) 968-5530
Fax: (734) 419-0209
Description:
Date: Scale:
Customer:
HAMILTON
ENGINEERING
Dwg.
No.:
Checked.
By:
AJT
03/04/09
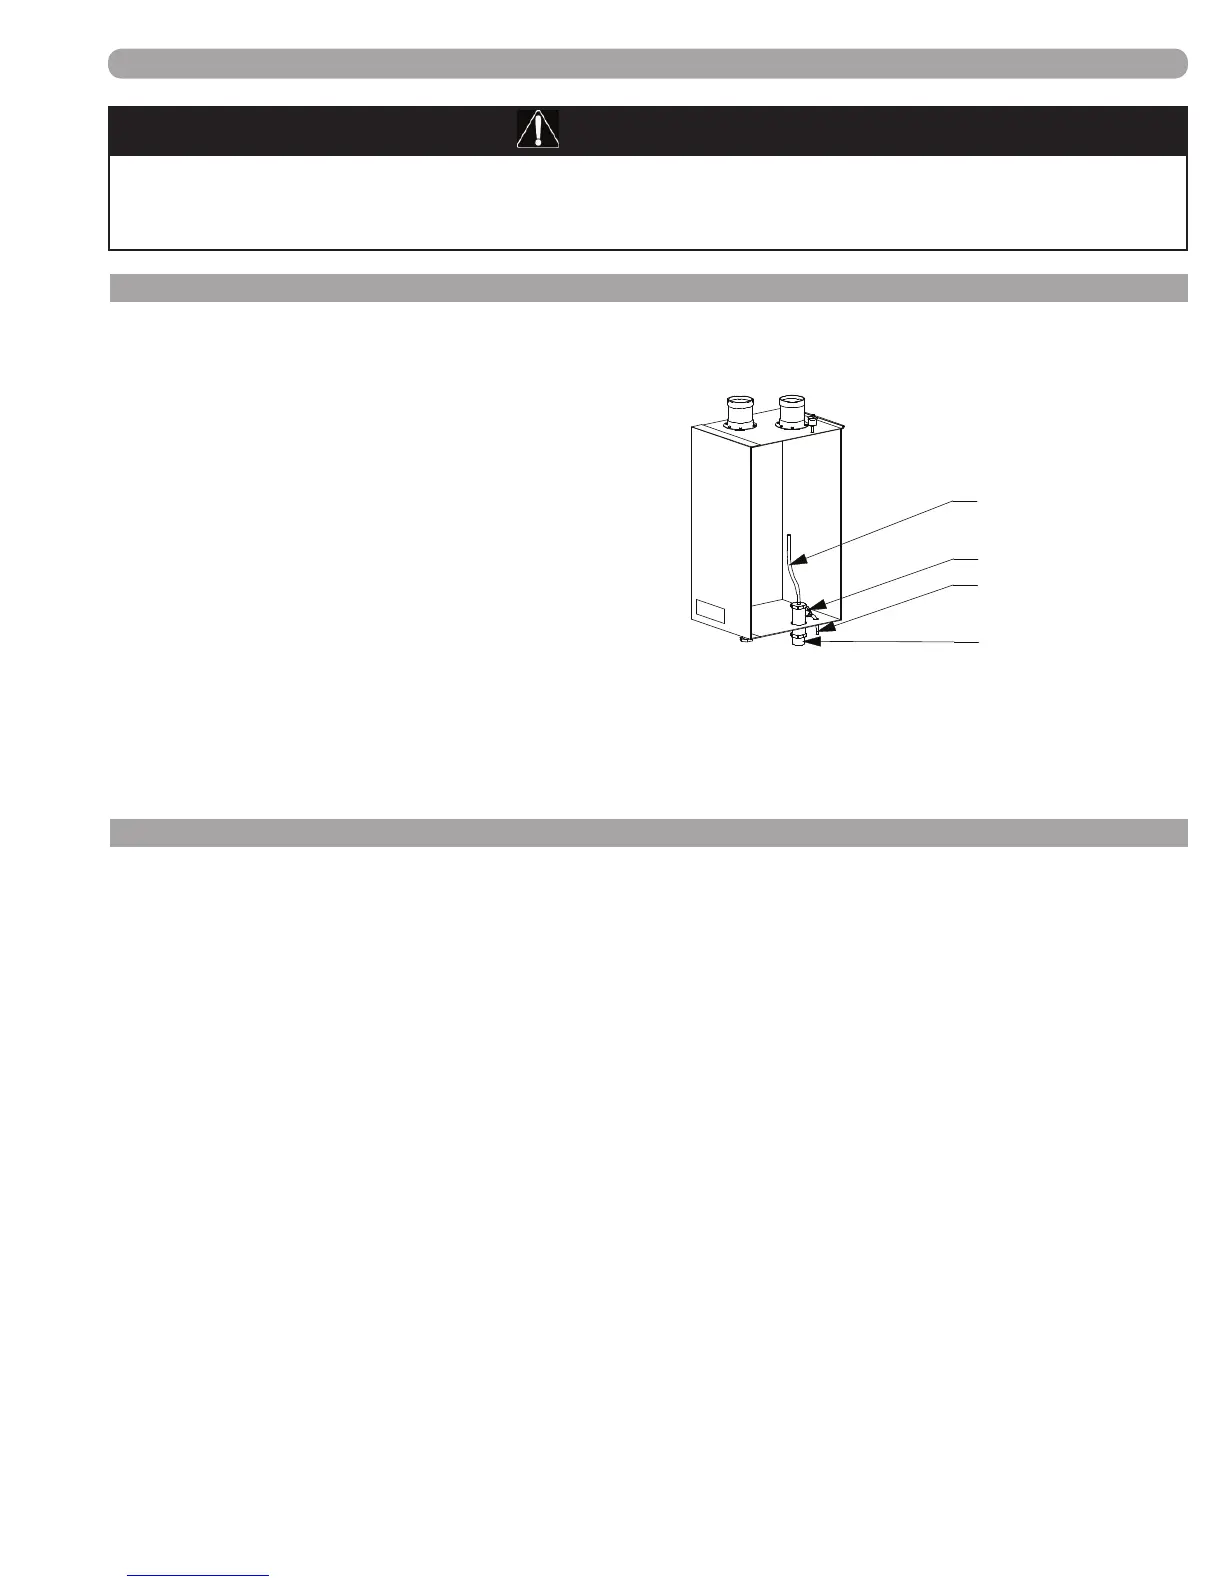
Condensate from
Heat Exchanger
Condensate Drain Trap
Clean Out Cap
Condensate to
Neutralizer
1) Turn off the power to the EVO.
2) Place a bucket under the condensate
trap.
3) Remove the condensate clean-out cap.
Use caution when removing the clean-
out cap, as the trap is full of condensate
and it may be hot.
4) Rinse out the clean-out cap in a sink to
remove any dirt or buildup that may
have accumulated.
5) Reinstall the clean-out cap on the
condensate trap.
6) Turn on the power to the EVO.
7) Monitor the condensate drain until ow
has been established.
The condensate trap should be cleaned at least once every year.
(FIGURE 8-2) EVO CONDENSATE
TRAP CLEANING
D. COMBUSTION CHAMBER COIL CLEANING INSTRUCTIONS*
*Before beginning this procedure, you must have the following items on hand:
• A Nylon brush - DO NOT use brass, stainless or steel brushes.
• Water
• Shop vacuum
1) Shut down the EVO by using the following steps:
a. Turn off the power, close the gas valve, and shut down the unit. Wait for the unit to be
cool to the touch.
b. Remove the clean-out cap according to the directions above.
c. Remove the molex plugs from the fan.
d. Remove the (6) 6mm nuts from the burner plate assembly to access the coils.
e. Pull the entire burner plate assembly towards you and protect or remove rear target wall.
2) Vacuum all loose material, then use the nylon brush to scrub coils to remove any buildup, then
vacuum the debris from the coils.
3) Spray the coils with clear water, making sure to conne the spray to the area being cleaned
(try to avoid getting the back ceramic (target) wall of the unit wet). Flush the combustion
chamber with fresh water. At this point, the EVO should be ready to power back up.
4) Before powering up the EVO follow the steps below
a. Re-install the burner assembly and rear target wall (ceramic insulation)
b. Replace the (6) 6mm nuts to the burner plate.
c. Re-connect the molex plugs.
d. Re-set thermostats.
e. Replace the clean-out cap.
Page 34 of 50