7
1-3 INSTALLATION
Watch the getting started video for the machine described in this section, also available at www.badgy.com
The Badgy printer must be placed in a dry location, protected from dust and drafts but well-ventilated. Take care to keep your printer on a
at, sturdy surface able to bear its weight.
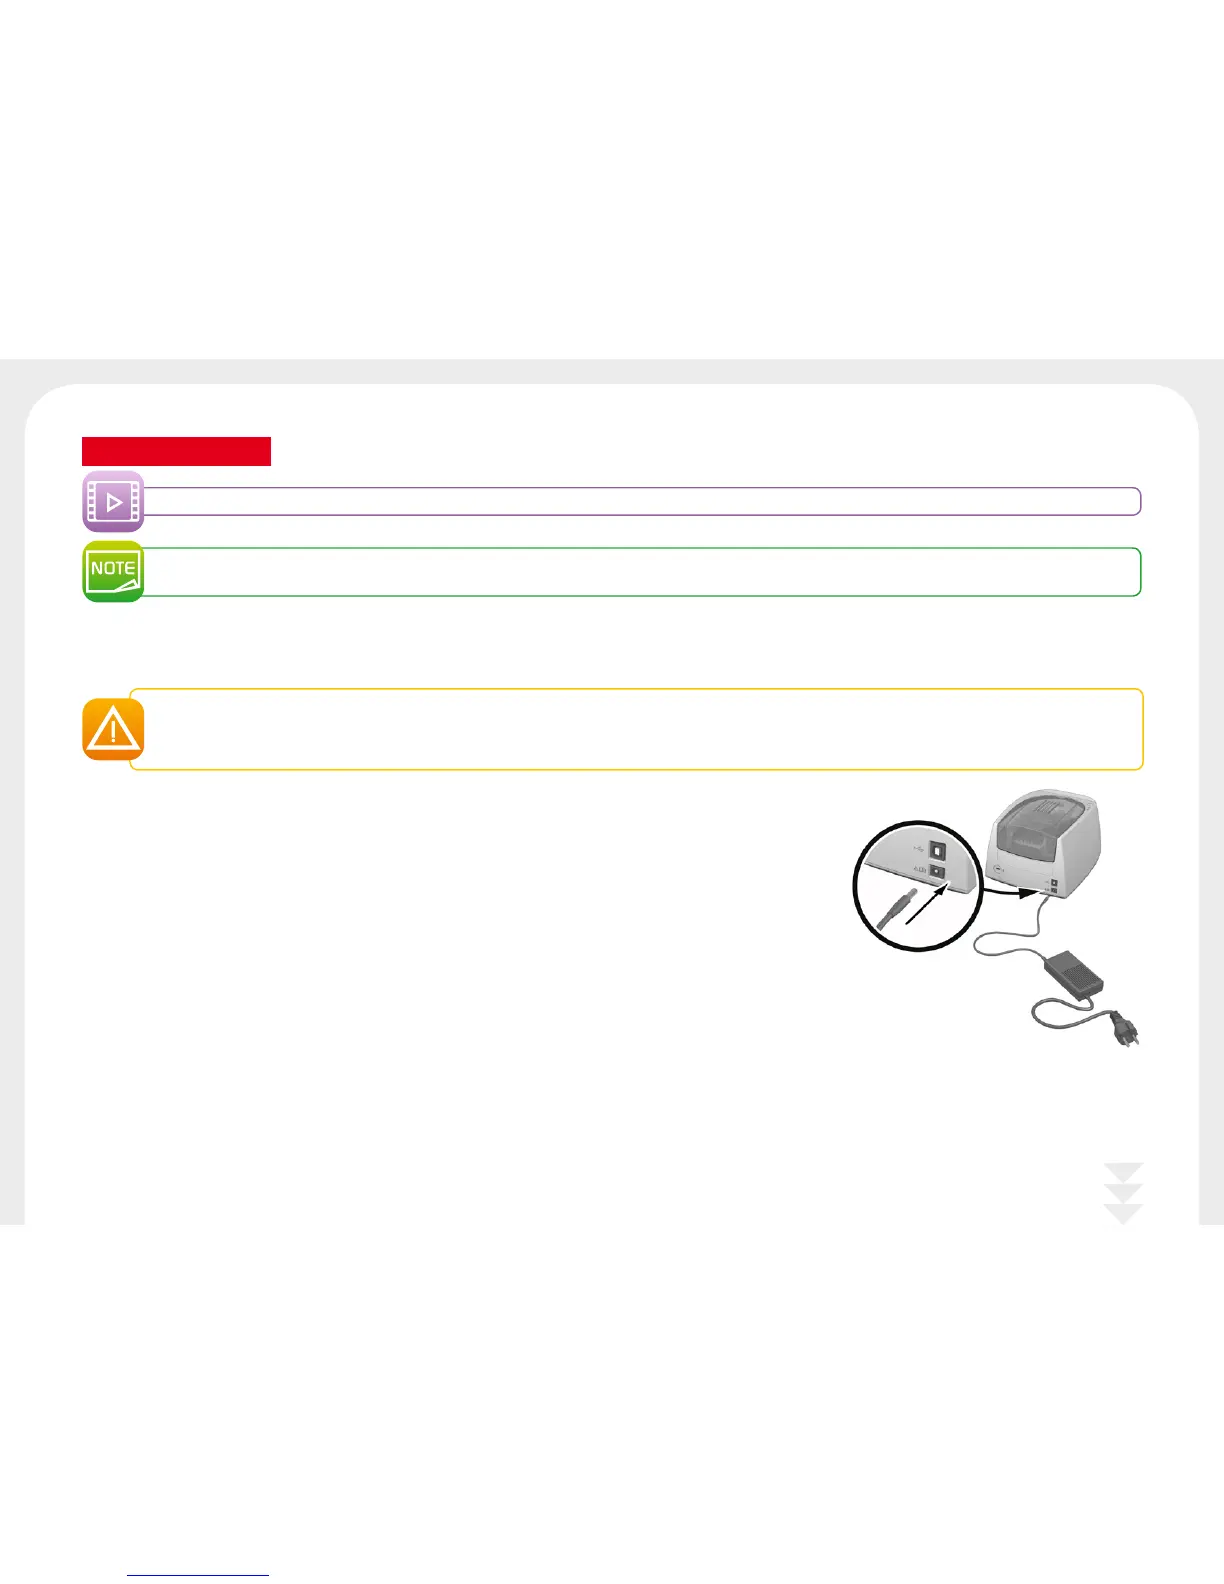
1-3a Connecting the Printer
Connection to the power supply
The printer must be connected to a properly protected and earthed electrical installation.
FI: Laite on liitettävä suojamaadoitus koskettimilla varustettuun pistorasiaan.
NO: Apparatet må tilkoples jordet stikkontakt.
SE: Apparaten skall anslutas till jordat uttag.
Ê
Connect the power cable to the power supply unit, then plug the power cable connector into the printer.
Ë
Next, plug the end of the power cable into an earthed power socket.
Ì
The printer is powered on: the control panel lights up showing the printer is working properly. If the
control panel does not light up, then either the installation has not been carried out correctly or the
printer is not working properly. Check the installation.