USE AND MAINTENANCE MANUALUSE AND MAINTENANCE MANUAL
Chain hoist from 198kg to 2500kg
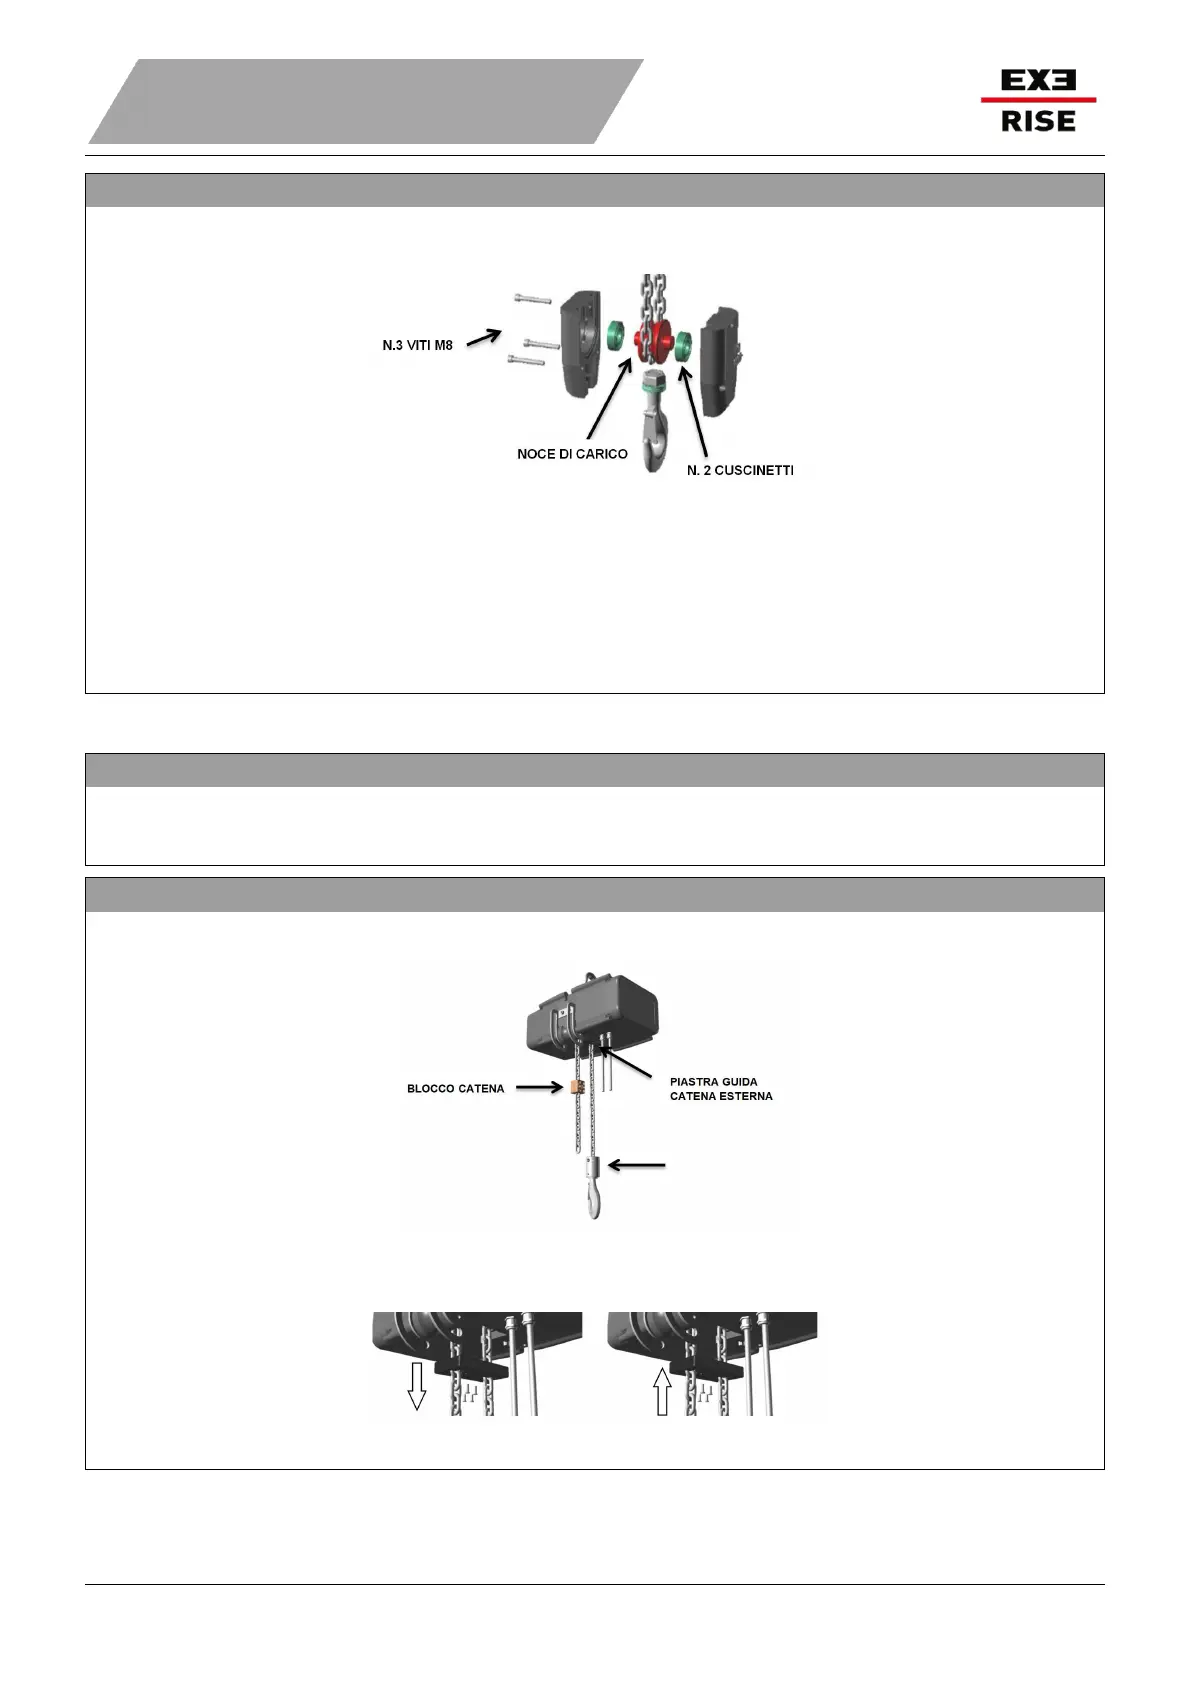
2 FALLS OF CHAIN2 FALLS OF CHAIN
1. Place the EXE RISE electric chain hoist upright on a working surface.
2. Place the Chain hook on the working surface so that the side of the bottom block with the screws is at the front.
3. Remove the 3 M8 screws (steel 8.8 - friction coefficient 0.15) with an M6 Allen key.
4. Gently pull out the front block of the pulley, taking care not to compromise the position and mechanism of the
bearings, load wheel, Chain hook and the other block of the pulley.
5. Remove the hook from the block and replace it with the new one.
6. Gently close the front block of the pulley, taking care not to compromise the position and mechanism of the
bearings, load wheel, Chain hook and the other block of the pulley.
7. Secure and tighten the 3 M8 screws with a torque wrench. The tightening torque is 23 Nm.
8.28.2 EXTERNAL CHAIN GUIDE PLATE REPLACEMENTEXTERNAL CHAIN GUIDE PLATE REPLACEMENT
SMALL FRAMESMALL FRAME
Small frame EXE RISE electric chain hoists are not equipped with external PVC chain guide plates, but are a
single block with the inner chain guides, so they cannot be replaced without replacing the whole block. This
replacement operation may be performed only by authorised EXE TECHNOLOGY personnel.
MEDIUM AND EXTRA LARGE FRAMEMEDIUM AND EXTRA LARGE FRAME
Note: in the following figures it is only reported the large frame model as an example.
1. Place the EXE RISE electric chain hoist in standard (fixed) mode.
2. Loosen and remove the screws of the outer plate which is divided into two parts with an Allen key.
In the case of the medium frame there are 4 screws and a 4mm Allen key is required.
In the case of the extra large frame, there are 8 screws and a 5mm Allen key is required.
3. Remove the two parts of the outer plate and insert the new one (also divided into two parts).
4. Secure and tighten the screws with a Allen key.