MLC Plus 50/100/200 Series • Hardware Features and Installation 13
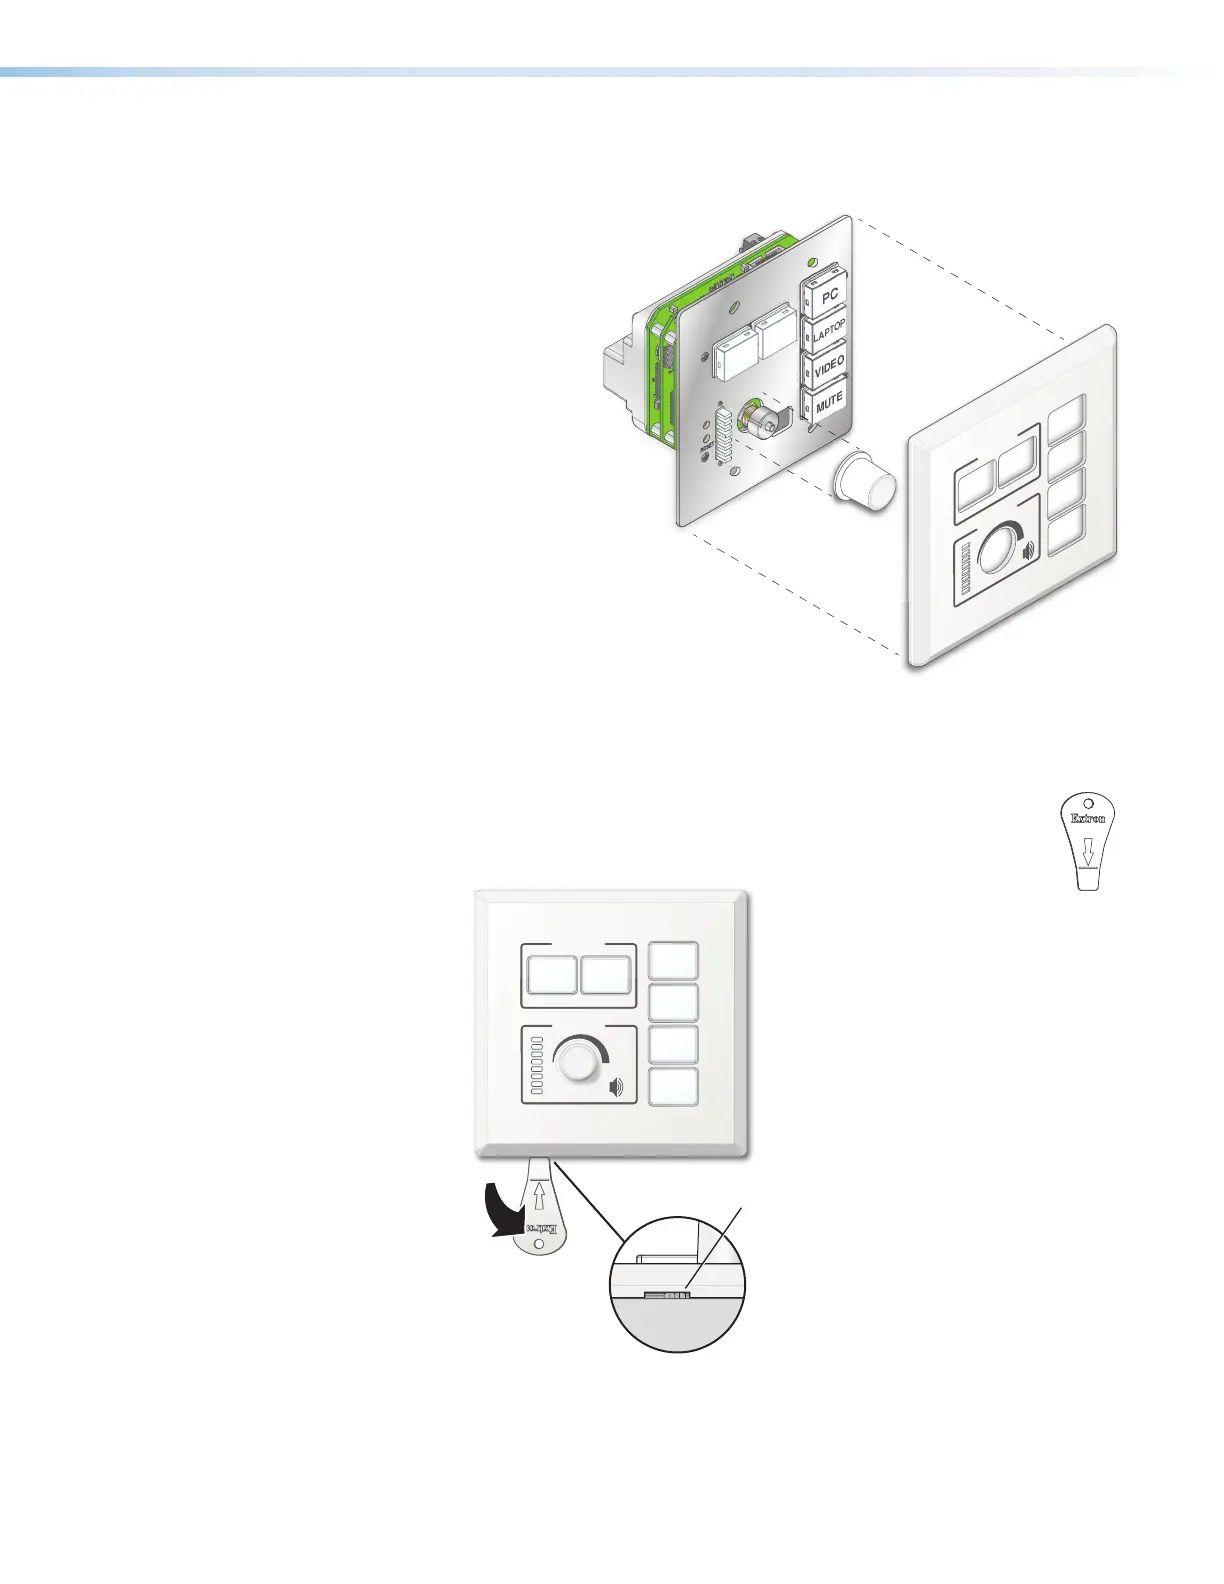
2. For models with knobs, if you are changing faceplate colors, remove the knob by
holding the body of the unit with one hand, gripping the knob firmly with the other hand,
and pulling it away from the unit.
3. For models with knobs, install the new
knob as follows:
a. Align the ridge inside
the knob with
the channel on
the metal knob
assembly.
b. Press the knob
toward the unit,
allowing the magnet
in the knob to fasten
it to the unit.
4. Align the openings
of the new faceplate
with the buttons, knob, and
Volume LEDs and place the
faceplate against the unit. The
magnetic catches fasten the
faceplate onto the unit.
To replace a faceplate after installation:
1. Remove the faceplate as follows:
a. Insert the provided Extron removal tool (shown at right) into the notch at
the bottom left of the faceplate and press the removal tool toward the wall.
The bottom of the faceplate pivots out toward you.
ess down
ress down
pr
tool
Extron
DISPLAY
ON
PC
VIDEO
OFF
LAPTOP
MUTE
VOLUME
Extron
I
A
LUM
Notc
Figure 12. Removing the Faceplate
b. Gently grip the sides of the faceplate and pull it away from the wall.
2. For models with knobs, if you are changing faceplate colors, remove the knob by
gripping the knob firmly and pulling it away from the unit.
RESET
E
OFF
ON
Extron
DISPLAY
VOLUME
33
4
4
Figure 11. Replacing the Knob and Faceplate
Keep this window–
it’s an anchor for
figure 11 links.