MLC Plus 50/100/200 Series • Software-based Configuration and Control 37
Basic Setup Steps: a Guide to this Section and Other Resources
NOTE: GC projects can be created offline and uploaded to the hardware at a later date.
Follow the steps in Hardware Features and Installation starting on page9. The
overall process for setting up a controller using GC is as follows:
See the network
communication setup
instructions in this guide.
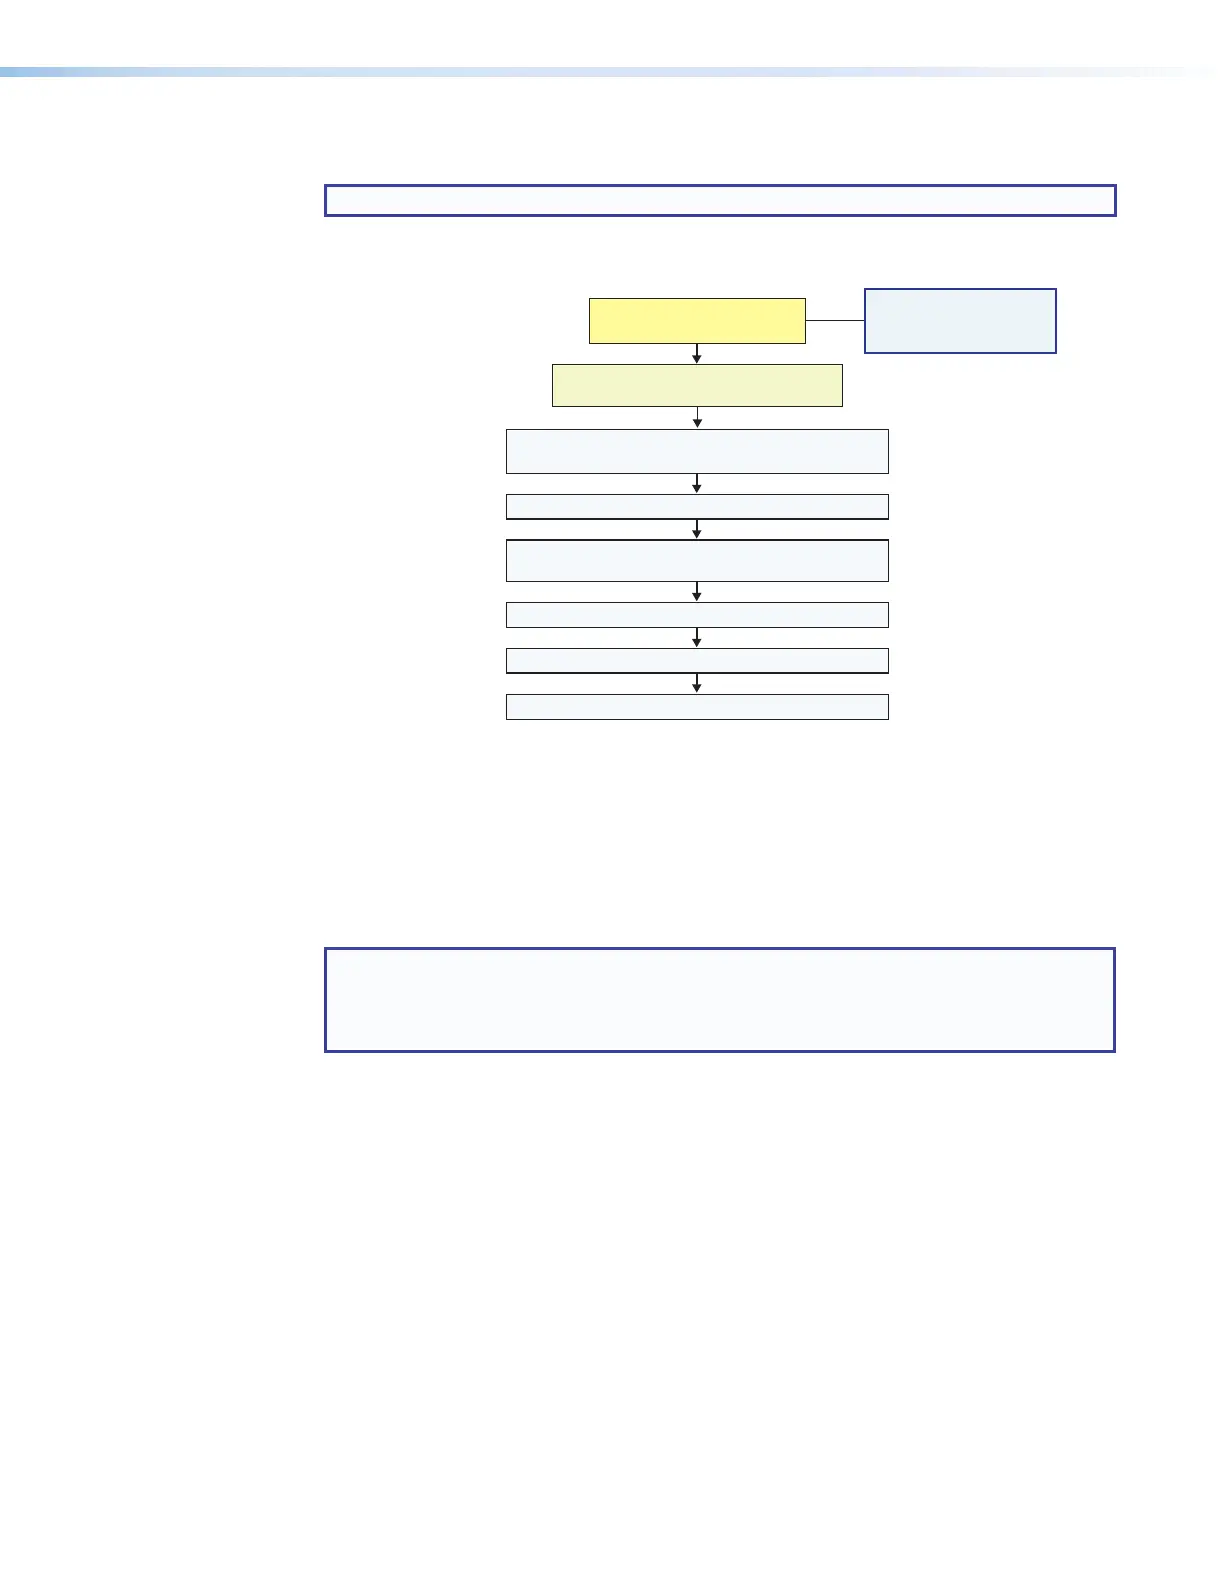
Create a new GC Professional or GC Plus project
and add the MLC Plus to it.
Congure ports on the controller.
Congure controller buttons.
Test the system, make adjustments, nalize conguration.
Save the project.
Cable the MLC Plus, then apply power.
Cable all devices.
Prepare the installation site.
Change buttons or faceplates, if desired
Mount the MLC Plus.
Create monitors, schedules, macros, timers,
and local variables.
Build and upload the conguration to the controller.
If desired or required, install a new
security certicate (via Toolbelt).
Configure the IP settings
of the MLC Plus.
Within Global Configurator
(GC Professional or
GC Plus mode):
Figure 33. Overall Configuration Steps
Downloading the Software and Getting Started
GC software, software updates, and a large variety of device drivers can be downloaded
from the Download page on the Extron website (www.extron.com/download/index.aspx).
When you locate the desired software or driver package, follow the on-screen directions to
download and install it.
NOTE: New RS-232 and Ethernet drivers are required. You must use serial and
Ethernet drivers developed specifically for the IPLinkPro platform. With the exception
of IR device drivers, drivers used for the previous generation IPLink (non-Pro)
controllers are not compatible.
Rev. C, 01/29/18: Updated
flowchart to add a step for
the security certificate.
network
communication setup
instructions