Page 12 of 44
Mounting and Dimension
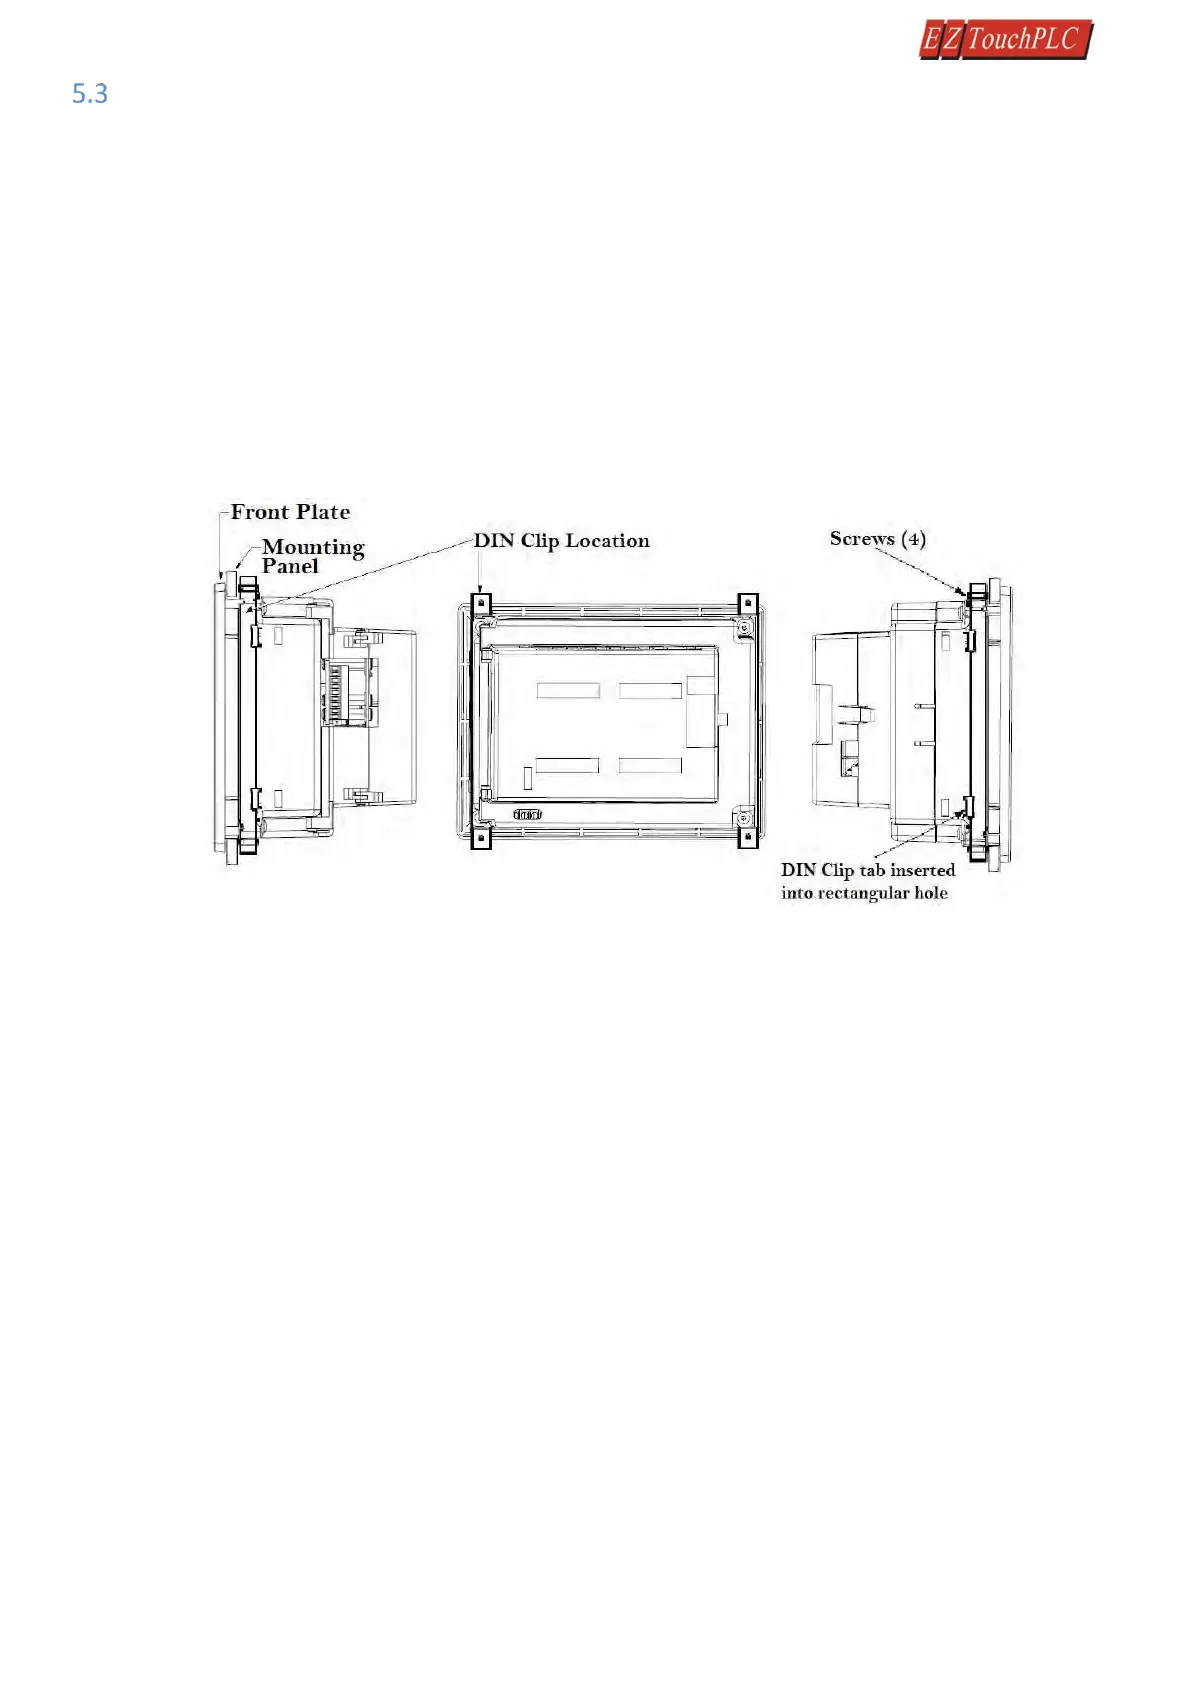
5.3.1 Mounting Instructions (6 Inch, 7 Inch Model)
The 6-inch and 7-inch models (6" EZ3-TouchPLC Modular, 7" EZ3-TouchPLC Modular) must be mounted using
DIN Clips. DIN Clips are metal brackets (P/N EZ- BRK-1, package of 2 brackets and 4 screws) that attach to the
panel and secure the front panel to a mounting surface with 4 screws. Use the diagram and instructions below
to mount the EZ3-TouchPLC Modular unit using DIN Clips.
1. There are 4 rectangular holes in each side (two at the top and two at the bottom) of the chassis as shown in
the following figure. Choose the holes that allow the appropriate space for your mounting panel thickness.
2. On each DIN Clip there are two metal tabs (bent inward) that fit into these holes. Insert the two clip tabs into
two holes (top and bottom) and secure the panel by alternately tightening the DIN Clip screws (4) until the
back edge of the unit's front plate is flush with the mounting panel.
 Loading...