Page 16 of 44
Wiring I/O Connections
EZ3-TouchPLC Modular uses EZAutomations’s cube IO modules please check our website for all available module.
Click here to go online
6.2.1 Inserting and Removing I/O modules
Insert I/O modules
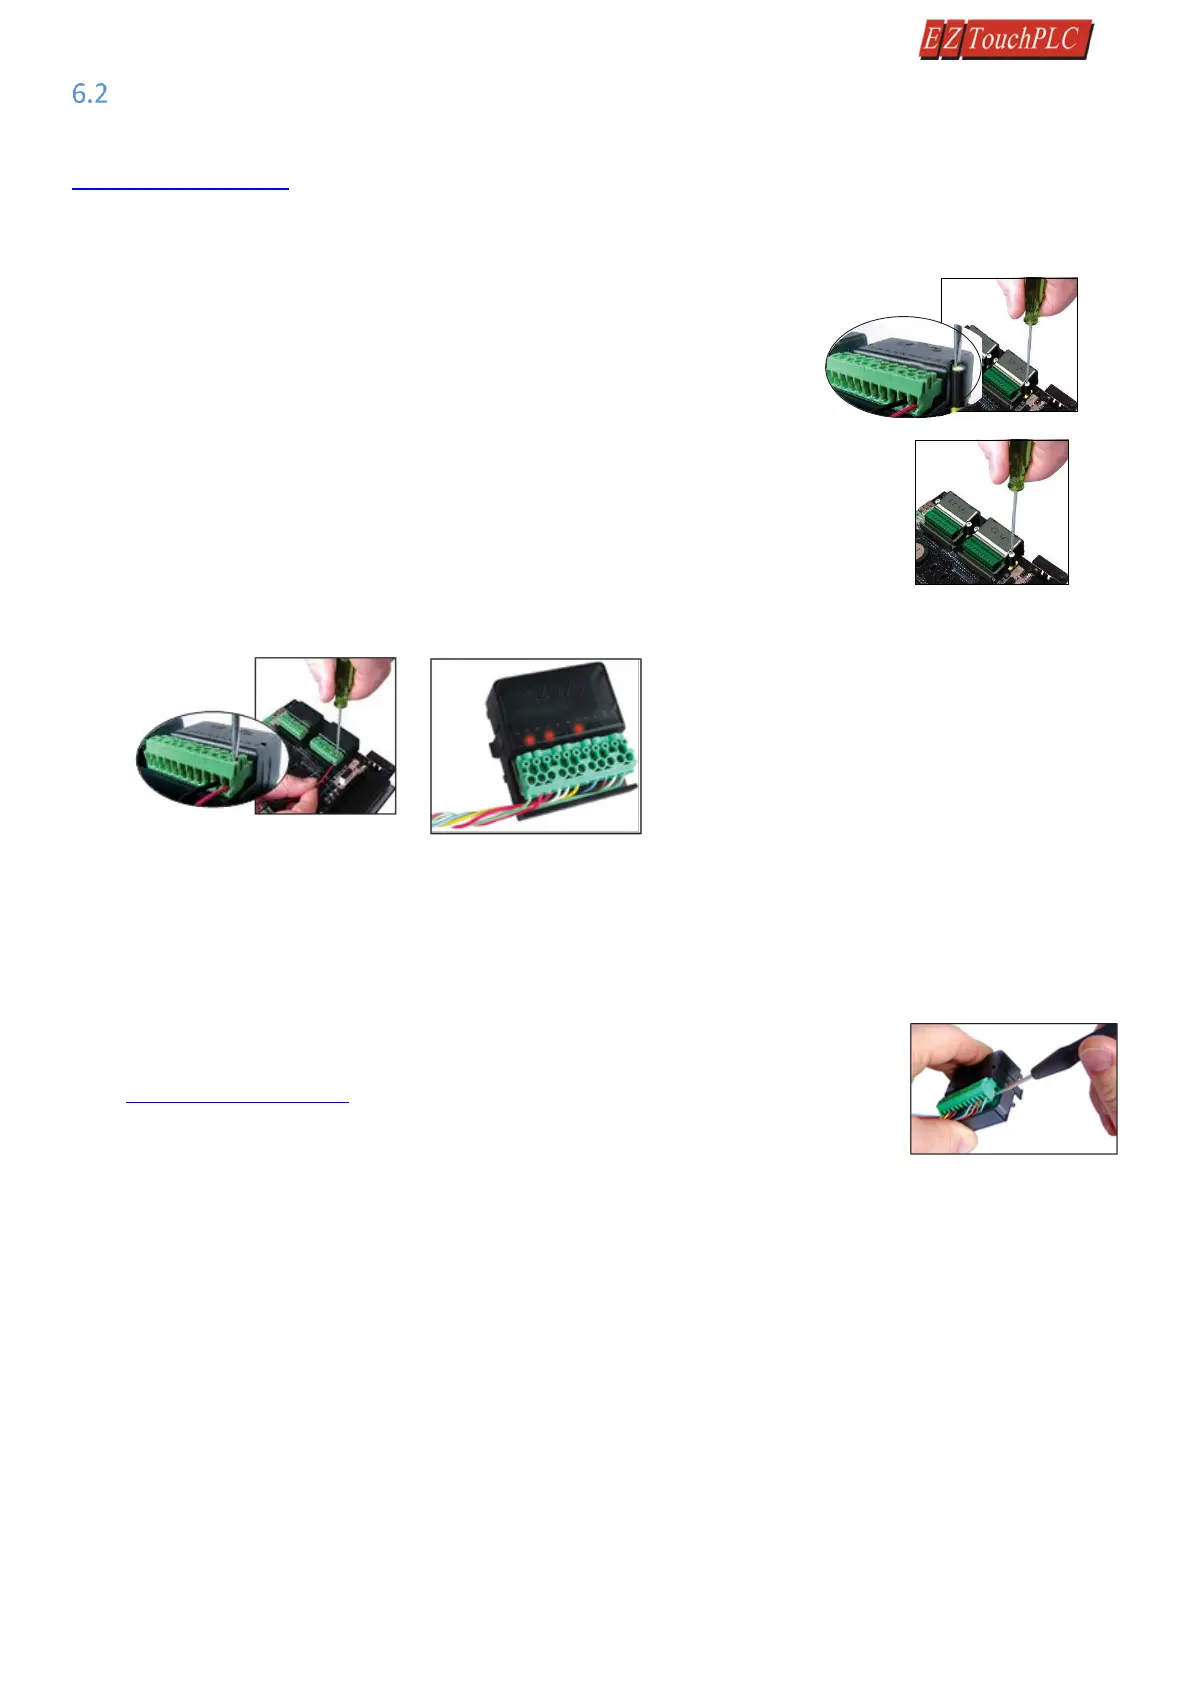
EZ I/O modules have a Molex connector & two captive screws which screw-down into base of the PLC. Insert
the module in the base and screw down.
Remove I/O Modules
Removed from the female connector on the PLC base, by unscrewing the two
captive screws on the sides of the module.
6.2.2 EZ-IO Wiring
Wiring EZI/O Modules
Simply insert the wire and screw to tighten. Use a 2.5mm blade screwdriver Terminal
block is rated at 300V, 10A 14AWG.
Removable Terminal Blocks
EZIO use removal terminal blocks for easy swapping of modules without need to re-wire.
As EZI/O was built to withstand industrial environments, terminal blocks have a very snug fit on the module.
Slip the edge of the screw-driver under the terminal block and lift to pop off.
To insert the terminal block, simply align the terminal block to the pins on the module and insert.
6.2.3 I/O Module Information
For information on I/O module specification and wiring information please check the
respective I/O modules wiring instruction insert which comes with product,
or Click here to go online and to download datasheets.
 Loading...