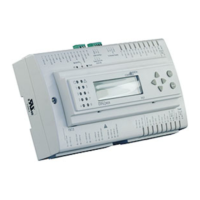
FX15 Controller Technical Bulletin
Detailed Procedures
Follow these instructions to properly install and connect the FX15
controller.
WARNING: Risk of Electric Shock. Disconnect or isolate all power
supplies before making electrical connections. More than one disconnect or
isolation may be required to completely de-energize equipment. Contact with
components carrying hazardous voltage can cause electric shock and may
result in severe personal injury or death.
AVERTISSEMENT: Risque de décharge électrique. Débrancher ou isoler
toute alimentation avant de réaliser un branchement électrique. Plusieurs
isolations et débranchements sont peut-être nécessaires pour-couper
entièrement l'alimentation de l'équipement. Tout contact avec des composants
conducteurs de tensions dangereuses risque d'entraîner une décharge
électrique et de provoquer des blessures graves, voire mortelles.
Mounting Instructions
To mount an FX15 controller:
1. Snap the controller onto the 35 mm (1.38 in.) rail for DIN rail
mounting. To release the controller, insert a screwdriver in Slots B
and lift the retaining clip. Since the retaining clip is spring-loaded,
you can also remove the controller without a screwdriver by
carefully pushing the controller up against the clip and then tilting
the top forward to release the top lug from the DIN rail.
2. Make wiring terminations with detachable connectors, which accept
1 x 1.5 mm
2
(0.002 in.
2
)/14 AWG cable. Two types are available:
screw and cage clamp connectors. For details, see Ordering Codes.
Make terminations of the Supervisor Link, Expansion Bus, and
Remote Display via the connectors provided with the controller.
3. Verify that the wiring has been correctly installed and that voltage
levels are appropriate for the various input signals according to the
application.
4. Set the jumpers and address switches of the controller as required.
For more information, see Jumper Details.