27
CLEANING AND MAINTENANCE (CONTINUED)
PUMP MAINTENANCE (CONTINUED)
C. CLEANING (CONTINUED)
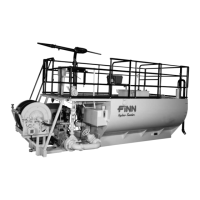
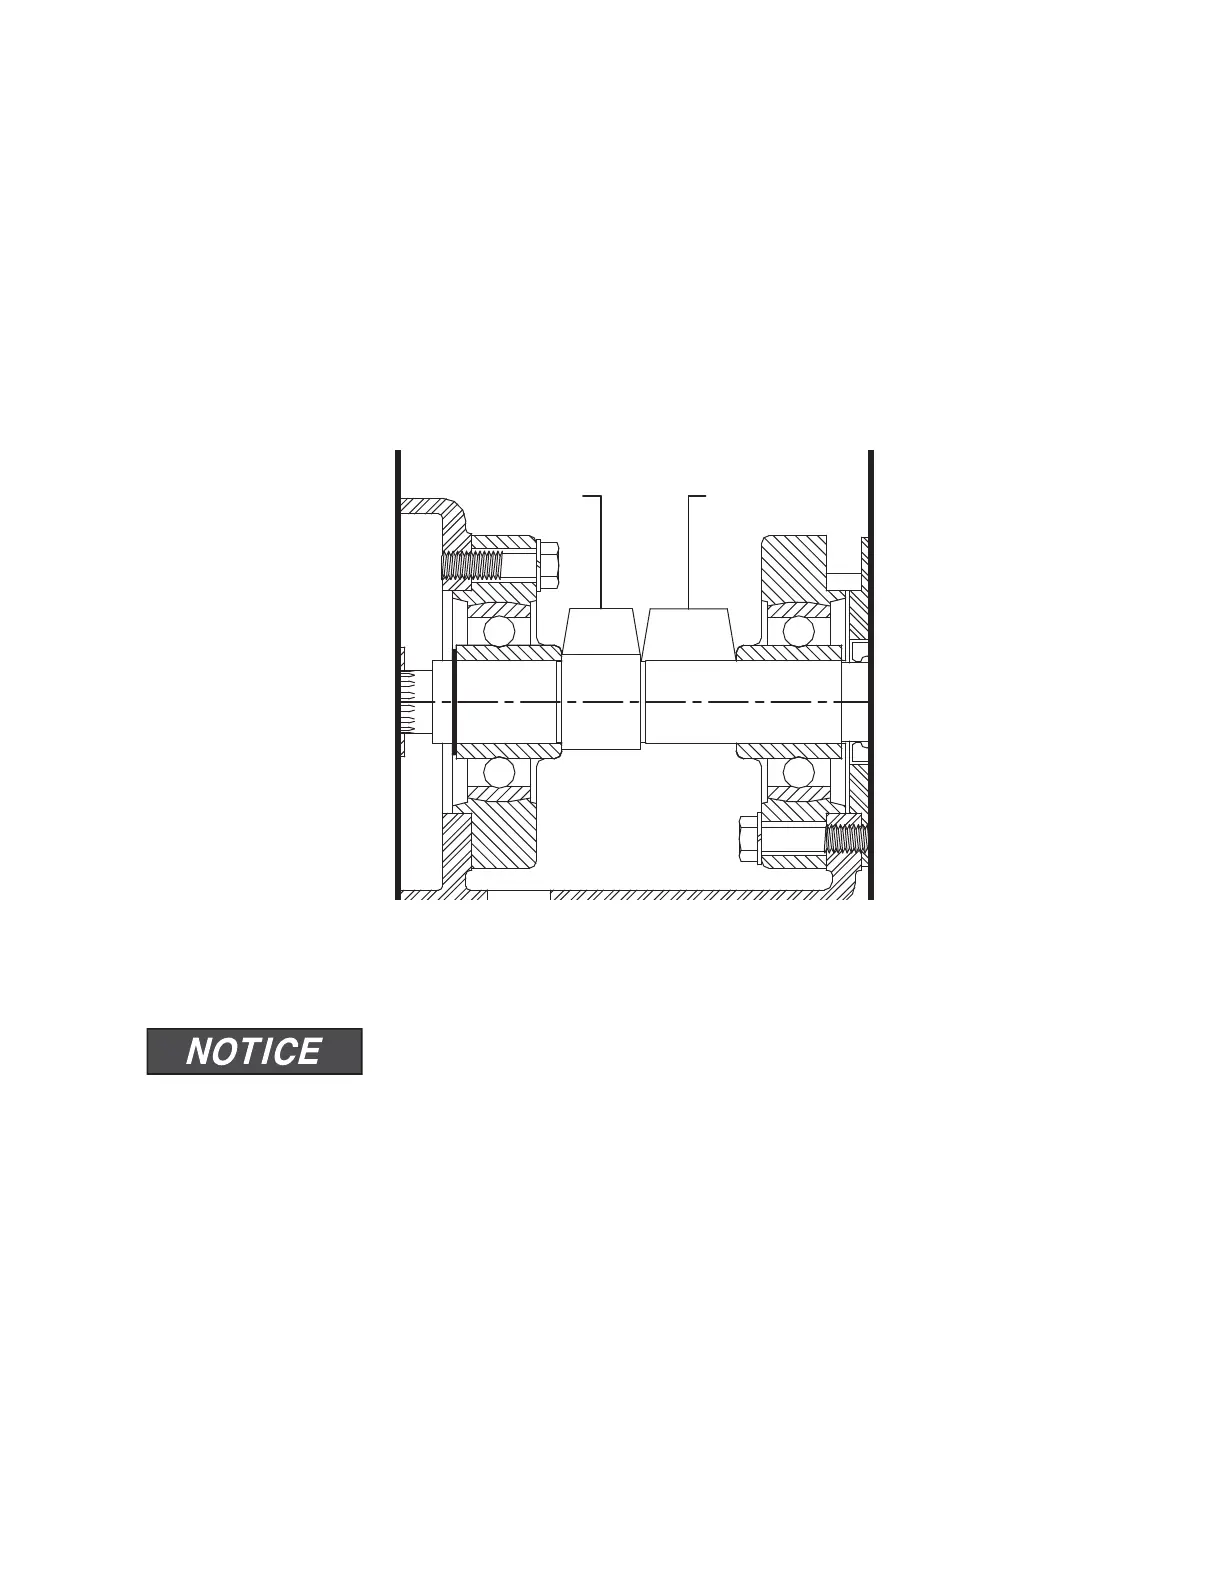
3. To remove pump impeller, take the pump impeller wrench, which is stored in the tool box,
and position it so that the hole is aligned with any of the eight tapped holes in the front of
the pump casing (4). The 90-degree leg of the pump impeller wrench should face inward,
toward the pump impeller and be positioned between any two of the pump impeller fins.
Bolt the wrench securely in place with one of the pump suction cover bolts (5B). Using a
pipe wrench on the pump shaft (9), unscrew the pump impeller, turning the pump shaft in
a clockwise direction. See Figure 8 for pipe wrench placement. Be careful not to unscrew
the pump impeller too far before removing the impeller wrench.
D. INSTALLING NEW SEAL ASSEMBLY
Do NOT unwrap new seal assembly until you are ready to install.
All parts of assembly are packed in sequence of installation.
1. To replace seal assembly (5), perform the steps in CLEANING, and remove pump
casing (4) by removing four bolts (7B) that hold casing and casing bearing (7) to pump
frame (15).
2. After cleaning all parts, including pump shaft, begin reassembly of pump. Install radial lip
seal (6) with the cavity portion of seal facing inward. Rebolt casing and casing bearing (7)
onto clutch housing using four bolts (7B). Using a light oil lubricant (such as 3-in-1 oil),
install the ceramic seat with its neoprene holder into the seal recess, making sure it is
square with the shaft. Lubricate the inside of the bellows assembly with a light oil lubricant
and check to make sure the steel ring is stuck (glued) to the end of the assembly. Slide
the bellows assembly onto the shaft and push until the steel ring is against the ceramic
seat.
3. Install seal spring on hub of pump impeller. After coating the threads on the pump shaft
with an antiseize compound, install pump impeller, seating it securely.
Figure 8 – Pump Impeller Removal
Not
Here
Pipe
Wrench
PUMPENGINE