Camera installation
8
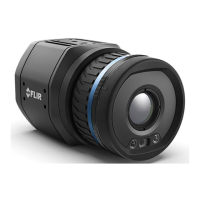
Prior to installing the camera, the recommendation is to set it up on an existing network
with a DHCP server, and then use the FLIR IP Config software to detect the camera on
that network. The FLIR IP Config scans for cameras automatically and you can identify
your camera by the MAC address printed on a label on the back of the camera. The cam-
era is then configured from a web browser.
Note Use FLIR IP Config version 3 or higher.
You can power the camera by using either the Power-I/O connector (18–56 V DC) or the
Ethernet/Power over Ethernet (PoE) connector (36–56 V DC) of the camera. See Figure
7.1 View from the rear, page 14 and 12 Pin configurations, page 38.
To install the camera, follow this procedure:
1. On the computer to be used for managing the camera, download FLIR IP Config from
http://support.flir.com, and then install it.
2. Connect the camera to power and the network. Do one of the following:
a. Connect the power cable between the camera and a power source (for pin config-
urations, refer to the user manual of the FLIR A400/A700 series). Connect the
network cable to the camera, and then either directly to the computer or to an
Ethernet switch on the same network as the computer.
b. Connect the PoE cable to the camera, and then to a PoE switch on the same net-
work as the computer.
3. The camera is set to use DHCP. On the computer, use FLIR IP Config to identify the
camera on the network, and change the IP settings if necessary.
4. On the computer, do one of the following:
a. Double-click on the camera in FLIR IP Config.
b. Type the IP address of your camera into the address bar of a web browser.
This displays the login view.
5. Log in using the provided username and password. This displays the web interface
of the camera.
6. Use the web interface to configure the camera. For Smart Sensor cameras, use the
web interface to also add measurements and set alarms.
#T810409; r. AB/66574/66574; en-US
15
 Loading...
