1.Checktheselectedlocationfortheunit.Aclear,atareawithsuitableclearancebehind
thepanelisrequired.
2.Beforemodifyingthemountingsurface,refertothedimensionssuppliedinthisdocument
toensurethereisenoughspacefortheunitandallcables.
3.Fixthesuppliedmountingtemplatetotheselectedlocation,usingmaskingorself
adhesivetape.
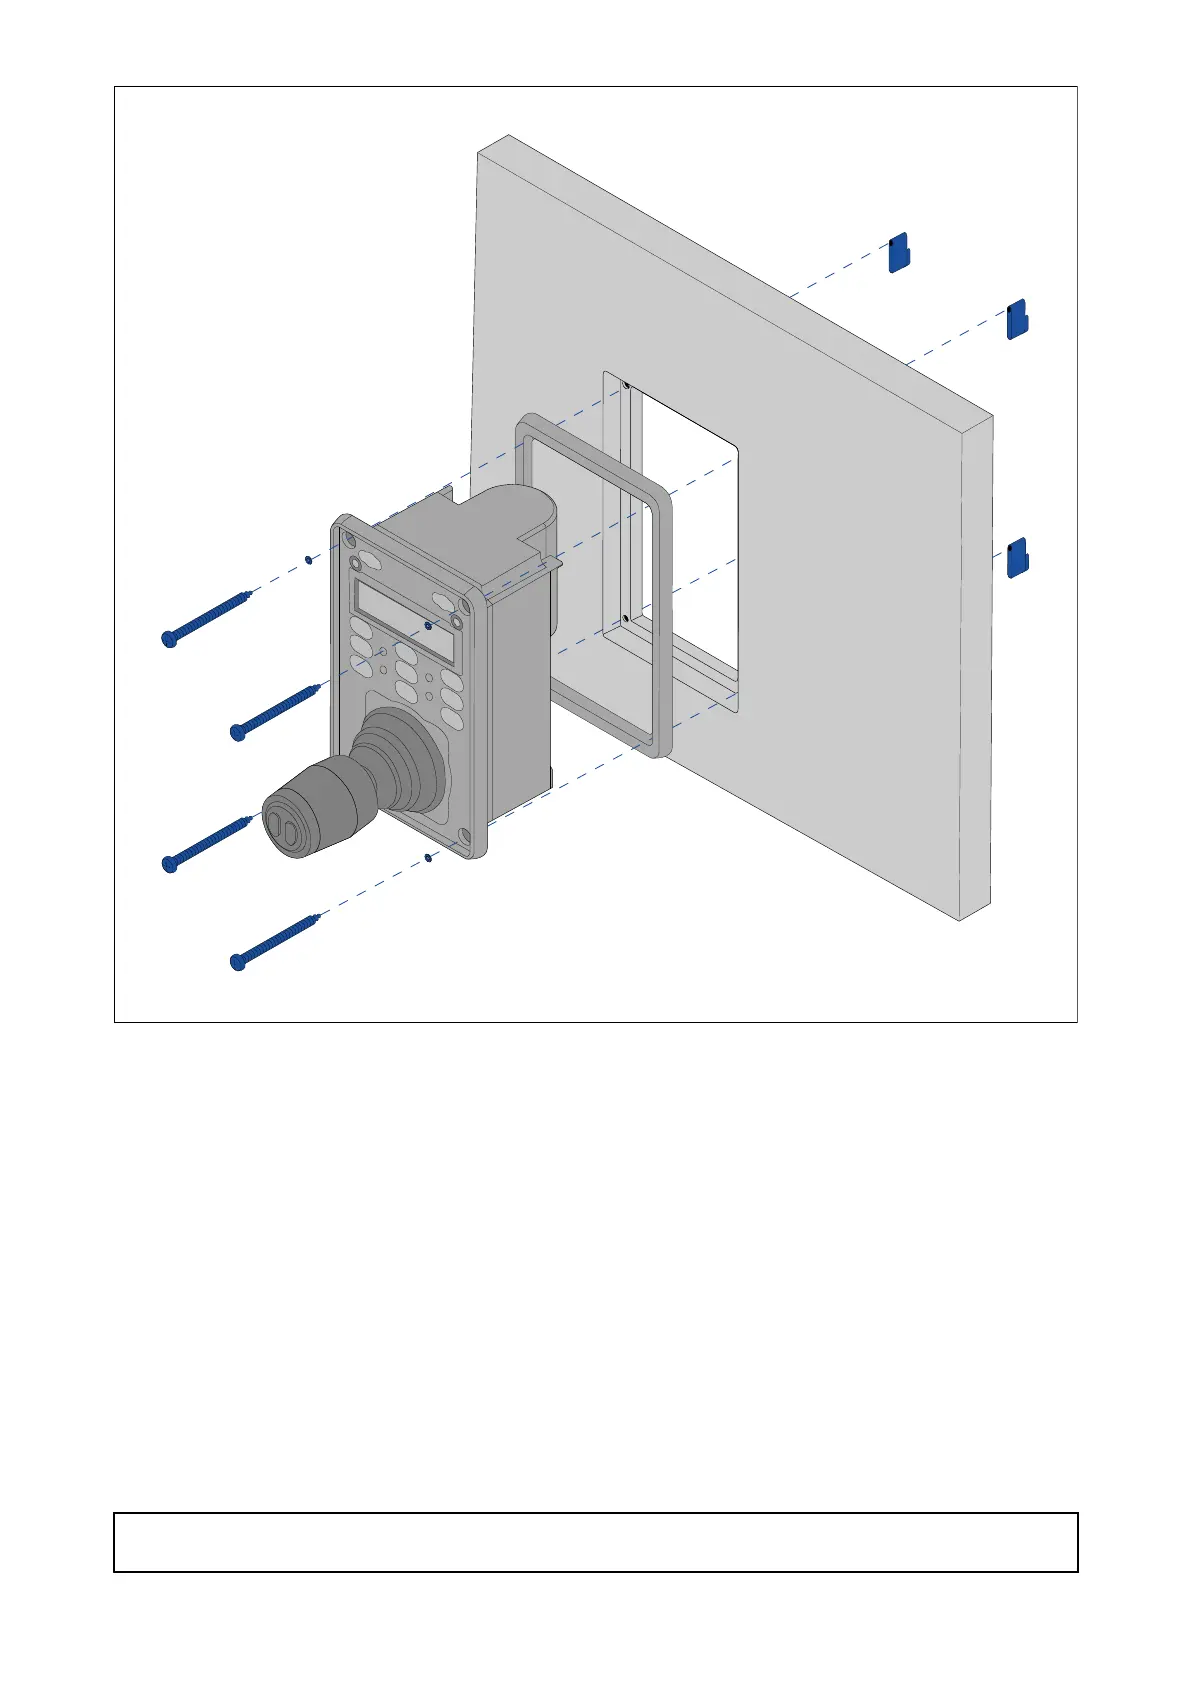
4.Drill4holesasindicatedonthemountingtemplatetoacceptthexings.
5.Usingasuitableholesaw(thesizeandpositionisindicatedonthetemplate),makea
holeineachcornerofthecut-outarea.
6.Usingasuitablesaw,cutalongtheinsideedgeofthecut-outline.
7.UsingaRouter,followtheFlushmountrebateline,tocutoutarebatetothespecied
rebatedepth,asindicatedonthetemplate.
8.Ensurethattheunittsintotheremovedareaandthenremoveroughedges.
9.Placethesuppliedgasketontotherearofthekeypad,ensuringthemountingholes
arealigned.
10.Connecttherelevantcablestotheunit.
11.Placethekeypadintotherebateandsecureusingthexingsprovided.
Note:Theappropriatetighteningtorqueanddrillbitsizetousedependsonthethickness
ofthemountingsurfaceandthetypeofmaterialitismadefrom.
Installation
39