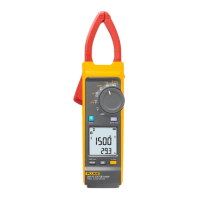
393/393 FC
Calibration Manual
6
2. Set the HIGH VOLTAGE enable switch to the ON position to operate and verify that
the DUT reading is within the limits of Table 2.
3. Set HIGH VOLTAGE enable switch to OFF position to stop DC power source output.
4. Reverse red and black test lead of 2290-5-SHV cable to V Ω input and COM jack on
the bottom.
Note
When you apply a negative DC Voltage, the Product beeps and the backlight
lights for 20 seconds. This is normal and you can continue with the measurement.
5. Set DC power source to 700 V.
6. Set HIGH VOLTAGE enable switch to ON position to operate and verify that the DUT
reading is within the limits of Table 2.
7. Set HIGH VOLTAGE enable switch to OFF position to stop DC power source output.
8. Repeat step 2 through step 7 with the DC power source set to 1450 V.
9. ONLY AFTER DC power source is disabled, disconnect all test leads.
mV DC Voltage
To verify mV dc voltage:
1. Connect the normal output HI and LO of the calibrator to the V Ω and COM input
connections on the bottom of the DUT.
2. Set the DUT to N and push (mV DC Voltage measurement mode).
3. Set the calibrator to the voltage for the first test point.
4. Set the calibrator to OPER.
a. Verify that the DUT reads within the display limits.
b. Verify the DUT reading for the remaining steps for mV DC voltage.
Resistance/Capacitance
To verify resistance and capacitance:
1. Connect the normal output HI and LO of the calibrator to the V Ω and COM input
connections on the bottom of the device under test (DUT).
2. Set the DUT to D (Resistance measurement mode).
3. Set the calibrator to the resistance for the first test point.

 Loading...