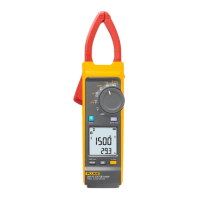
393/393 FC
Calibration Manual
4
AC Voltage
To verify ac voltage:
1. Connect the normal output HI and LO of the calibrator to the V Ω and COM input
connections on the bottom of the device under test (DUT).
2. Set the DUT to V (AC Voltage measurement mode).
3. Set the calibrator NORMAL output to the voltage and frequency for the first test point.
4. Place the calibrator in OPER:
a. Verify that the DUT reads within the display limits.
b. Verify the DUT readings for the remaining steps for AC voltage.
DC Voltage (0 V to 600 V)
To verify dc voltage:
1. Connect the normal output HI and LO of the calibrator to the V Ω and COM input
connections on the bottom of the device under test (DUT).
2. Set the DUT to N (DC Voltage measurement mode).
3. Set the calibrator to the voltage for the first test point.
4. Place the calibrator in OPER:
a. Verify that the DUT reads within the display limits.
b. Verify the DUT reading for the remaining steps for DC voltage.
DC High Voltage (600 V to 1500 V)
W Caution
Read all safety Information before you use the 393/393 FC, 55xxA, and
2290-5. High voltages are used during this test.
The dc high voltage verification can be done with two calibrators or with a high voltage dc
power supply. See the section for your specific setup.
Two Calibrators Method
To verify dc high voltage with two 55xxA calibrators:
1. With two 55xxA calibrators, connect the NORMAL LO terminals between both
calibrators.
2. Connect the NORMAL HI output from calibrator 1 to the V Ω input jack on the bottom
of the DUT.
3. Connect the NORMAL HI output from calibrator 2 to the COM input jack on the
bottom of the DUT.

 Loading...