721
Users Manual
8
Notes
When is pushed to turn on the Product, a
short startup self-check routine is run. During
that routine, the display shows the current
firmware revision level, auto-shutdown status,
and the range of the internal pressure sensors.
A maximum of 5 minutes warm-up is necessary
for the product to reach rated accuracy. A longer
warm-up period can be necessary for large
changes in ambient temperature. See the “Zero
Function Use” section for more about zeroing
the pressure sensor displays. It is recommended
that pressure ranges be zeroed each time the
Product is started.
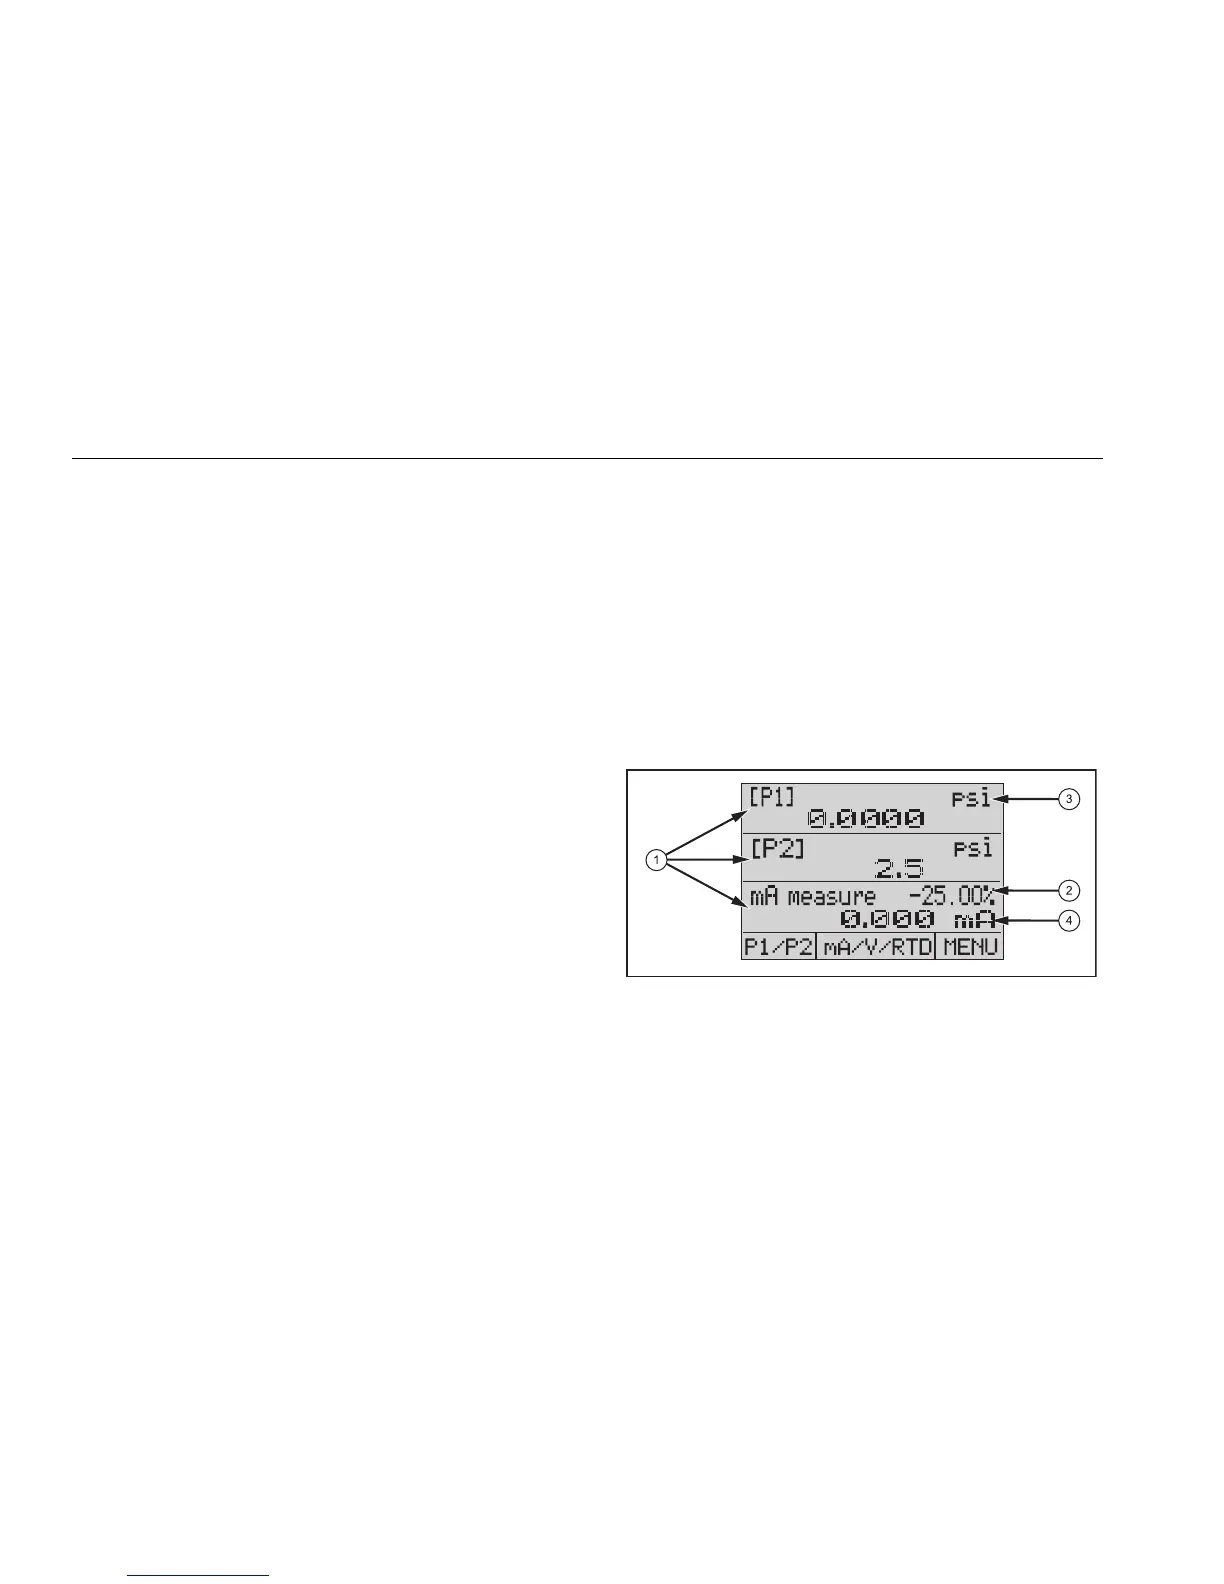
Display
The display has two main regions:
• The menu bar (located at the bottom of the screen) is
used with the function buttons to access the Product
menu.
• The main display has a maximum of three process
measurement sub-regions.
These sub-regions will be referred to as the UPPER,
MIDDLE and LOWER displays. Figure 2 shows the
location of the different display fields. Table 3 describes
them.
hmq007.eps
Figure 2. Display