20
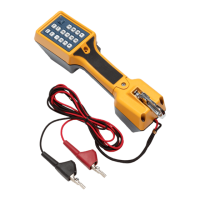
TS52PRO Test Set
Users Guide
Maintenance
W
WarningX
Disconnect the test set’s alligator clips from
any metallic connections before performing
any maintenance. Read all instructions
completely and understand possible hazards
to end user if repairs are not performed
properly.
Batteries are hazardous to handle. Do not
allow the terminals to be shorted together.
Severe burns or explosion can result if not
handled properly. Dispose of the battery
properly to ensure contacts cannot short.
Disposal may be restricted by local laws.
Cleaning
For general cleaning, wipe the case, front panel keys,
and lens using a soft cloth slightly dampened with
water or a non-abrasive mild cleaning solution that
does not harm plastics.
WCaution
Do not use CRC Cable Clean
®
or any
chlorinated solvent or aromatic
hydrocarbons on the test set. Doing so will
damage the test set.
Replacing the Battery
See Figure 4.
To replace the 9 V battery:
WWarningX
Be sure to account for all hardware
removed. Loose or missing hardware could
create a hazard for the end user. Be sure to
replace the battery with a good 9 V alkaline
battery or the test set will not operate
properly.
1
Disconnect the test set from the line and place on
a flat work surface with the battery cover up.
Note
Battery cover screws are retained in the cover
and will not come all the way out of the battery
cover.
2
Use a Phillips screwdriver to loosen only the four
screws attaching the battery door cover to the
back of the test set. Remove the battery door
cover. Do not access or touch the printed circuit
board or other areas of the test set.
3
Remove the old battery and properly discard.
Make sure the terminals cannot short.
4
Insert a new 9 V alkaline battery into the test set.
Do not use a rechargeable battery. When inserting
the battery, observe the proper polarity.
5
Place the battery door cover on the test set and
fasten the four screws securely. Do not over
tighten the screws. The battery door screws should
be torqued to a maximum of 0.904 N-m or 8 in-lb.
bfp04.eps
Figure 4. Battery Replacement
Battery door
Battery spacer
9V
Battery
Screws
4 places
(Not removable)

 Loading...