142 143
Setting the electrical support level
You can use the controls to determine how much
the e-bike electrical support will assist you when
pedalling. The electrical support level can be
changed at any time, even while riding.
The following electrical support levels are available:
• “OFF”The electrical support is switched off
and the e-bike can be moved by pedalling only,
like a normal bicycle. All other functions (e.g.
lighting) are still available.
• “ECO”: Effective electrical support with maxi
-
mum efciency to achieve maximum range
• “TOUR”: Continuous electrical support for
trips with a large range
• “SPORT”: Powerful electrical support for ath
-
letic riding on mountainous routes as well as
in city trafc
• “TURBO”: Maximum electrical support up to
high pedalling frequencies for athletic riding
Increase the electrical support level by pressing
the “+” button 13 on the operating unit until the
desired electrical support level is shown at Indica
-
tor b or lower the value by pressing the “–” but-
ton 12. The motor power requested is shown on
the display a. The maximum motor performance
depends on the electrical support level chosen.
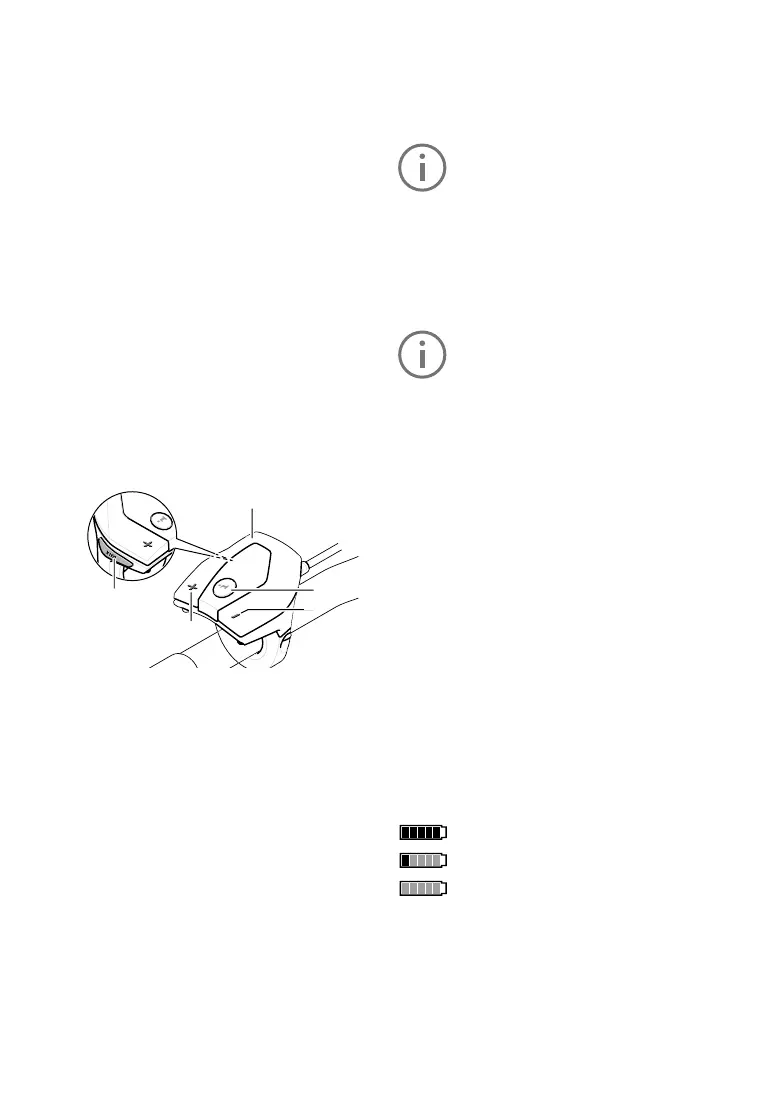
10. Control panel
11. The “i” button on the control unit activates
the display function.
12. Reduce value/scroll down “–” button
13. Increase value/scroll up “+” button
14. Pushing aid button “WALK”
Switching the pushing/ start-up aid on and off
The pushing/ start-up aid can make it easier for
you to push the e-bike or get it moving. Do not use
the pushing aid to ride the bike.
FLYERS with pedalling support up to 25 km/h are
equipped with a pushing aid. This is limited to 6
km/h in the fastest gear. The FLYER can con
-
veniently be moved out of underground parking or
along steep paths using the pushing aid. Models
with pedal assist above 25 km/h are equipped with
a setting-off aid up to 18 km/h. The installation is
performed in compliance with national regulations.
14
13
11
10
12
To activate the pushing aid, briey press the
«WALK» button on your on-board computer. Af
-
ter activation, press the «+» button within three
seconds and hold it down. The e-bike drive will
be switched on.
The pushing aid cannot be activated in
support level «OFF».
The pushing aid is switched off as soon as one
of the following events occurs:
• You release the «WALK» 14 button,
• The wheels of the e-bike are blocked (e.g. by
breaking or bumping against an obstacle)
• speed exceeds 6 km/h or 18 km/h
With certain systems, the pushing aid
can be started directly by pressing the
«WALK» button.
Switch lighting on/off
The headlight and the rear light can be switched
on and off at the same time by pressing the but
-
ton 2 on the controls when the respective bicycle
version supplies the riding lights from the e-bike
system. The daytime running light is activated
when riding at a variant speed. The lighting will
automatically turn on when you switch on the sys
-
tem. The button 2 will not turn off the light.
Gear Recommendation
If the notication “g” is displayed, you should shift
into a higher gear and pedal at a lower cadence.
If the notication “h” is displayed, you should shift
into a lower gear and pedal at a faster cadence.
Battery charge status indicator
The battery charge status indicator i shows the
charge status of the e-bike battery and not that of
the internal controls’ battery.
The charge status of the e-bike battery can be
read on the battery itself.
Each bar on the battery symbol i corresponds to
approx. 20% capacity:
The battery is fully charged.
The battery should be topped up.
The charge for electrical support is used
up and the electrical support function
will gently switch off. The remaining capacity is
provided for the lighting and the controls, the dis
-
play ashes. The battery will still provide approx.
2 hours of lighting.
 Loading...