focusrite.com Tell the world 14
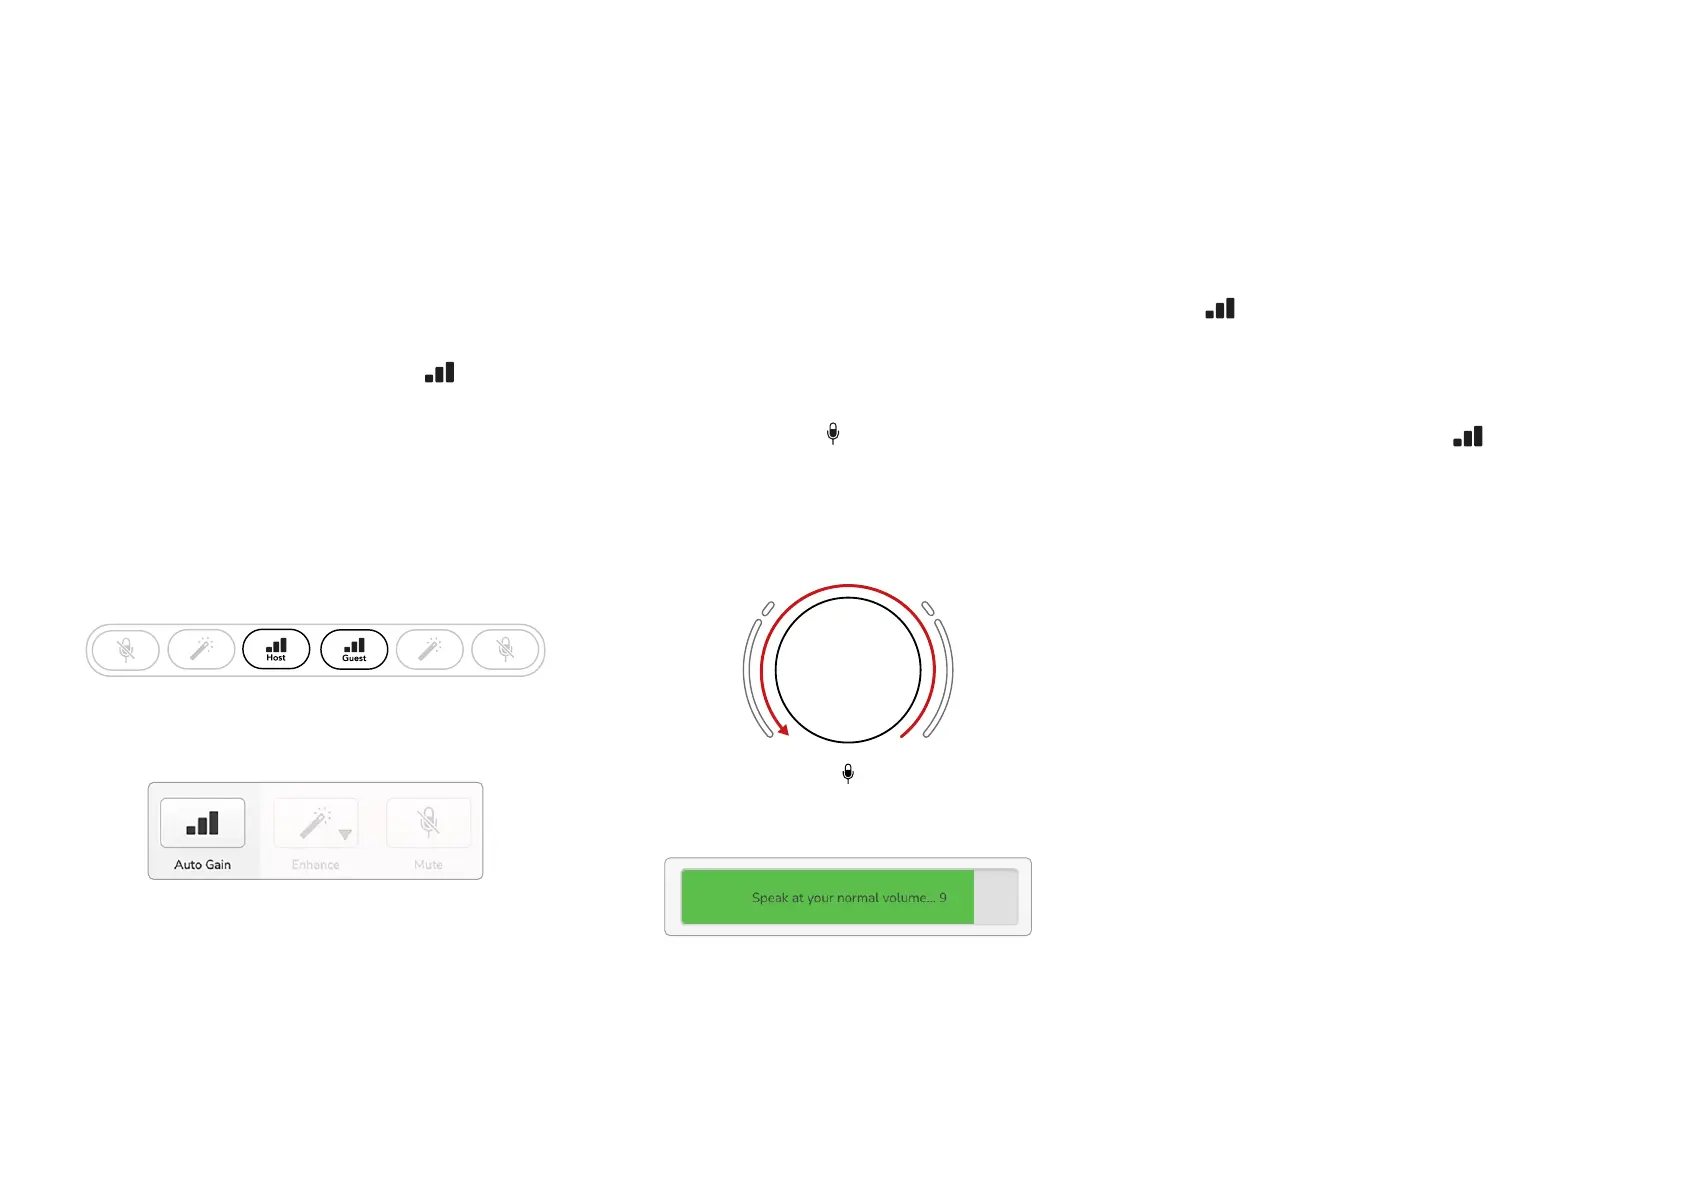
Using Auto Gain
Vocaster Two’s Auto Gain feature allows you to
get a good recording level without guesswork.
Activate Auto Gain by holding the button;
press the Host or Guest button according to
which microphone input is to have its gain set.
or, if you have Vocaster Hub open on your
computer, by clicking on the on-screen Auto
Gain icon.
Vocaster Two
Vocaster Hub
When you activate Auto Gain in software or
using the button Vocaster disables all input
controls for the other channel.
Now you - or your guest - should speak into the
microphone for ten seconds, using a normal
speaking voice you will use for the recording
itself.
The inner halo on the knob acts as a
count down timer, starting fully white, then
extinguishing anticlockwise. A progress bar is
also displayed on Vocaster Hub.
Halo countdown on Vocaster
Vocaster Hub countdown
After ten seconds, Auto Gain sets the input
level for the microphone and you’re ready to
start recording.
To apply Auto Gain to the other input, hold the
other button, and repeat the process.
After using Auto Gain, you can still manually
adjust the levels with the gain knob any time
you like: short-press the other button rst
if the input you want to adjust is not selected.
Auto Gain didn’t set my input level
If the halos ash amber the signal is too loud or
too quiet so Auto Gain couldn’t set the correct
level and sets it to the minimum or maximum
level.
If the halos ash red Auto Gain couldn’t set a
usable level. This could be due to a Mic Level
that was too low:
• Test a different microphone or cable.
• Make sure 48V is on, if you’re using a
condenser microphone.
• Make sure you switch on your microphone
(if it has an on/off switch).
EXAMPLES OF USE