Forcepoint Next Generation Firewall Hardware Guide | Models 330, 331, 335, 335W
18
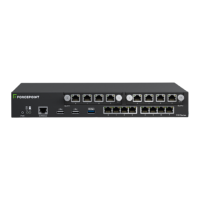
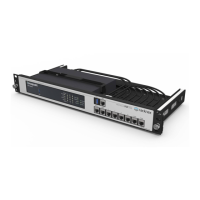
Connect network cables
Ethernet ports are mapped to interface IDs during the initial configuration. Determine which Ethernet ports to use
for connecting to your networks.
Steps
1) Connect network cables to the Ethernet ports.
Connect network cables to SFP ports
If you installed an SFP interface module on the appliance or the appliance has an integrated SFP port, insert the
copper or fiber-optic SFP transceiver into the port, then connect the cables.
Steps
1) Insert the SFP transceiver in the port slot until you feel the connector on the transceiver snap into place.
Note: Make sure that the latch on the SFP transceiver is up when you insert the SFP
transceiver in the port slot.
2) If the SFP transceiver has a rubber plug, remove the plug.
3) Connect the copper or fiber-optic cable to the SFP transceiver.
Note: Each SFP port must match the wavelength specifications at the other end of the cable.
The cable must not exceed the stipulated cable length for reliable communications.
Connect the power adapter
Use the power cable to plug in the appliance.
Note: We recommend using a UPS to ensure continuous operation and minimize the risk of
damage to the appliance in case of sudden loss of power.
Steps
1) Attach a suitable power plug for your region to the DC power adapter.
Standard power plugs for several regions are included with the delivery.
2) Connect the power cable to either one of the two power connectors on the back of the appliance.
CAUTION: The power adapter delivered with the appliance is intended for Forcepoint
appliances only. Do not connect the power adapter to any other devices.
3) Plug the DC power adapter into a grounded, high-quality power strip that offers protection from electrical
noise and power surges.