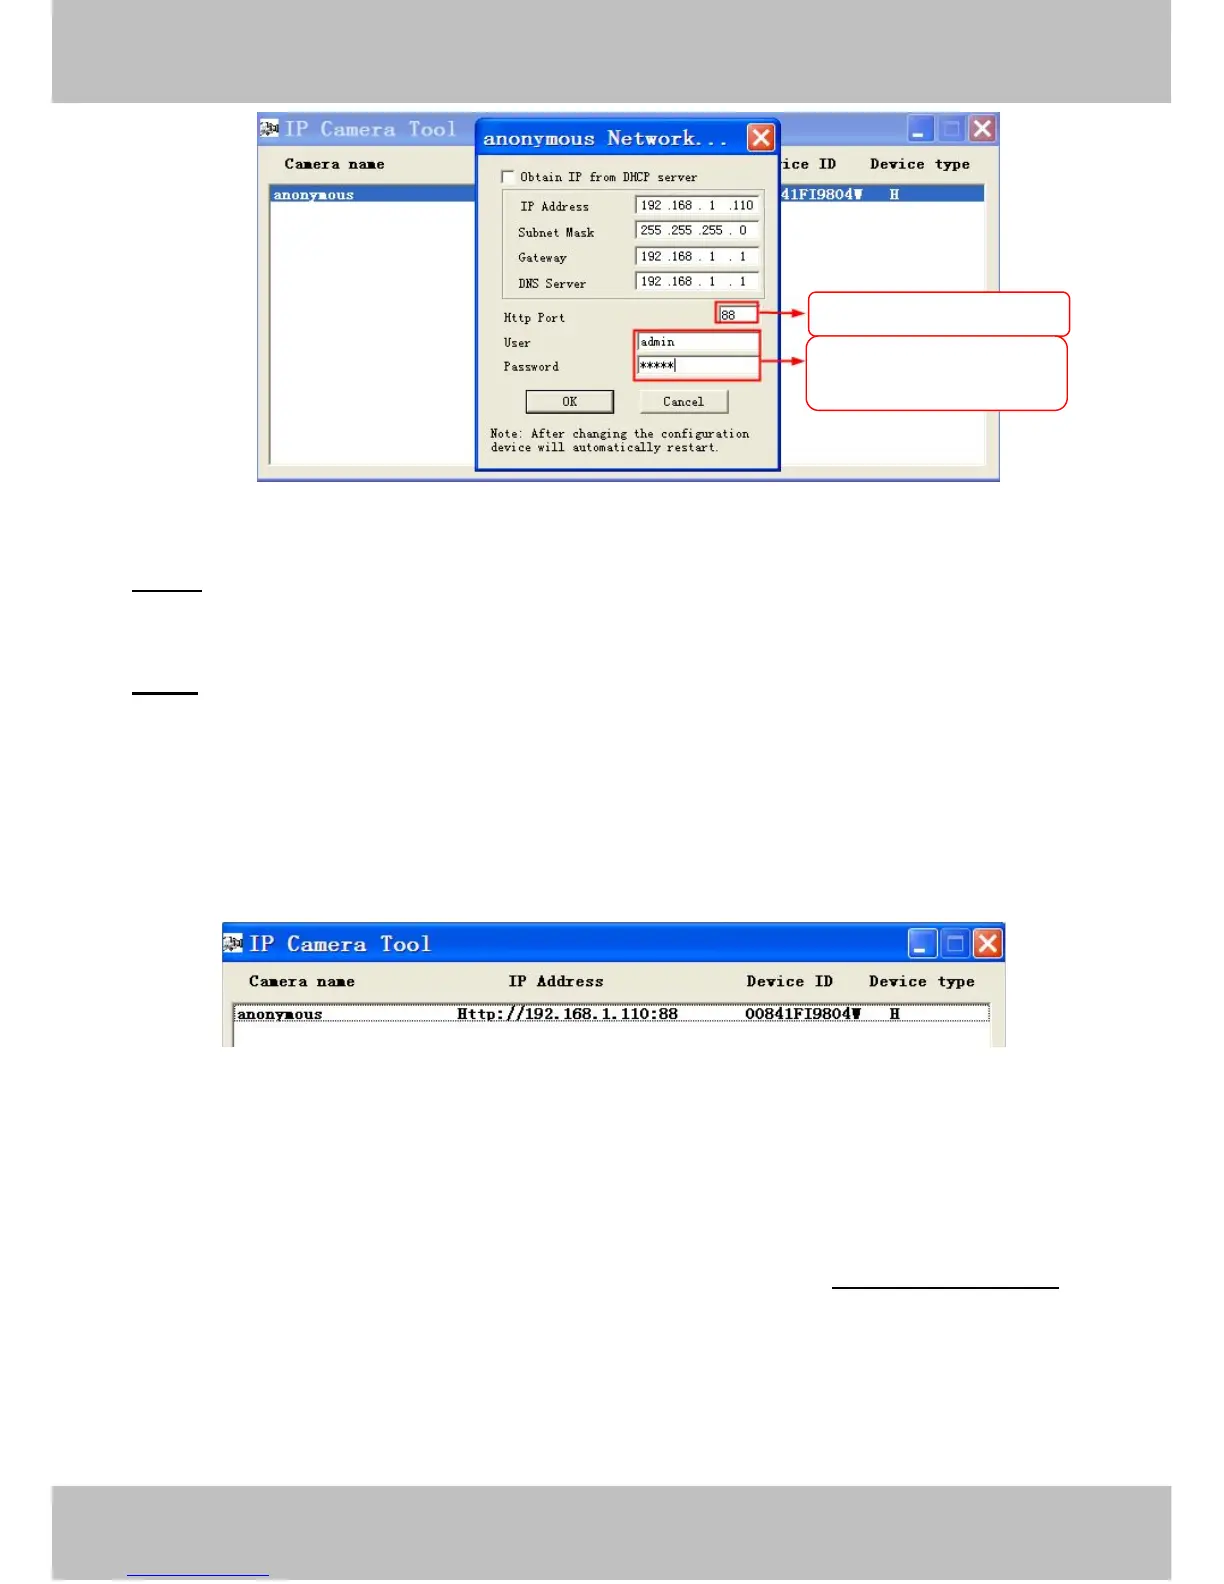
Step 2: Enter the username and password of the Administrator (default username is admin with a blank
password), and click “OK” to apply changes.
Step 3: Wait around 10 seconds, you’ll see that the camera’s LAN IP address has changed. In our example it
was changed to 2000, so we see http://192.168.8.102:2000 in IP Camera Tool. Also, the LAN IP address is
now fixed at a static IP address of http://192.168.8.102:2000. This IP address will not change even if the
camera is powered off and back on, the camera will remain on this LAN IP address. This is very important that
a static LAN IP address is set, or you may have problems later with remote access and seeing the camera
remotely if the camera loses power and reconnects on a different LAN IP address. Make sure you set a static
LAN IP address!
NOTE:
If the camera cannot be accessed, please make sure the port forwarding is succeed.
ONVIF port: By default, the ONVIF port is set to 888. Also, they can be assigned with another port number
between 1 and 65535(except 0 and 65534). But make sure they can not be conflict with other existing ports.
HTTPS port: The default port is 443. You can use the url to access the camera: https:// IP + HTTPS port.
RTSP port: The default port is 554.