w
w
w
w
w
w
.
.
f
f
o
o
s
s
c
c
a
a
m
m
.
.
c
c
o
o
m
m
9
S
S
h
h
e
e
n
n
z
z
h
h
e
e
n
n
F
F
o
o
s
s
c
c
a
a
m
m
I
I
n
n
t
t
e
e
l
l
l
l
i
i
g
g
e
e
n
n
t
t
T
T
e
e
c
c
h
h
n
n
o
o
l
l
o
o
g
g
y
y
C
C
o
o
.
.
,
,
L
L
i
i
m
m
i
i
t
t
e
e
d
d
T
T
e
e
l
l
:
:
8
8
6
6
7
7
5
5
5
5
2
2
6
6
7
7
4
4
5
5
6
6
6
6
8
8
F
F
a
a
x
x
:
:
8
8
6
6
7
7
5
5
5
5
2
2
6
6
7
7
4
4
5
5
1
1
6
6
8
8
9
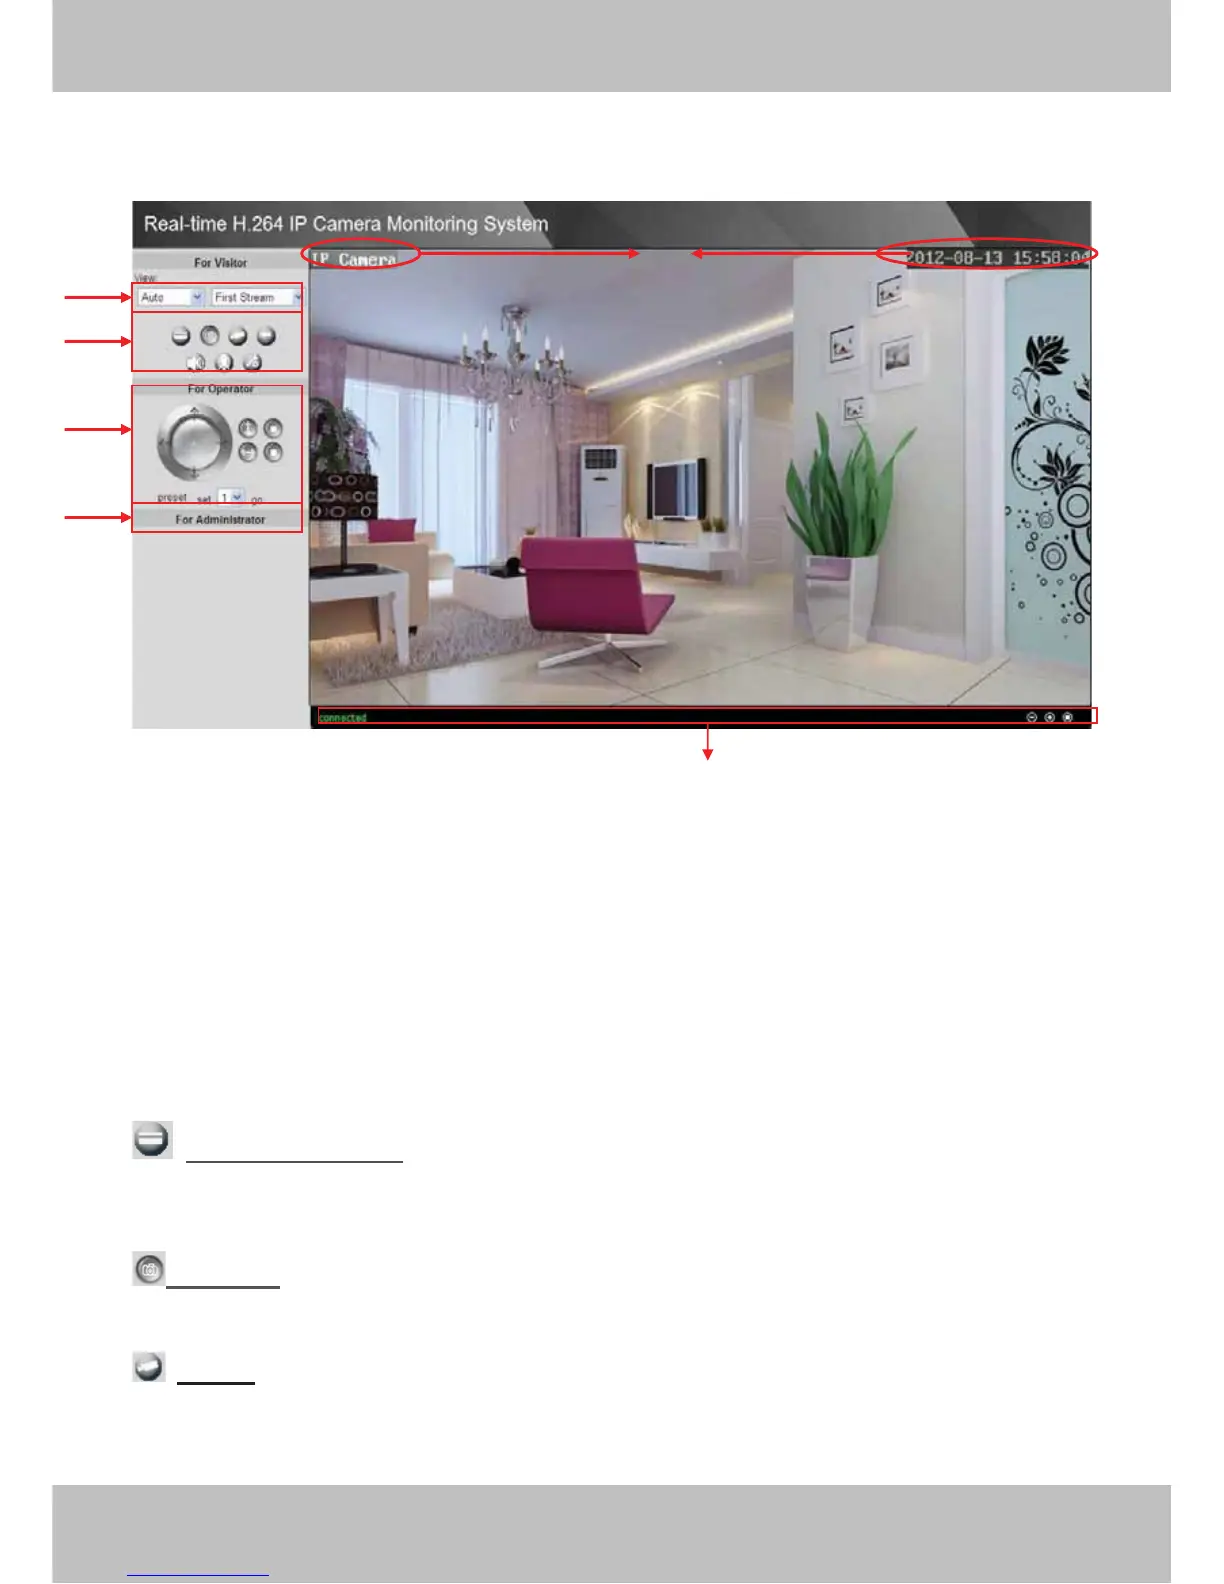
2.2 Surveillance Window
Figure 2.4
Section1 Resolution
The resolution contains five types: 1270*720, 960*540, 640*360, 320*180 and Auto. You can
choose First Stream or Second Stream to adjust the view window.
Note: When the network bandwidth is badly, you’d better select Second Stream and the video
will be more fluency.
Section2 Snapshot/Record/Playback/Audio/Path Buttons
: Browse the SD Card: If the camera has plugged in SD card, click this icon and you can
see some information such as the stored files in the SD card, you can read the stored files.
Snapshot: Click this icon, the camera will snap a picture and store it to a predetermined
path.
Record: Click the icon. The camera will begin recording and store the recorded file to the
folder you set. And the status column will display REC when recording. Click the icon again it will
stop recording
.
1
2
3
4
5
6
 Loading...