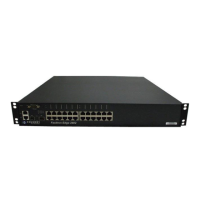
Replacing and Maintaining the Hardware
December 2008 © 2008 Foundry Networks, Inc. 6 - 7
• Gently lift the module up and out of the chassis.
3. Place the 10-Gigabit module in an anti-static bag for storage.
4. Unplug the power cable for the 10-Gigabit module from the main board and remove it from the chassis.
5. Do one of the following:
• Insert the new 10-Gigabit module as instructed in the section “Installing a 10-Gigabit Ethernet Module”
on page 6-7.
• If you are removing the module without replacing it, install the blank face place in the upper left-hand
corner or the front panel.
6. Re-assemble the device as instructed in the section “Re-assembling the Chassis” on page 6-7.
Installing a 10-Gigabit Ethernet Module
Follow these procedures when installing a 10-Gigabit Ethernet Module:
1. Disassemble the FastIron chassis as instructed in the section “Disassembling the Chassis” on page 6-6.
2. Remove the 10-Gigabit Ethernet module, power cable, and faceplate from the protective packaging.
3. Install the 10-Gigabit module’s power cable (supplied with the 10-Gigabit module):
• Plug one end of the cable into the power connector on the main board of the device. The connector is
located on the rear of the main board towards the rear of the device.
• Plug the other end of the cable into the power connector located on the rear of the 10-Gigabit module
(the side opposite the port connectors).
4. Install the 10-Gigabit module in the chassis:
• Use the two guide links (mounting posts) located towards the rear of the main board to properly place
and align the 10-Gigabit Ethernet module inside the chassis and on top of the main board.
• Depress the 10-Gigabit module, applying pressure in the location of the connector, and not at the side.
Note that the connector must be fully seated and snapped into place. Otherwise, the module will not
work.
• Use a #2 Phillips-head screwdriver to fasten the three screws on the 10-Gigabit module. Affix the screws
loosely at first, then tighten them once you are sure the board is properly positioned.
5. Mount the faceplate (provided with the 10-Gigabit module) on the upper left-hand corner of the front panel.
Use a #2 Phillips-head screwdriver to fasten the two screws in place.
6. Re-assemble the device as described in the following section.
Re-assembling the Chassis
This section provides instructions for re-assembling the FastIron device after removing, installing, or replacing a
10-GbE module.
1. Replace the device’s cover by gently guiding the cover into place, taking care not to bump the connectors for
the 10-Gigabit port(s). To seat the cover, lift up slightly on the rear of the cover while affixing the front of the
cover, then carefully seat the back of the cover into place.
2. Replace the power supplies or power supply and blank faceplate.
3. Once the cover and power supplies are properly positioned, re-fasten the screws on each side of the cover.
4. If the device is rack-mounted, replace the mounting brackets.
5. Replace the screw that secures the power supplies in place.