Franka Emika GmbH ©October 2018
25
Verbindungskabel Connection cable The connection cable connects the
Arm with the Control.
Fail-safe Sicherheits-
blockiersystem, bzw.
Sicherheitsblockier-
system
fail-safe safety
locking system
The fail-safe safety locking system
locks all 7 axes of the Arm, as soon
as the Arm is no longer powered.
This way, the Arm stays in position
even when turned off. Hereinafter
also referred to as safety locking
system.
Entriegelungswerk-
zeug
Unlocking tool The unlocking tool provided can
be used for manually unlocking the
safety locking system in case of
emergency to move the Arm.
Notentriegelung Emergency
unlocking
Emergency unlocking is the process
of using the unlocking tool to unlock
the safety locking system in order to
manually move the Arm.
Emergency unlock Emergency unlock
The emergency unlock labels on the
Arm indicate the three positions on
the Arm where an emergency unlock
can be carried out.
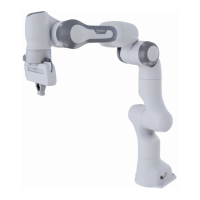
Achsen/Gelenke Axes/joints The robotic arm consists of 7 con-
secutive joints or axes. The mo-
vement is created in these joints.
Handführen/Guiding Guiding Guiding describes the procedure
of taking the Arm by the hand and
moving it manually, for example to
teach a new pose.
Geste Gesture A gesture is a movement of the
Arm similar to a human gesture (e.g.
nodding to confirm a procedure).
Guiding Modus Guiding mode Guiding modes facilitate guiding
by locking or unlocking different
directions or rotations in space. For
example, the Arm can be moved in
three directions in space. You can
switch between guiding modes eit-
her using the guiding mode button
on the Grip or directly from Desk.
Guiding Taster Guiding Button The guiding button is located on the
grip of the Pilot. Using this button
you can guide the Arm, as long as
the enabling button is half-pressed
too.