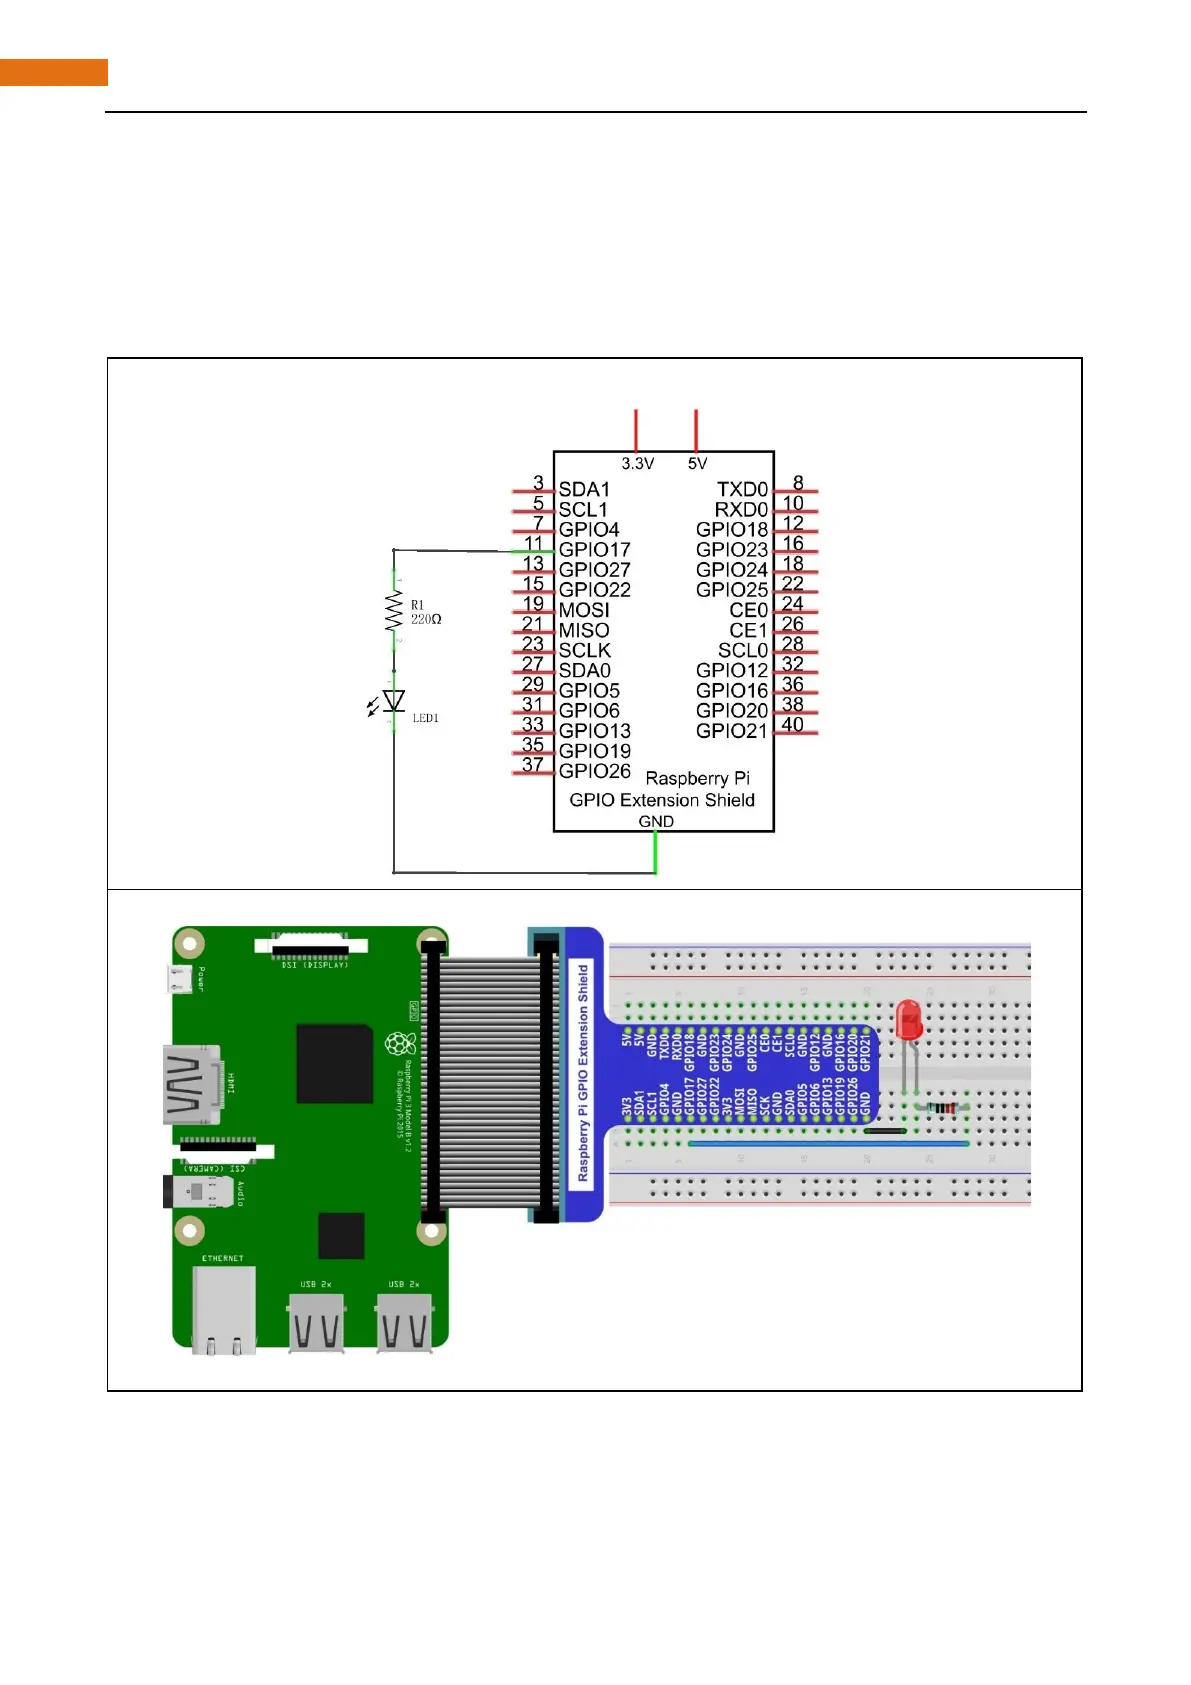
EasyManuals Logo

Freenove Ultimate Starter Kit User Manual

Freenove Ultimate Starter Kit
286 pages
To Next Page IconTo Next Page
To Previous Page IconTo Previous Page
Page #54 background imageLoading...
Page #54 background image
Chapter 1 LED
54
www.freenove.com
support@freenove.com
Circuit
Disconnect RPi from GPIO Extension Shield first. Then build the circuit according to the circuit diagram and
the hardware connection diagram. After the circuit is built and confirmed, connect RPi to GPIO Extension
Shield. In addition, short circuit (especially 5V and GND, 3.3V and GND) should be avoid, because short circuit
may cause abnormal circuit work, or even damage to RPi.
Schematic diagram
Hardware connection
Because Numbering of GPIO Extension Shield is the same as RPi GPIO, later Hardware connection diagram
will only show the part of breadboard and GPIO Extension Shield.
Note
Do NOT rotate Raspberry Pi to change the way of this connection.
Please plug T extension fully into breadbard.

Table of Contents

Questions and Answers:

Question and Answer IconNeed help?

Do you have a question about the Freenove Ultimate Starter Kit and is the answer not in the manual?

Freenove Ultimate Starter Kit Specifications

General IconGeneral
BrandFreenove
ModelUltimate Starter Kit
CategorySingle board computers
LanguageEnglish