IMPORTANT: Low-rolling resistance (LRR) tires
minimize wasted energy as a tire rolls, thereby
decreasing rolling effort and improving fuel
efficiency. If tire replacement is necessary,
replacement tires must meet or have less rolling
resistance than the originally installed tires in
order to maintain compliance with greenhouse
gas and fuel efficiency regulations.
Contact your tire manufacturer/supplier to
determine the rolling resistance of the originally
installed tires. Visit
www.epa.gov/smartway for
additional information and resources.
3.
Check tire inflation.
For inflation pressures and maximum loads, see
the tire manufacturer’s guidelines. Inflate the tires
to the applicable pressures if needed.
If a tire has been run flat or under-inflated, check
the wheel and tire for damage before adding air.
Keep compressed air reservoirs and lines dry
during tire inflation. Use well-maintained inline
moisture traps and service them regularly.
WARNING
Do not operate the vehicle with underinflated or
overinflated tires. Incorrect inflation can stress
the tires and make the tires and rims more
susceptible to damage, possibly leading to rim or
tire failure and loss of vehicle control, resulting
in serious personal injury or death.
NOTICE
A weekly pressure loss of 4 psi (28 kPa) or more
in a tire may indicate damage. The tire should be
inspected and, if necessary, repaired or replaced
by a qualified tire service facility.
IMPORTANT: The load and cold inflation
pressure must not exceed the rim or wheel
manufacturer’s recommendations, even though
the tire may be approved for a higher load
inflation. Consult the rim or wheel manufacturer
for the correct tire inflation pressure for the
vehicle load.
4.
Examine each rim and wheel component.
4.1
Remove all dirt and debris from the
assembly. Rust streaks or metal build-up
around stud holes, or out-of-round or worn
stud holes, may be caused by loose wheel
nuts.
WARNING
Have any worn or damaged wheel components
replaced by a qualified person using the wheel
manufacturer’s instructions and the wheel
industry’s standard safety precautions and
equipment. Otherwise a vehicle or workshop
accident could occur, possibly resulting in
serious personal injury or death.
4.2
Inspect for broken, cracked, badly worn,
bent, rusty, or sprung rings and rims.
NOTICE
Use the recommended torque values and follow
the proper tightening sequence. Insufficient
wheel nut torque can cause wheel shimmy,
resulting in wheel damage, stud breakage, and
extreme tire tread wear. Excessive wheel nut
torque can break studs, damage threads, and
crack discs in the stud hole area.
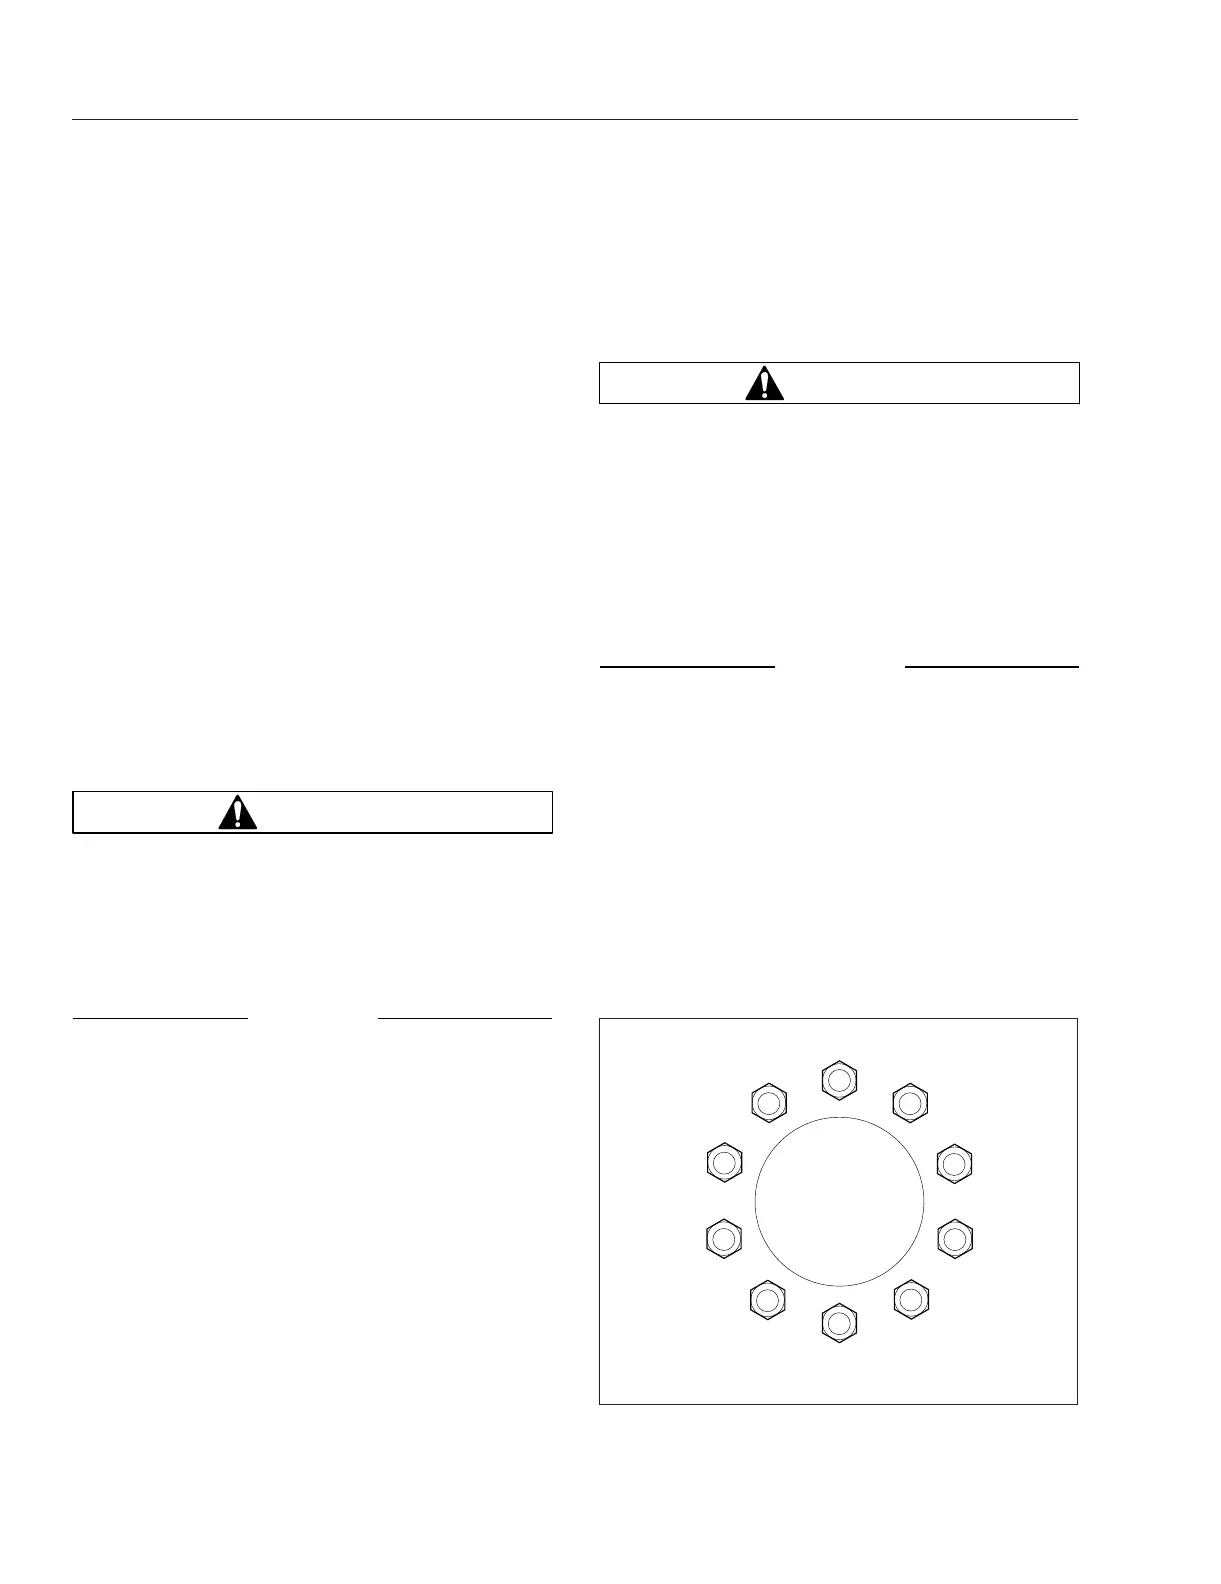
4.3
Make sure all wheel nuts are tightened. If
tightening is necessary, use the tightening
pattern in
Fig. 22.4 to initially tighten the
flange nuts to 50 to 100 lbf·ft (68 to 136
N·m). Then tighten the flange nuts to 450
to 500 lbf·ft (610 to 678 N·m).
f400268
1
10
8
6
4
9
2
7
5
3
04/30/2007
Fig. 22.4, Tightening Pattern, 10-Hole Wheels
Pre- and Post-Trip Inspections and Maintenance
22.3