8.
Install the filter collar over the filter cover.
Simultaneously apply downward pressure to the
top of the clear cover until it is seated on the
body of the lower housing and hand tighten the
collar until it no longer spins freely. Using the
collar wrench, tighten the cover 18 lbf·ft (24
N·m). This is equivalent to rotating the collar
clockwise two or three additional ribs, depending
on the specific filter model.
9.
Start the engine and run it at increased rpm for
one minute to purge air from the fuel lines.
Emergency Starting With
Jumper Cables
When using jumper cables, follow the instructions
below.
WARNING
Batteries release explosive gas. Do not smoke
when working around batteries. Put out all flames
and remove all sources of sparks or intense heat
in the vicinity of the battery. Do not allow the
vehicles to touch each other. Do not lean over
the batteries when making connections, and keep
all other persons away from the batteries. Failure
to follow these precautions could lead to severe
personal injury as a result of an explosion or
acid burns.
NOTICE
Make sure both electrical systems are the same
voltage. Electronic devices on both vehicles can
be damaged when connected to a vehicle with a
different operating voltage.
NOTE: On vehicles equipped with optional
underhood jump start posts, connect to these
posts instead of the batteries.
1.
Apply the parking brakes and turn off the lights
and all other electrical devices.
2.
Remove the battery box cover.
NOTE: The battery box on an M2 Plus may be
located in a variety of locations, including under
the passenger seat, behind the side fairing, or
behind the cab. If the battery box is located
behind the side fairing, it can be accessed by
opening the side fairing kick panel.
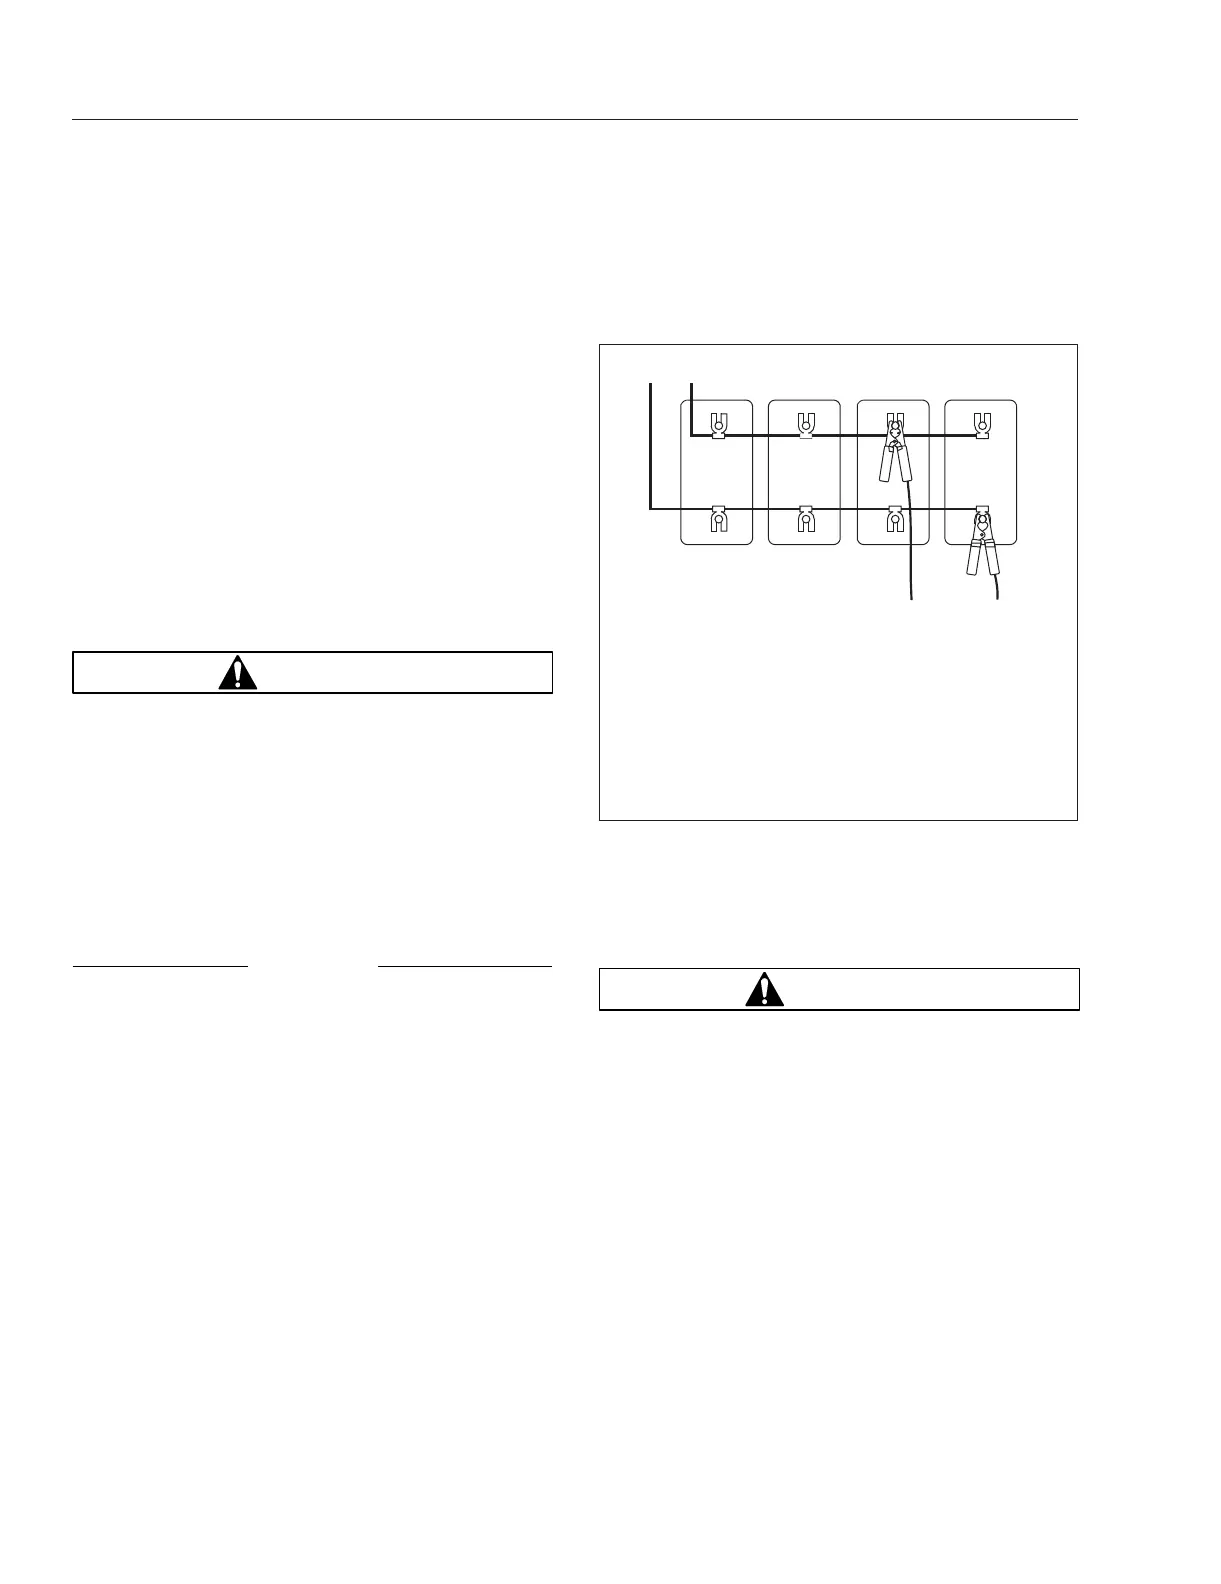
3.
Connect the positive (+) jumper cable to the
positive battery post or jump start post on the
vehicle needing the jump start. See Fig. 23.4,
ref. A.
4.
Then connect the other end of the positive
jumper cable to the positive battery or jump start
post of the vehicle providing the jump start.
WARNING
Do the next step exactly as instructed and do not
allow the clamps of one cable to touch the
clamps of the other cable. Otherwise, a spark
could occur near a battery, possibly resulting in
severe personal injury from explosion or acid
burns.
5.
Connect one end of the negative jumper cable to
the negative battery or jump start post of the
vehicle providing the jump start.
6.
Then connect (ground) the other end of the cable
to a negative battery or jump start post on the
vehicle needing a jump start. See
Fig. 23.4, ref.
B.
7.
Start the engine of the vehicle providing the jump
start and let the engine run a few minutes to
charge the batteries of the other vehicle.
f545111a04/22/2020
1
A
+
−
+
−
+
−
+
−
B
2
1. – Hardline Battery Cable of Vehicle Needing the
Jump
2. + Hardline Battery Cable of Vehicle Needing the
Jump
A. + Jumper Cable to Connect First and Disconnect
Last
B. – Jumper Cable to Connect Last and Disconnect
First
Fig. 23.4, Jumper Connections on Vehicle Needing
Jump Start
In an Emergency
23.3