Output Format
83
Copy
3
• If [Repeat Image] or [Booklet Creation] is set, the annotation is added to each individual
image.
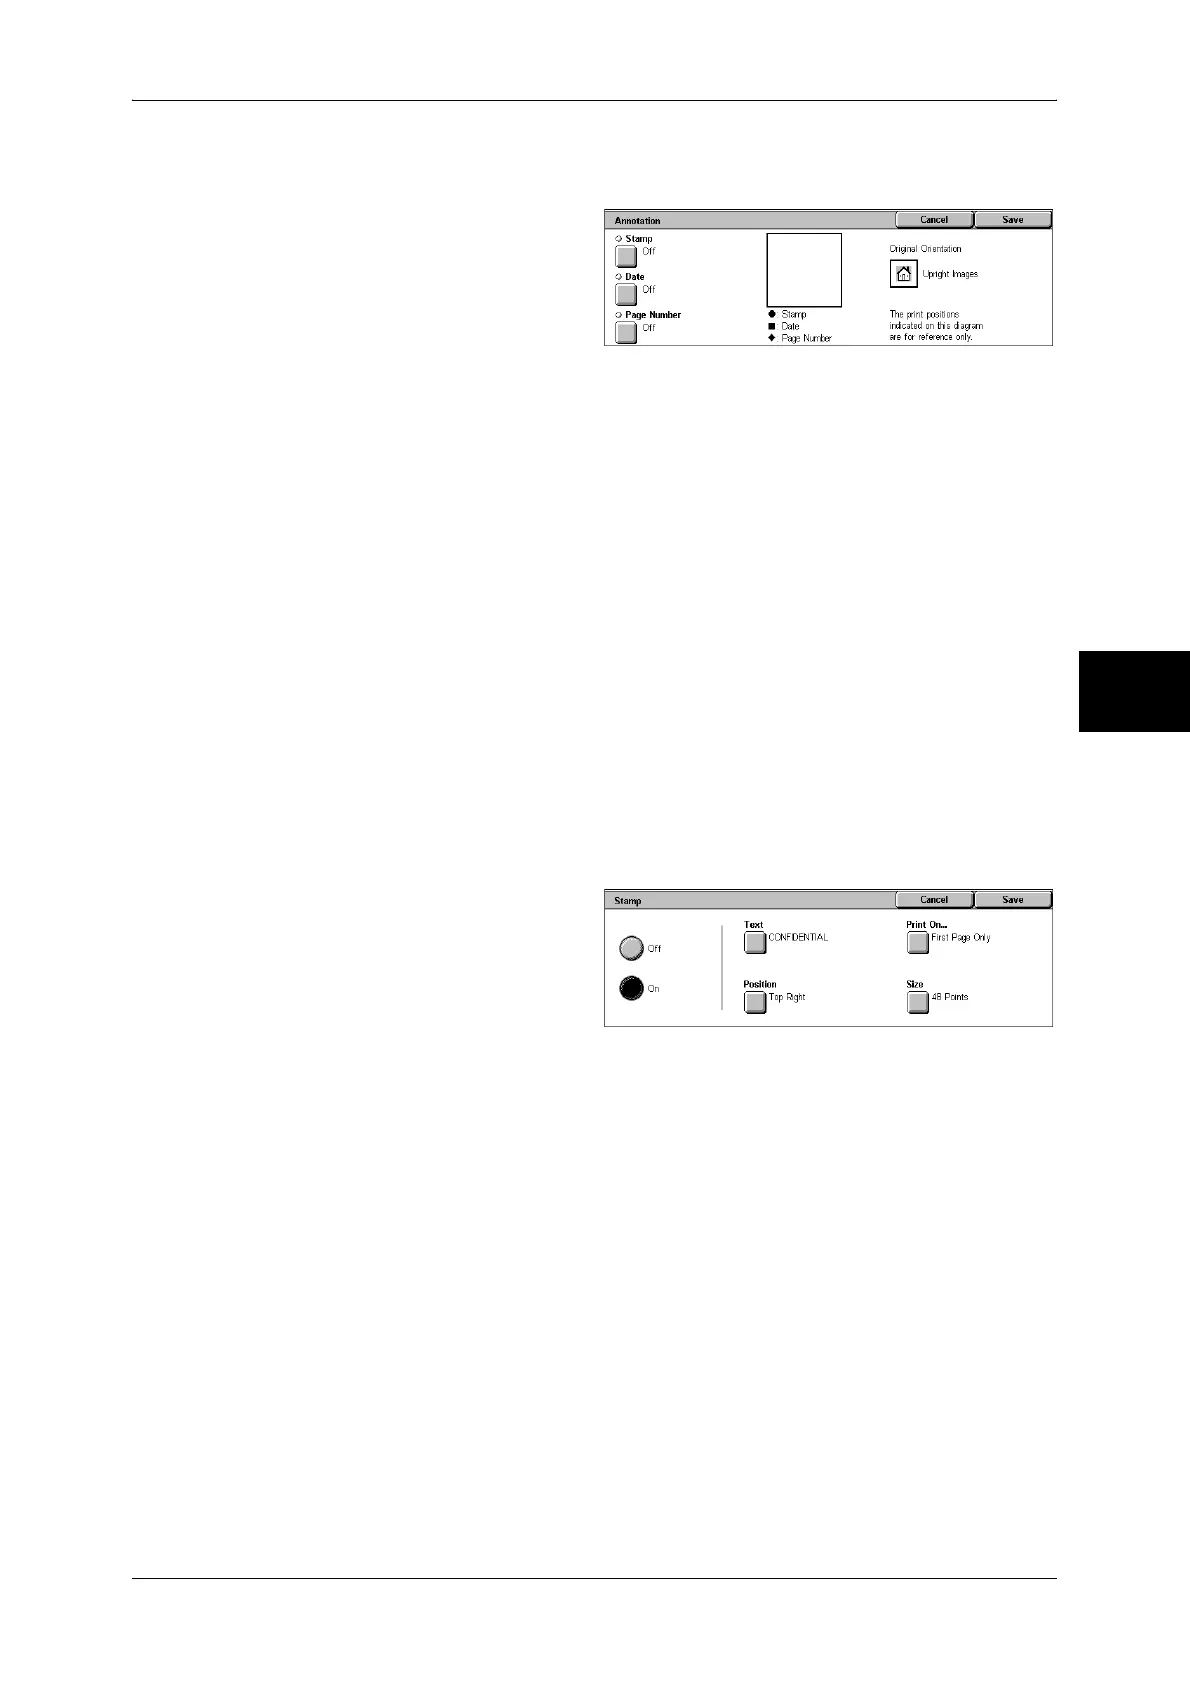
1 Select [Annotation].
2 Select any item.
Stamp
Displays the [Stamp] screen.
Refer to "[Stamp] Screen" (P.83).
Date
Displays the [Date] screen.
Refer to "[Date] Screen" (P.84).
Page Number
Displays the [Page Number] screen.
Refer to "[Page Number] Screen" (P.84).
Original Orientation
Displays the original’s orientation that you specified on the [Original Orientation]
screen.
Refer to "Original Orientation (Specifying the Orientation of Loaded Documents)" (P.74)
[Stamp] Screen
You can set the style and position of the stamp.
1 Select any item.
Off
No stamp is added.
On
A stamp is added.
Text
Displays the [Stamp-Text] screen.
You can select the text for stamp. You can specify text from 8 preset text or the text set
in the System Administration mode.
For information on how to register text, refer to "Annotation - Create Stamps" (P.298).
Position
Displays the [Stamp-Position] screen.
You can select from 9 positions for the stamp.
Print On...
Displays the [Stamp-Print On] screen.
You can select the page(s) to print the stamp from [First Page Only] and [All Pages].
 Loading...