7.2 Paper jam in the paper processor section
7–31
7. Troubleshooting with the power off
(4) Push processing racks Nos. 4 and 3 down into the solution and move the rack stopper (far) slightly to
the left to secure them.
At this time, the rack stopper is released for processing racks Nos. 1 and 2.
(5) Attach processing racks Nos. 2 and 1 into the tank and secure them with the rack stopper (near).
(6) Push processing racks Nos. 2 and 1 down into the solution and move the rack stopper (far) fully to the
left to secure them.
36. Attach the upper guides and the squeegee unit.
IMPORTANT
• Dry the upper guide (No. 1) before attaching. If the rollers are wet, it will adversely affect the finished
print.
37. Close the squeegee unit top cover.
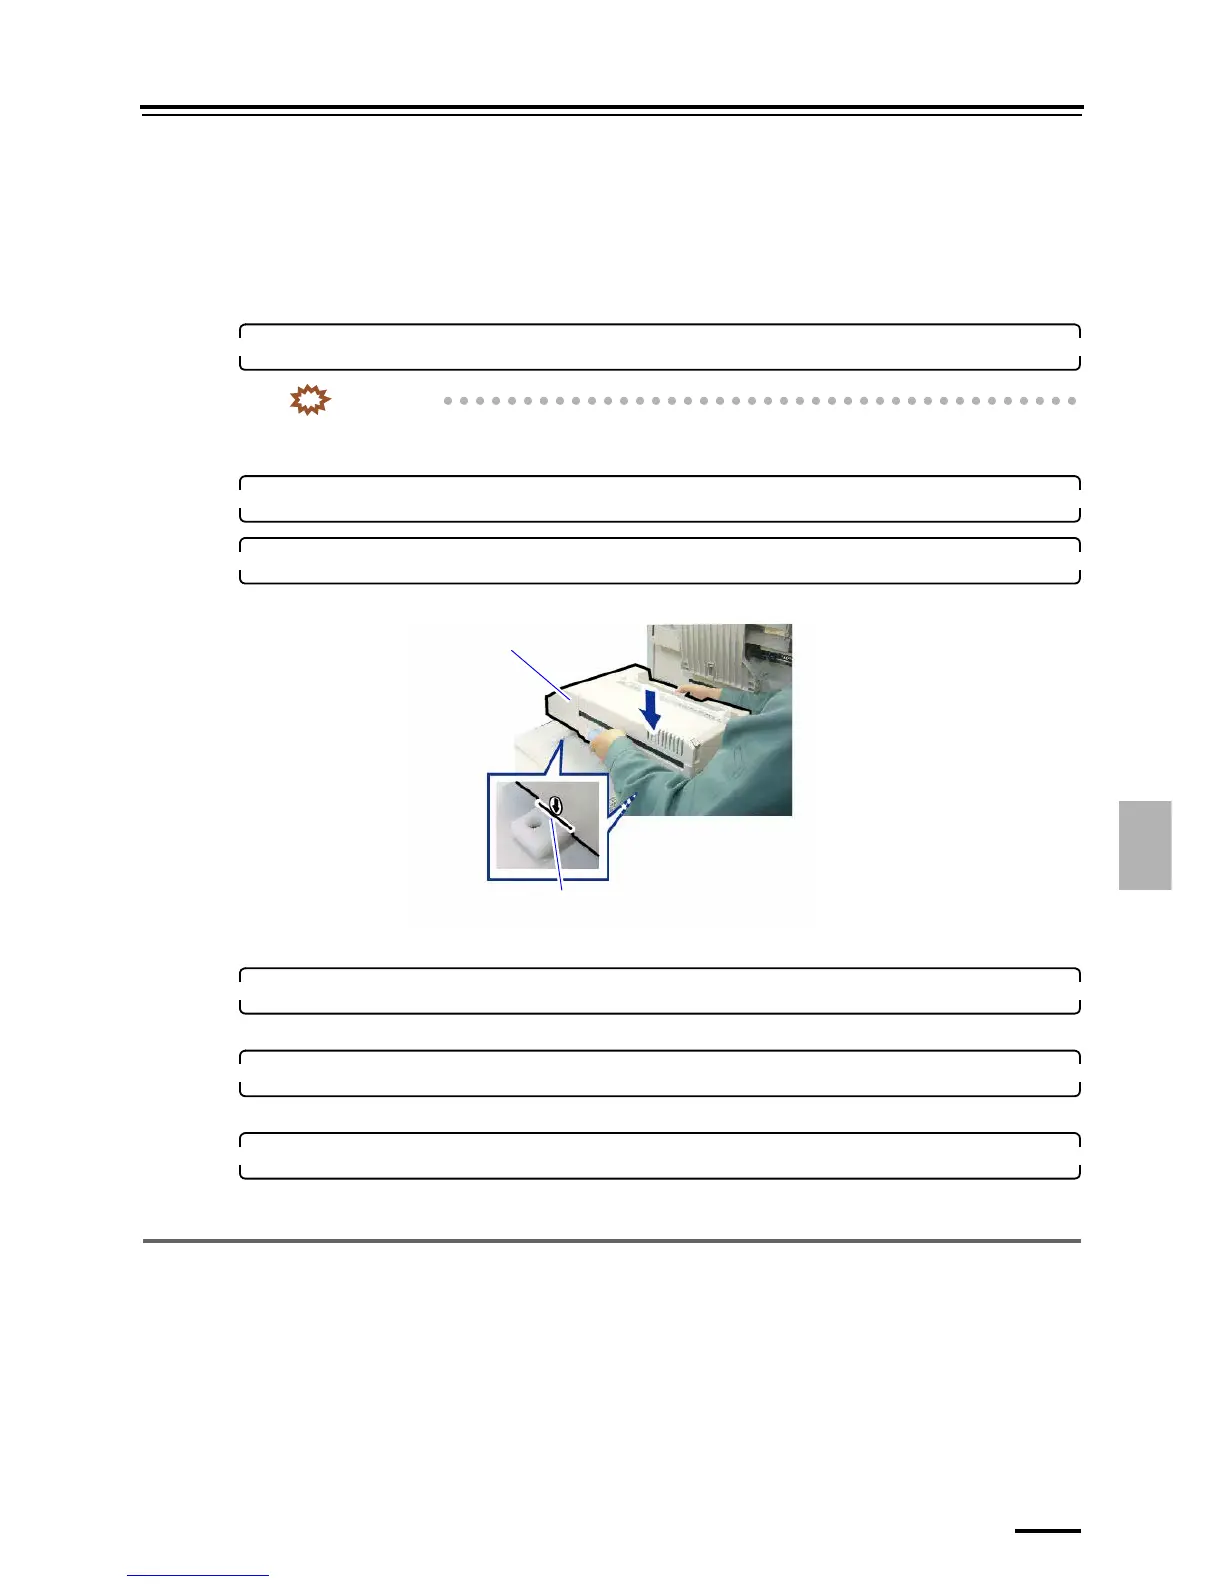
38. Attach the colorimeter unit.
Put the colorimeter unit on the left cutout position of the rails.
39. Keep the processor top cover slightly open.
Raise the stand inside the cover and slightly open the processor top cover.
40. Lay down the print conveyor unit and close the print sorter unit.
This completes taking corrective action for paper jammed in the paper processor section.
41. Turn on the main power supply and the circuit breaker, then start up the system.
• For details, see ☞7.1.2 Turning on the power supply after troubleshooting.
7.2.3 Paper jam around upper guide (No. 1)
If paper jams as shown below, you cannot remove upper guide (No. 1) by lifting it.
Align the arrows to the left cutouts of the rails.
Colorimeter unit
G089472





 To Next Page