Part # 4523133 Rev 4 (08/04/09)Page 16
Installing Release Material:
Areleasematerialsheetmustbereplacedwhen:
• Productstickstoreleasematerial.
• Carbonbuild-upruinstasteorappearance.
• Tearingoccursinthesheet’scookingarea.
• Releasematerialcoatingiswornosheet.
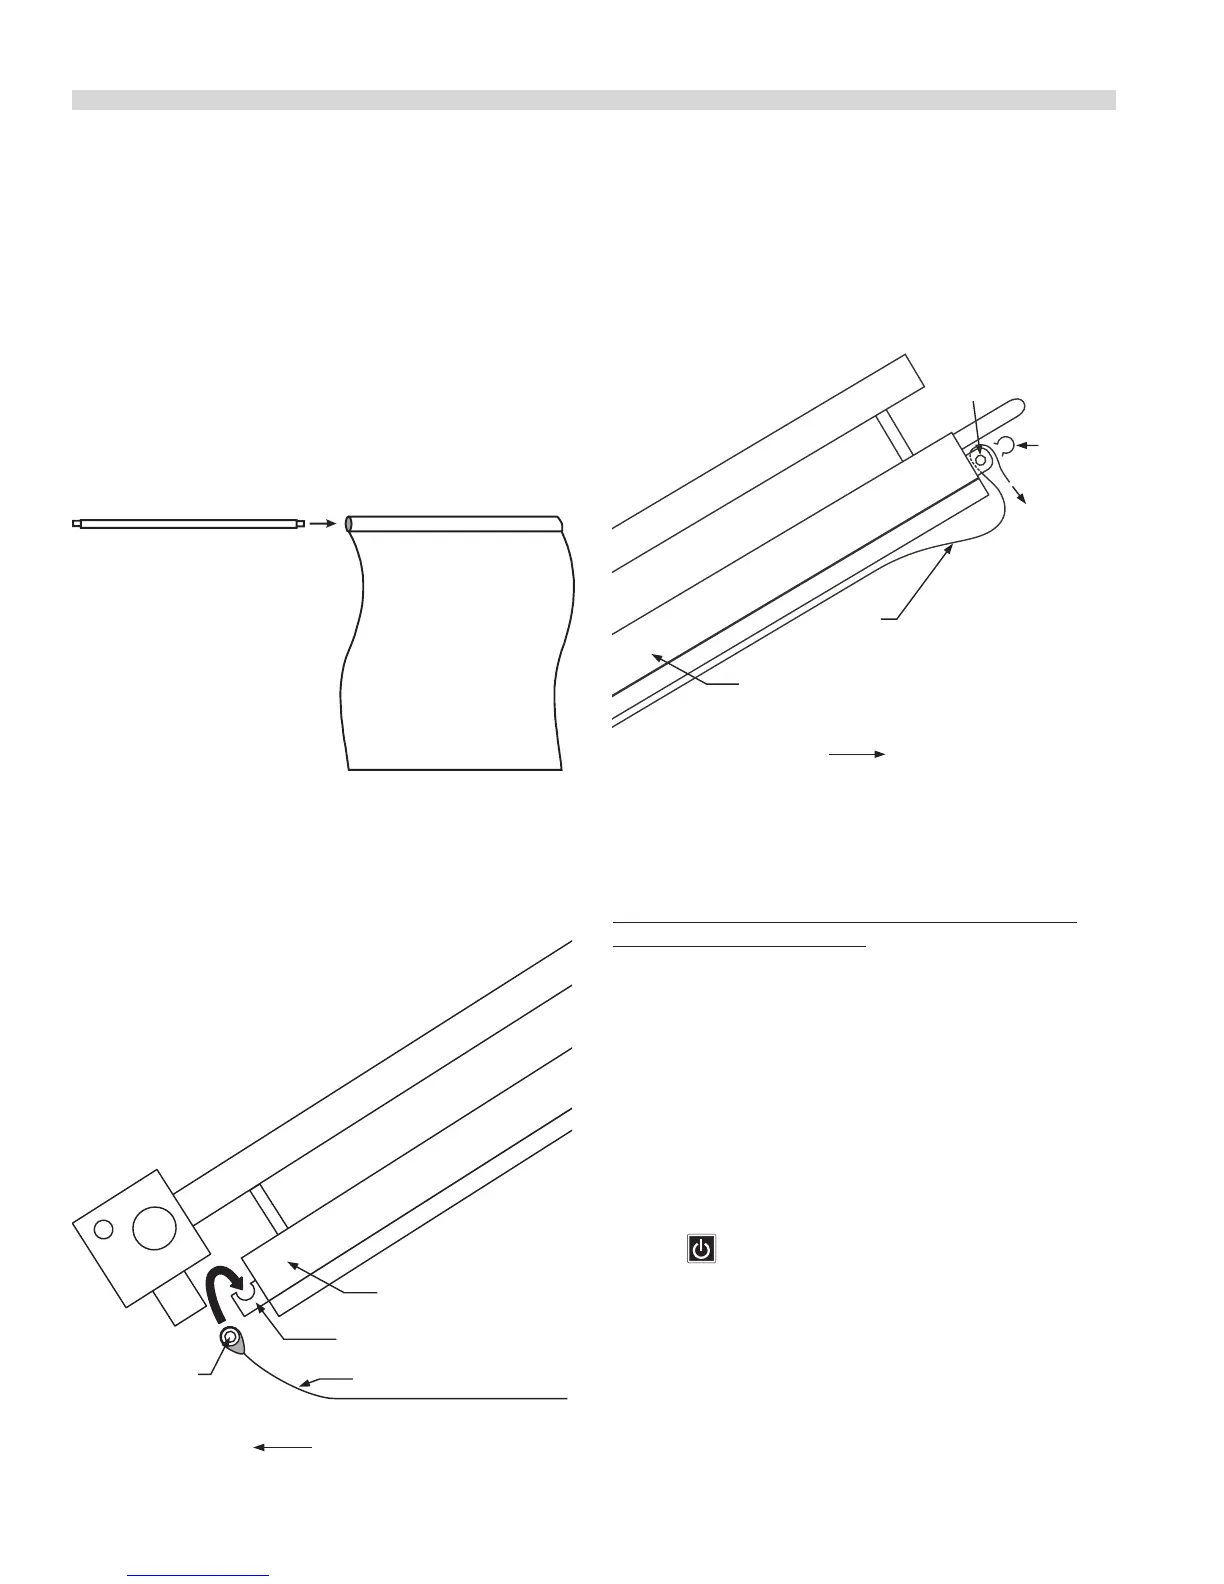
Slide release material rod through hemmed end of the
release material sheet.
Hook release material rod on brackets located at the rear of
the upper plate
Holding the bottom of the release material sheet in place,
gently pull the sheet toward the front of the platen.
UPPER PLATEN (side view)
RELEASE MATERIAL HOOK
RELEASE
MATERIAL ROD
RELEASE MATERIAL SHEET
REAR OF GRILL
OPERATION
Thread the front edge of the release material sheet behind
the release material bar on the front of the platen, then
around the top and down over the front of the bar as shown.
Place locking clips over release material sheet and press into
place over release material bar.
Check alignment and tightness of release material against
upper platen.
UPPER PLATEN (side view)
RELEASE
MATERIAL
BAR
RELEASE
MATERIAL
LOCKING
CLIP (1)
RELEASE
MATERIAL
FRONT OF GRILL
NOTE: Make sure release material ts smoothly over upper
platen. Installing release material sheets too tight may cause
premature failure of the sheet.
Release sheets are reversible and should be ipped over
and reattached on a daily basis. For instructions on cleaning
release sheets, see Step 17., under Daily Cleaning in Cleaning
and Maintenance section
Lighting Instructions:
1. Ensure that the exible gas hose is connected to the grill
and the power cord is plugged into the receptacles.
2. Turn the main power switch ON and allow the controls
to go through the power-up self-check. Once the control
panel displays the word “OFF” the unit is ready to begin
the heating process.
3. Press
.
The control will automatically initiate the
heating cycle. The burner will ignite and heat until the
temperature specied by the menu item has been
obtained.

 Loading...