4 Fishnder 400C Owner’s Manual
InstallIng the FIshFInder 400c
Step 3: Install the Transducer
Proper transducer installation is key to getting the best performance
from your shnder. If the transducer lead is too short, extension
cables are available from your Garmin dealer. Coil and secure any
excess cable.
CAUTION: DO NOT cut the transducer lead or any part of
the transducer cable, because cutting the transducer cable voids
your warranty. The cable cannot be spliced and connected to any
existing (Garmin or non-Garmin) transducer cables.
The following pages contain tips and basic installation instructions
for some popular transducers. Detailed installation instructions are
provided in the transducer kits. Some transducers might have to be
installed by a professional marine installer.
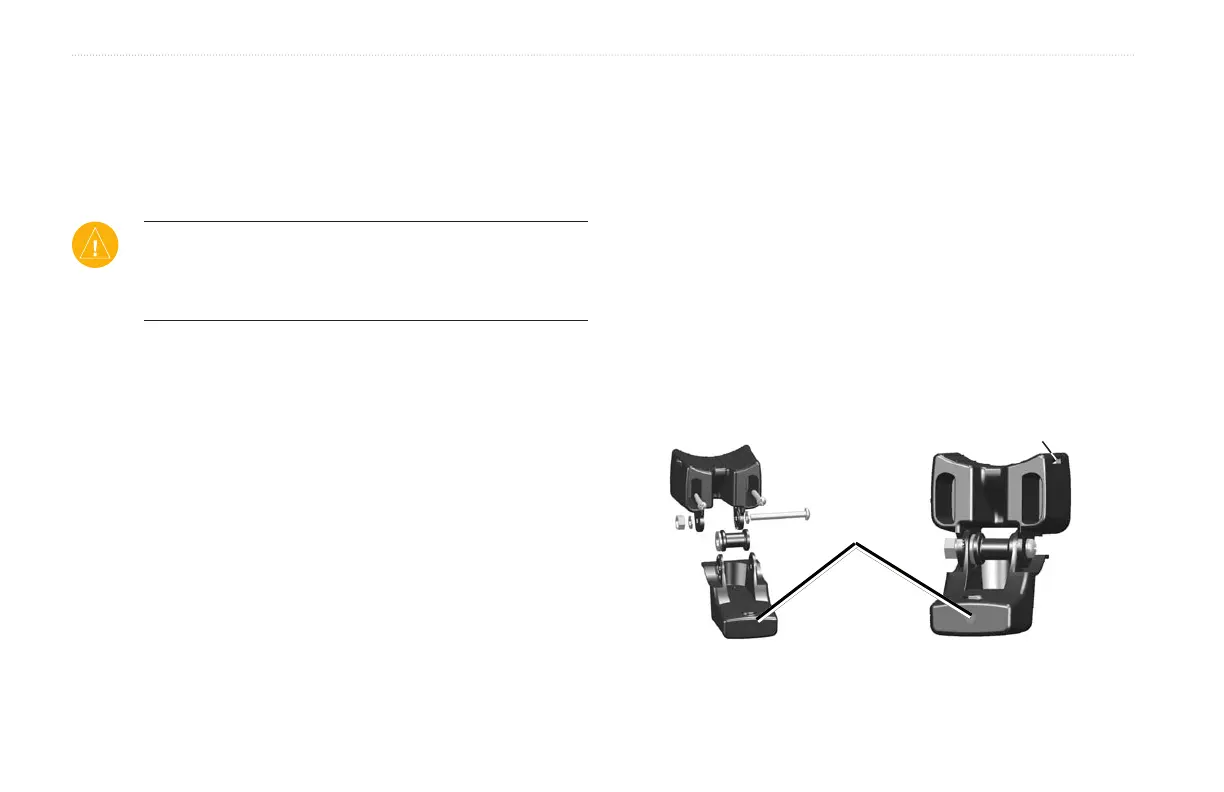
Assembling the Transducer
To assemble the transducer:assemble the transducer:
1. Inserttherubberwasherandplasticspacerintothe
transduceratthesametime.DONOTlubricatetherubber
washer.
2. Routethecabletowardthebackofthetransducer.Slidethe
transducerintothetransducermount.
3. Placea5mmatwasheronthe10-32x1.75"screw,and
insertthescrewthroughthetransducermount,spacer,and
rubberwasher.
4. Placetheremaining5mmatwasherontheexposedend.
Installthe10-32locknutngertight.Youcantightenthe
transducerfurtherafterinstallationontheboat.
Back of the transducer
Cable tie slot