Powering ON / Basic Controls
8
Garrett Metal Detectors AT Max
™
9
Power ON/OFF—Hold this button for 1 second to switch power
ON or OFF.
Factory Reset —To restore factory settings, press and hold the
power button for 5 seconds (until the detector produces a fast
double beep).
Battery Level Indicator—Shows continuous status of battery life.
Replace batteries when 1 segment remains (see page 47).
Frequency Adjust—Press the
FREQ button to scroll through the
frequency settings. Choose from four minor frequency adjustments
(F1 to F4) in order to minimize interference caused by electrical
sources or other metal detectors. Note that initial button press
shows current setting.
Backlight—Press the SHIFT
button, then push the LIGHT button
to switch the LCD backlight on or off. Use the backlight in low light
situations for improved visibility of the screen.
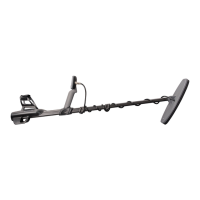
Adjust lower stem to comfortable length, and hand-tighten the
camlocks. Wrap cable snugly around the stem with the first turn
of the cable over the stem.
Insert coil connector into the 4-pin connector of the control box
by lining up connector pins. Press firmly, yet carefully, until the
O-ring is felt to be inserted, and hand-tighten.
Note: If the O-ring is properly
seated, the connector's collar can
be easily tightened; if the collar is
difficult to turn, the O-ring may
not be seated properly.
If needed, adjust the arm cuff by
removing the screw on the bottom. Move the two-piece cuff to
the other hole, reinsert the screw through the headphone cable
clip, and tighten.
Power ON/
OFF Button
Battery Level
Indicator
FREQ ADJUST
LIGHT (must
press SHIFT first)