CHAPTER 3-Installation
Connecting Network Cables
DS2000-IFR Installation and Maintenance Guide
3-7
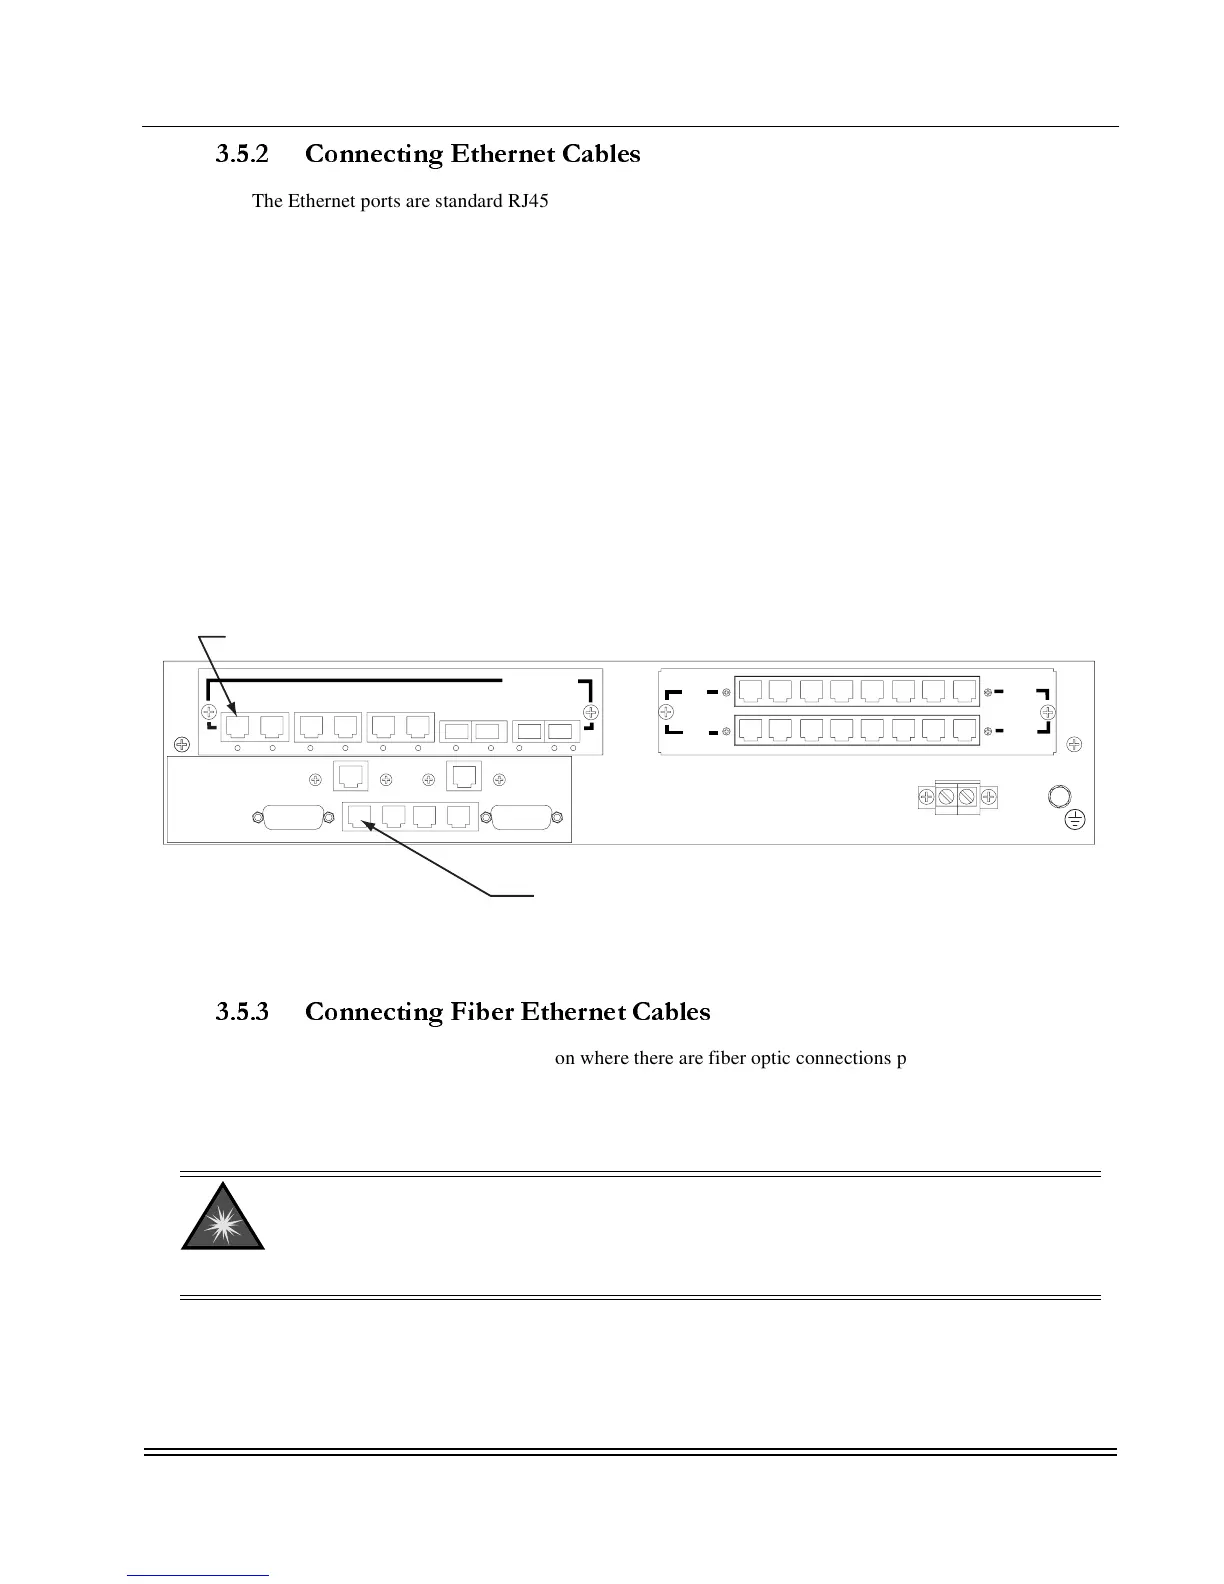
3.5.2 Connecting Ethernet Cables
The Ethernet ports are standard RJ45 ports. Connect the standard Ethernet cables to the Ethernet ports as
follows. (Refer to Figure 3-3 on page 3-7)
1. If installed remove the dust cover from the Ethernet port on the DS2000-IFR.
2. Install the RJ45 connector into the port on the DS2000-IFR, with the clip facing down.
3. Push the RJ45 connector into the slot until an audible click is heard.
Give the cable a little tug to ensure that the connector clip is firmly seated.
4. Ensure that the Link LED is illuminated for the port. See Figure 3-3 for location of the Link LED.
If the Link LED is not on verify that the equipment on the other end of the cable is powered up.
Figure 3-3. Ethernet Ports
3.5.3 Connecting Fiber Ethernet Cables
There is one DS2000-IFR configuration where there are fiber optic connections possible in Ethernet ports
E7, E8, E9 and E10 depending on the configuration. The port accepts an LC type connector which slides on
until the connector clicks into the port. Follow the safety precautions and steps to install the fiber optic
cables to these ports and refer to Figure 3-3 for Ethernet port locations.
NOTE: The Ethernet ports, E1 through E10, are managed by the Ethernet port switch. The
additional Ethernet port, Port E0, should not be connected to be used in the same port
grouping mode as the other Ethernet ports. The Ethernet port, Port E0, is a standalone
separately configured port.
LASER WARNING: Laser output can cause serious damage to the eye. The lasers used in the
DS2000-IFR produce light that is invisible to the naked eye. It must be assumed at all times that
the fiber optic cables and optical ports are radiating light energy. When connecting or handling
the fiber cables or connectors, it is imperative that the technician avoid looking into the tip of the
fiber or the port.
Ethernet Ports E1 through E10
E0 - Ethernet 10/100 BASE-T
S8
S16
RS232
S1
S9
RS232
Ethernet
RS232(DEBUG) E0 AUX1 S0 CON AUX 2
W1
W2