3.0 MECHANICAL CONFIGURATION
3.1 Up stacker / Down stacker Configuration
The GBA ST1 product can be configured for installation in either up or down stacking applications.
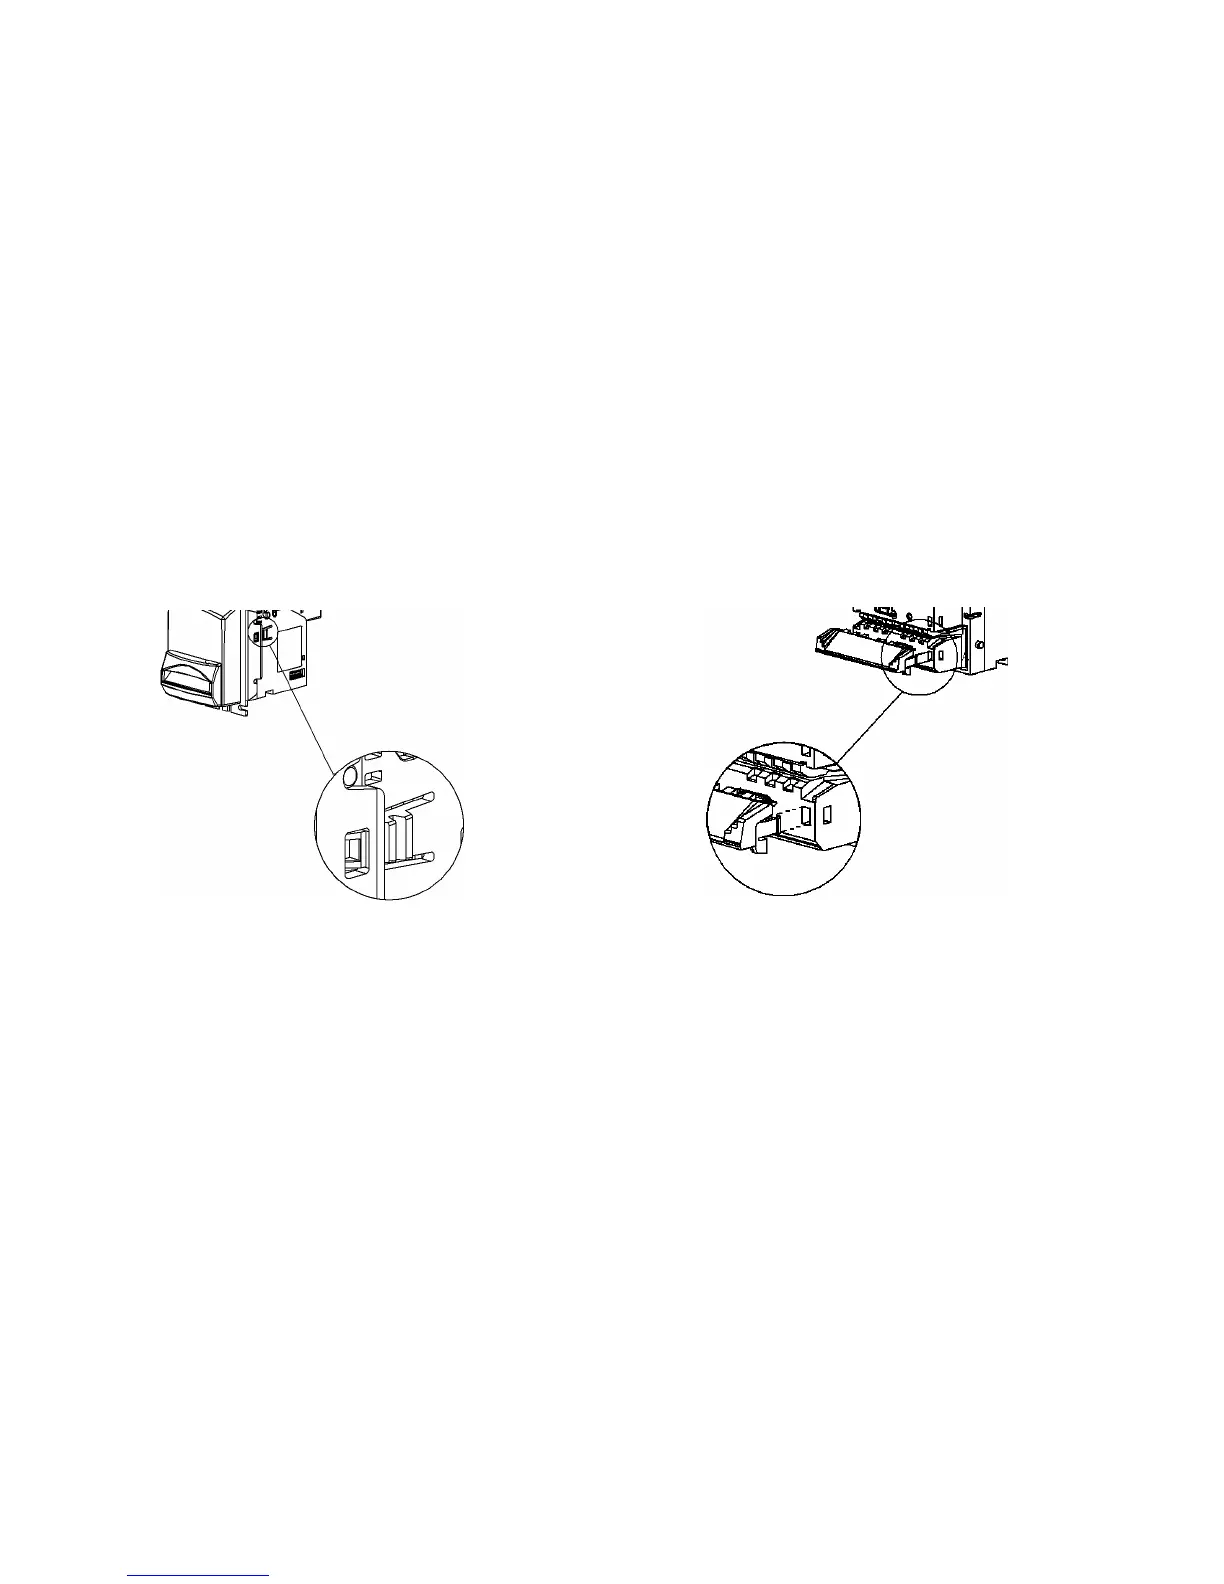
3.1.1 Faceplate Fitting / Removal
Refer figure 3.1.1
For either up or down stacker configuration, align the faceplate with the 4 locating studs and the 2
clips on the side of the validator. Gently push the faceplate until it is in contact with the validator,
and retained by the clips. To remove the faceplate, depress the two clips either side of the
faceplate and pull the faceplate away from the validator body.
Note: Access to the clips is simplified by firstly removing the cashbox.
3.1.1 - Images of faceplate fitment - stud and clip. 3.1.2 - Image of note guide fitting – recessed area
3.1.2 Note Guide Fitting / Removal
Refer figure 3.1.2
For either up stacker or down stacker configuration, take the note guide and locate the
interlocking teeth into the corresponding recesses on the main body. Gently push the note guide
until it “clicks” into position and is held by the retaining clips.
When fitting an illuminated note guide, please take extra care to ensure that the contact pins on
the note guide are aligned with the connector in the main body.
To remove the note guide, locate and then depress the two clips either side of the note guide, and
pull away from the validator.