5–8 EPM 9450/9650 ADVANCED POWER QUALITY METERING SYSTEM – INSTRUCTION MANUAL
RS485 COMMUNICATION CHAPTER 5: COMMUNICATION WIRING
• Connect the shield to the Ground (G) terminal on the Master. The (S) terminal on the
EPM meter is used to reference the EPM meter’s port to the same potential as the
source. It is not an earth-ground connection. You must also connect the shield to
earth-ground at one point.
• Provide resistors at each end, connected to the (+) and (-) lines. RT is approximately
120 Ohms, but this value may vary based on length of cable run, gauge and the
impedance of the wire. See RT EXPLANATION in Section 5.3.
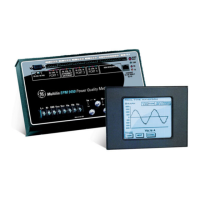
5.3.3 RS485 Connection to the EPM P40N
PLUS
or P60N External Display
Insert one end of the supplied RS485 cable into Port 3 of the EPM 9450/9650 meter. Port 3
is factory-set to match the EPM display’s baud rate of 9600. To use a port other than Port 3,
you must set the port’s baud rate to 9600 using the GE Communicator software (see the GE
Communicator Instruction Manual for instructions). Insert the other end of the cable into
the back of the EPM P40N/P40N
PLUS
or P60N display. (The connectors fit only one way into
the ports.)
The cable harness brings 17V DC to the displays from the EPM meter. RS485
communication is viable for up to 4000 feet (1219 meters). If your cable length exceeds 200
feet you must use a remote power supply, such as GE’s PSIO, and:
1. Connect the shield to the shield (S) terminal on the EPM display port. The (S)
terminal on the EPM meter is used to reference the EPM meter’s port to the
same potential as the source. It is not an earth-ground connection. You must
also connect the shield to earth-ground at one point.
2. Provide termination resistors at each end, connected to the + and - lines. RT is
approximately 120 Ohms. See RT EXPLANATION in Section 5.3.
The EPM P60N LCD display can be connected to as many as 8 meters in a daisy chain
formation, as shown.
Figure 5-7: Daisy Chain Meters with the EPM P60N LCD Display