S47183-e 01/2008 Design and specifications are subject to change without notice 43
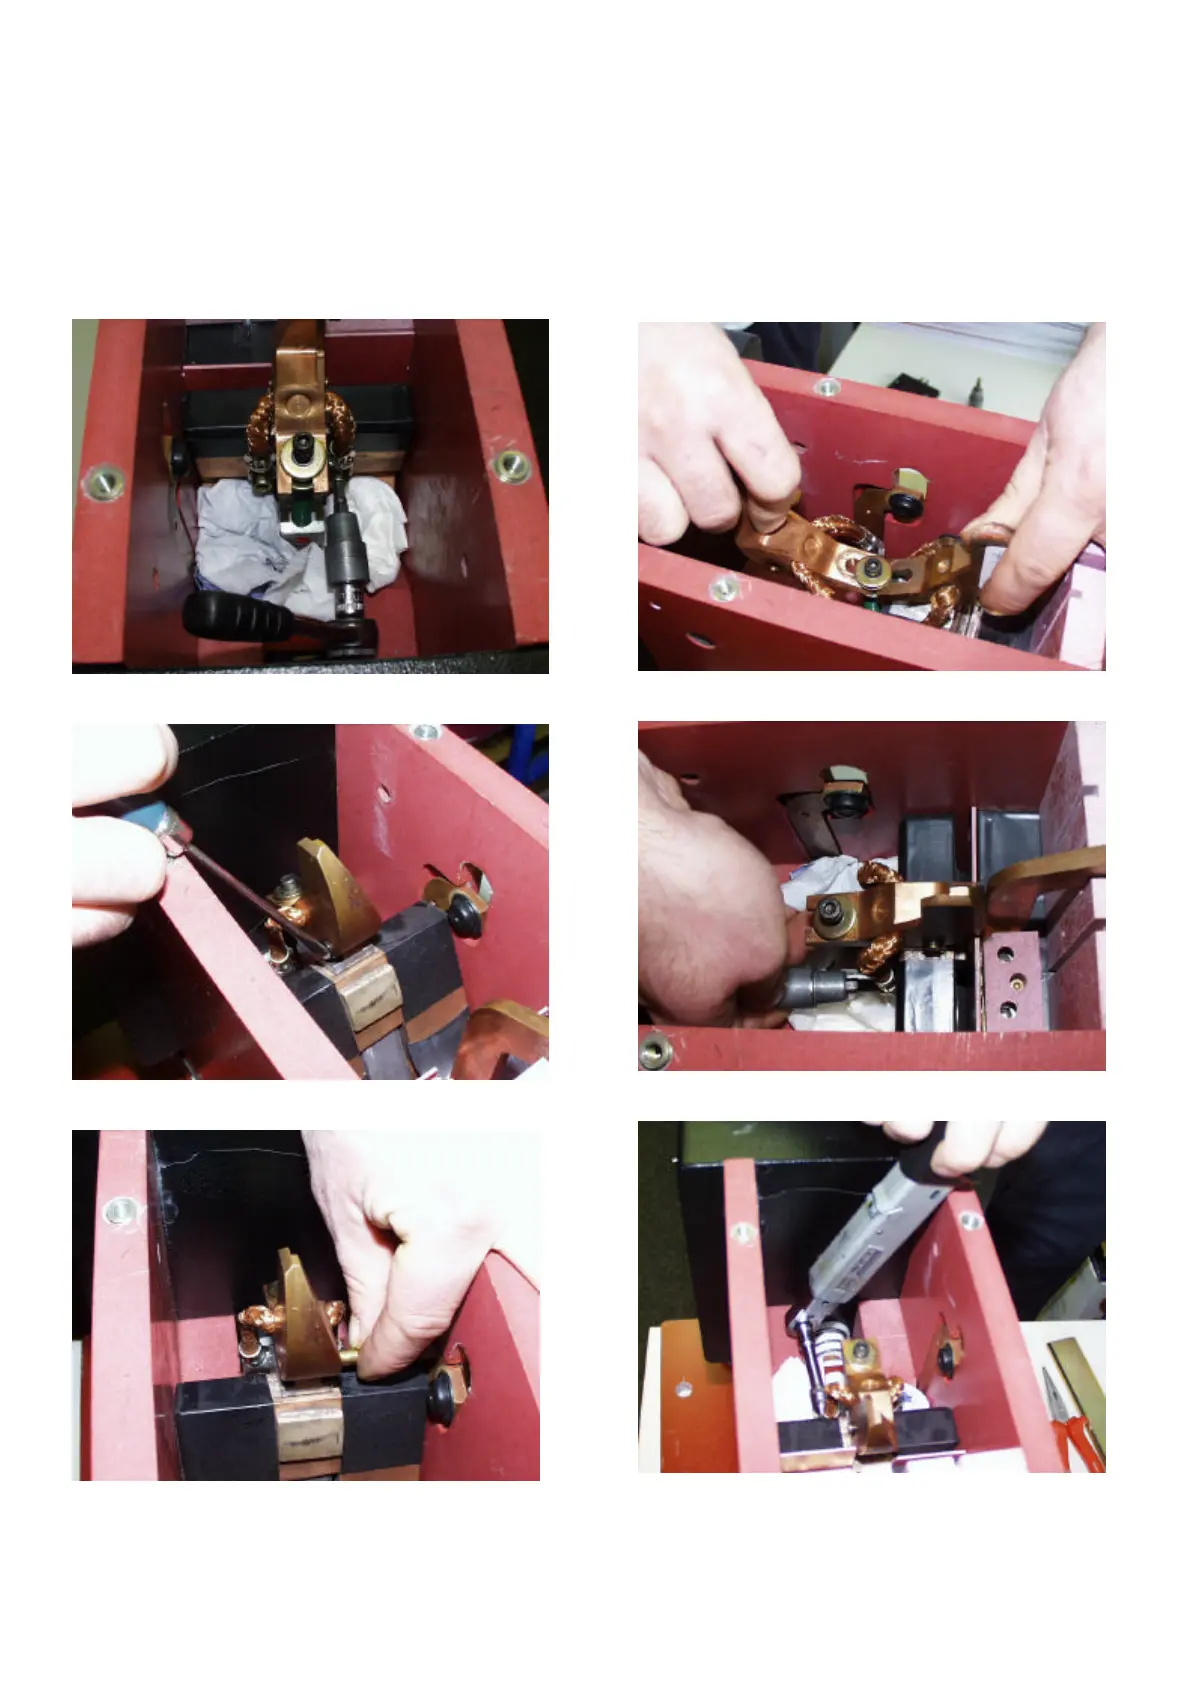
D) Changing the pre-arcing contact
• Remove front and back arc runner. See 6.2.2-C.
• Close the breaker and secure the solenoid drive
against unintended opening. See 1.2.1.
• Secure the contact area against parts falling inside
the breaker. See 1.2.1.
• [Fig. 52-1]. Initially loosen two braid’s screws with tool,
and unbolt them finally with hand.
• [Fig. 52-2]. Remove the safety ring from axis end.
• [Fig. 52-3]. Pull out the axis from contact.
Fig. 52-1 Unscrew cooper braid
Fig. 52-2 Remove safety ring
Fig. 52-3 R emove axis
• [Fig. 52-4]. Replace pre-arcing contact with new one.
Use old contact to lift up two washers, and slip the
new contact under these. Remove old contact and ro-
tate the new one by 180° to its normal orientation.
• [Fig. 52-2/3]. Install back the axis and safety ring.
• [Fig. 52-5]. Initially screw in braid’s screws by hand.
• [Fig. 52-6]. Tighten these by torque of 10Nm [88lbf*in].
• Install back the arc runners. See 6.2.2-C.
• Check the adjustments according to point 6.2.3.
• Install back adapter and arc chute. See 6.2.1-D/E.
Fig. 52-4 Replace pre-arcing contact
Fig. 52-5 Fixing braid’s screws by means of hand
Fig. 52-6 Tighten braid’s screws with torque of 10Nm
 Loading...