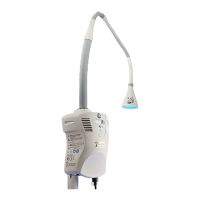
8.4.2 Functional Checks
1. Move the light pipe to verify that it moves freely and stays in position.
NOTE: The light pipe will typically experience some minor deection (less than 1.3cm) after positioning.
2. Plug the power cord into the power outlet. Conrm that the hour meter display turns on and the
standby/on indicator illuminates in green.
3. Press and release the standby/on switch, and conrm the over-temperature/under-temperature red
indicator ashes briey and the standby/on indicator changes to blue.
4. Conrm that the fan is operating by momentarily placing your hand close to the exhaust vent when
the device is on to feel the air ow coming out of the device.
5. Conrm that the therapeutic light is on.
WARNING:
Never look directly at the light. Exposure can cause eye damage.
8.4.3 Light Intensity Check
In order to ensure uniform light distribution and the performance of all the optical components, perform
the following procedure.
1. Turn on the system.
2. Focus the light so that the spot diameter is 35.5 cm (14”) or when the shade is 38 cm (15”) from the
bed surface.
3. Using a calibrated Biliblanket Light Meter II, measure the light at the 5 points indicated on the below
diagram and calculate their average. Conrm that the average is at least 27 µW · cm
-2
· nm
-1
. Refer to
symptom S11 in Chapter 10 for troubleshooting.
NOTE: IEC standards recommend LED module replacement at 25% output reduction, which
corresponds to 27 µW · cm
-2
· nm
-1
and occurs at approximately 10000 hours. However, sucient
irradiance for eective phototherapy continues well after 25% reduction.
1
3
2
4
5
3.5”
3.5”
53
Chapter 8: Service Maintenance and Checkout

 Loading...