Connecting EnerVista 750/760 Setup to the Relay
16 750/760 Quick Reference Guide
example, we will use “Substation 2” as the site name. Click the OK button when
complete.
4. The new site will appear in the upper-left list.
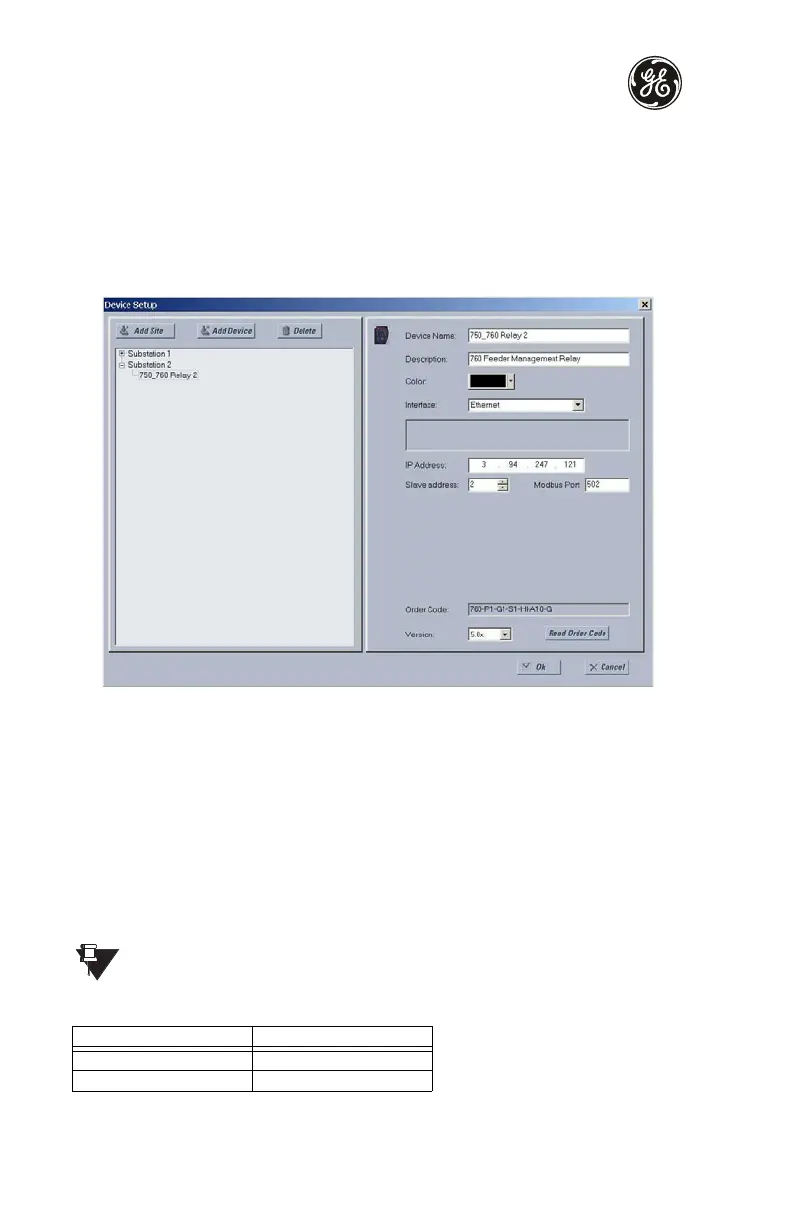
5. Click the Add Device button to define the new device.
6. Enter the desired name in the Device Name field and a description (optional).
7. Select “Ethernet” from the Interface drop-down list. This will display a number of
interface parameters that must be entered for proper Ethernet functionality.
Enter the IP address, slave address, and Modbus port values assigned to the 750/760
relay (from the S1 RELAY SETUP
ZV COMMUNICATIONS ZV NETWORK
CONFIGURATION menu).
8. Click the Read Order Code button to connect to the 750/760 and upload the order
code. If an communications error occurs, ensure that the Ethernet communications
values correspond to the relay setting values.
9. Click OK when the relay order code has been received. The new device will be added
to the Site List window (or Online window) located in the top left corner of the main
EnerVista 750/760 Setup window.
The 750/760 Site Device has now been configured for Ethernet communications. Proceed
to the following section to begin communications.
To ensure optimal response from the relay, the typical connection timeout should
be set as indicated in the following table:
TCP/IP sessions Timeout setting
up to 2 2 seconds
up to 4 3 seconds

 Loading...