D
IRECTION 5813707-100, REVISION 2 VENUE™ SERVICE MANUAL
Chapter 8 - Replacement Procedures 8-49
PRELIMINARY
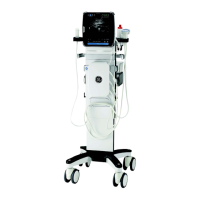
6.) Disconnect the printer power supply cable by gently turning the connector a bit.
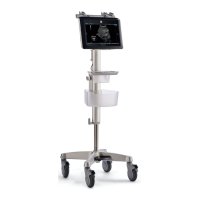
7.) Remove the power supply by pulling the ledge upwards.
8.) Slide the printer and remove it from the printer assembly
8-2-19-5 Printer and Printer Bracket Installation Procedure
1) Install the printer in the printer assembly.
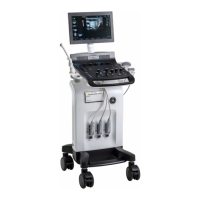
2) Install the power supply in the printer assembly make sure that the power supply label is facing the
bottom of the printer bracket assembly.
3) Connect the power supply cable connector to the printer.
4.) Reconnect four screws attaching the printer to the printer assembly.
5.) Install the printer assembly on the cart
Figure 8-129 Disconnect Power Supply Connector
Figure 8-130 Power Supply Removed from Printer Assembly
• Printer Assembly Installation Procedure

 Loading...