www.geeetech.com
Page 49
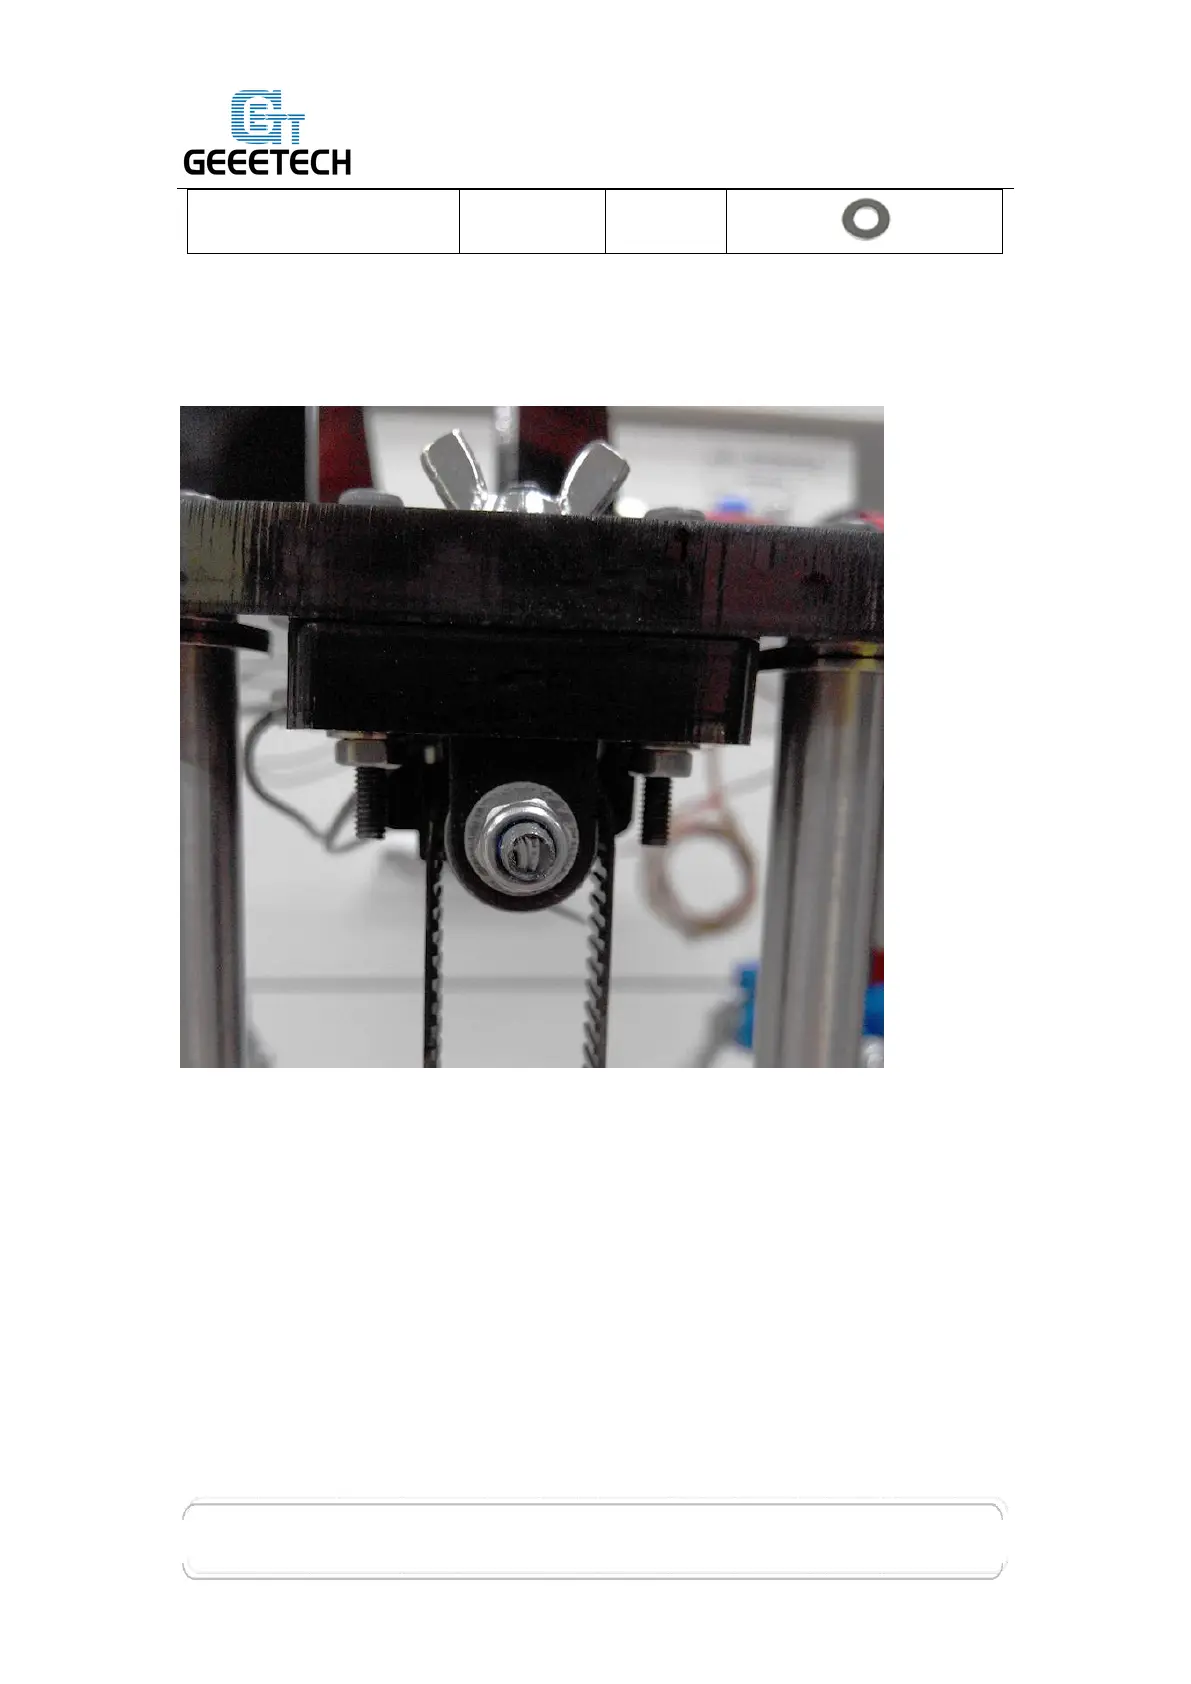
Step 1. Thread the timing belt (#38) through the drive wheel with the pitched side
in direct contact with the drive wheel and the smooth side facing out.
Step 2. Punch a 2-2.5mm hole in to the timing belt with a leather hole punch or
similar (not supplied).
Step 3. Fix one end of the timing belt to the belt mount (#M5) with an M3x8mm
screw (#18) and M3 washer (#5).
Step 4. Guide the timing belt around the motor pulley (#36) and back up to the
underside of the belt mount (#M2). Mark the location of the new hole to be punched
to allow the timing belt to be fixed to the belt mount. Trim the timing belt, punch
the hole and fix it to the belt mount with a M3x8mm screw (#19) and M3 washer (#5).
 Loading...