Do you have a question about the Geeetech ME CREATOR 2 and is the answer not in the manual?
Essential safety precautions for operating the MeCreator 2 3D printer, covering moving parts and proper usage.
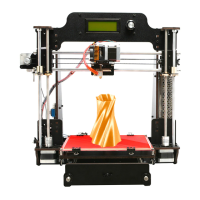
Instructions for unboxing the MeCreator 2 3D printer and removing protective materials.
Steps to remove zip ties securing the extruder and other components during shipping.
Verification of all included accessories to ensure completeness before setup.
Guidance on assembling the filament holder using provided bolts and nuts.
Instructions for applying the provided tape smoothly to the build platform for better adhesion.
Verifying the printer's power supply voltage and connection requirements.
Identifying and downloading essential software like Repetier-Host and Arduino IDE.
Steps for installing necessary USB drivers on Windows and Mac OS for computer connection.
Initial configuration steps within Repetier Host, including setting up the printer profile.
Guide to creating and naming a new printer profile in Repetier Host.
Connecting the printer to the computer via the correct COM port and baud rate.
Setting travel feed rate, Z-axis feed rate, and default temperatures for manual control.
Defining extruder number, maximum temperatures, and melt volume per second.
Setting the printer's build volume dimensions (width, depth, height) and origin.
Clicking the 'Connect' button in Repetier Host to establish communication with the printer.
Testing the X, Y, and Z axis motors by initiating the 'Home' function in Repetier Host.
Verifying the printer's home position and axis coordinates after the motor test.
Understanding the relationship between the origin point and home position coordinates.
Testing the heating functionality of the hot bed and the extruder.
Testing the extruder to ensure it heats properly and extrudes filament without issues.
Controlling the printer's LED strip light using specific G-code commands in Repetier Host.
Overview of the LCD rotary knob functions and the homepage display elements.
Exploring the 'Prepare' menu options like disabling steppers, auto-homing, and preheating.
Adjusting temperature and motion parameters, and saving settings using the LCD control menu.
Navigating the LCD menu to perform motor tests, specifically auto-homing.
Selecting and moving individual axes (X, Y, Z) using the 'Move axis' option on the LCD.
Controlling axis movement and increment steps (e.g., 1mm) via the LCD interface.
Controlling the printer's LED light status using the LCD interface options.
Step-by-step guide to leveling the build platform using a paper and manual controls for optimal print adhesion.
Configuring layer height and first layer height for optimal printing precision and adhesion.
Setting print head and bed temperatures for PLA/ABS, and specifying filament diameter.
Setting hot bed shape, build area dimensions, and number of extruders in Slic3r.
Adjusting nozzle diameter, retraction settings, and other advanced parameters in Slic3r.
Loading .stl or other supported model files into Repetier Host for slicing.
Processing the loaded 3D model using Slic3r to generate print-ready G-code.
Saving the generated .gcode file onto an SD card for standalone printing.
Inserting the SD card and selecting the .gcode file on the printer's LCD to start printing.
Step-by-step guide for uploading firmware using Arduino IDE on Windows OS.
Instructions for installing drivers and uploading firmware using Arduino IDE on Mac OS.
Modifying firmware configuration files to correct motor direction if reversed.
Diagnosing and resolving issues related to unresponsive or malfunctioning motors.
Troubleshooting common extruder problems like non-extrusion or poor extrusion flow.
Adjusting parameters to fix print quality issues such as stringing, warping, or adhesion.
Accessing online documents, troubleshooting guides, and contacting technical support.
Contact information for sales inquiries and providing valuable product feedback.
| Brand | Geeetech |
|---|---|
| Model | ME CREATOR 2 |
| Category | 3D Printers |
| Language | English |