owner's manual
genesys xp
The recording studio section Page99
NAVIGATION
CONFIRM
TRACK SELECT
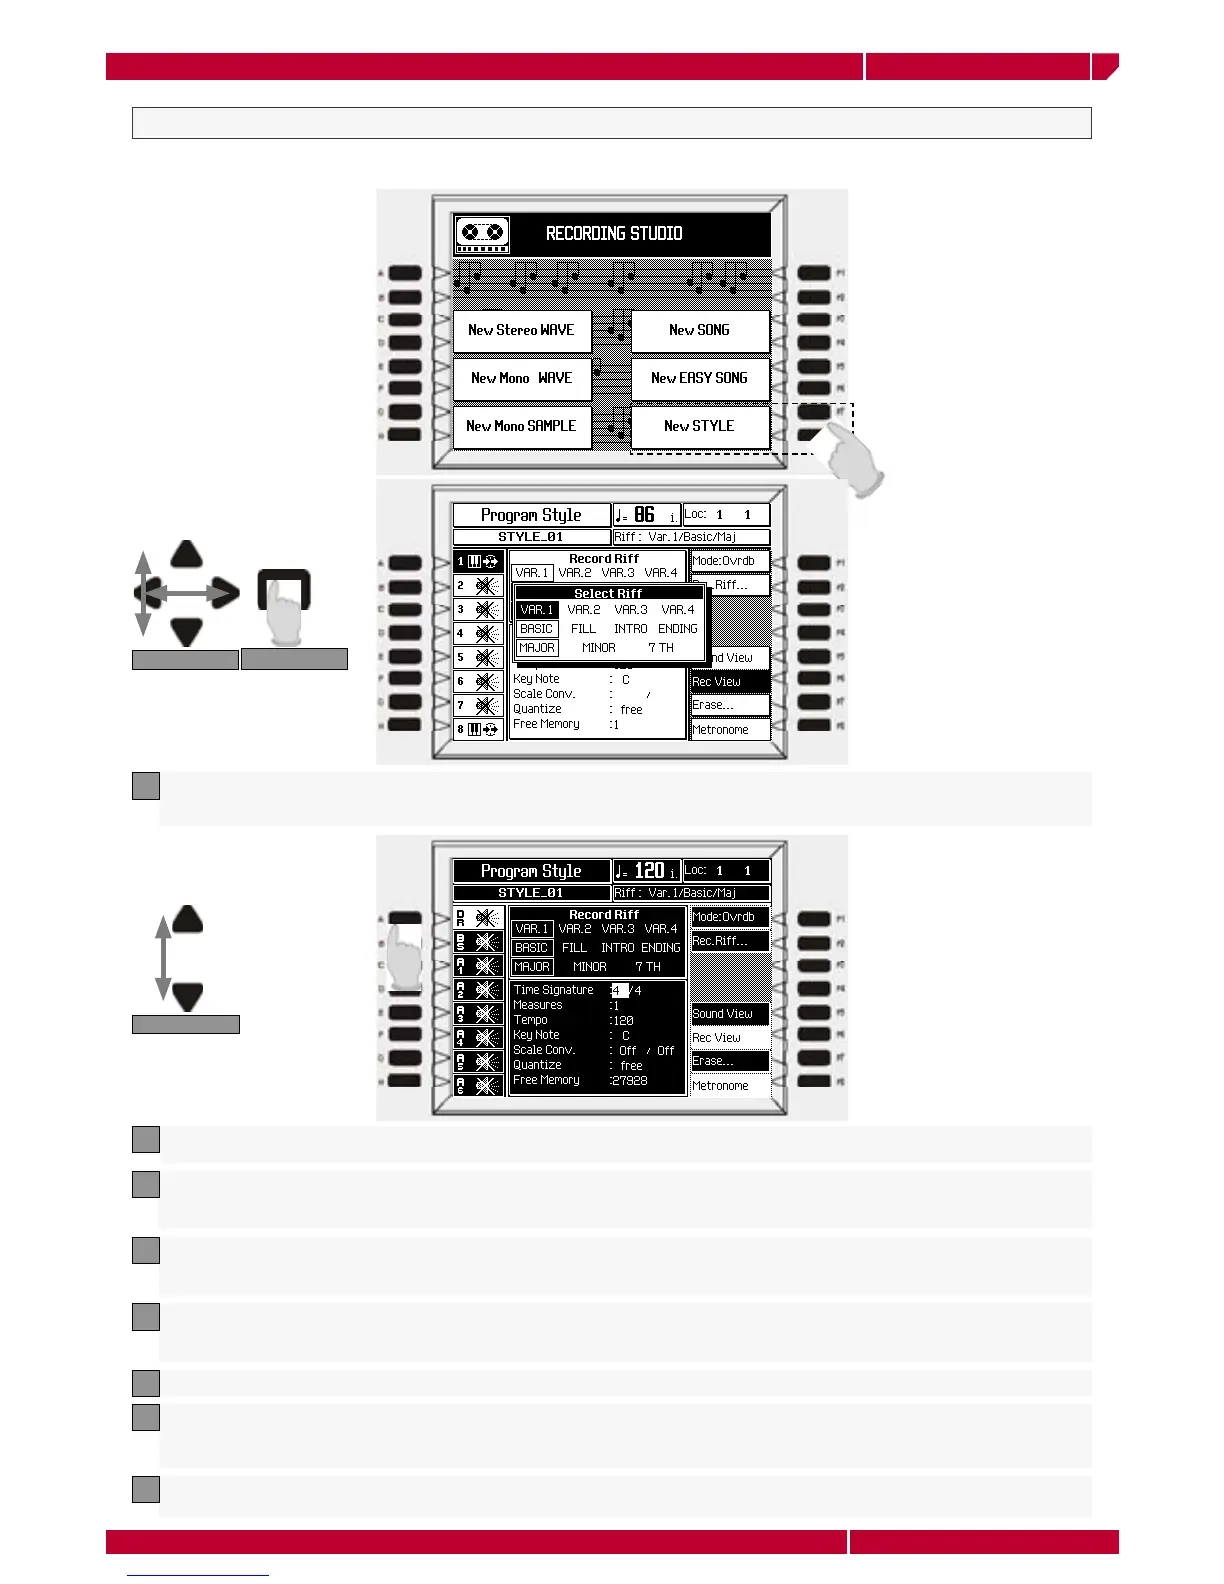
NEW STYLE RECORDING
The NEW STYLE recording option allows to create a new Style or to copy an existing one and modify its RIFF. Press the
function button F7 (or F8) to enter the style programming page.
Select the Variation, (VAR. 1, VAR. 2, VAR. 3, VAR. 4), section, (BASIC, FILL, INTRO, ENDING) and chord, (MAJOR, MINOR,
7TH) with the CURSIR buttons and press ENTER to confirm. The LED on the RECORD button lights up and the RECORD VIEW
page is shown in negative highlight.
1
Select the track you want to record (usually the Drum track first). Press the corresponding function button to place the track
in Record mode (Record icon showing). Only tracks showing the Record icon will capture events during the recording
2
Press START/STOP to start the recording. A one-measure countdown will start (shown on the measure counter in the top
right hand corner of the display) and a metronome click will help you with your timing. If you don’t want the metronome,
turn if off with the soft button F8
3
Start playing after the lead-in. The recording proceeds in a cyclic manner: once the end of the riff is reached, the recording
starts again from the beginning. The number of bars recorded will depend on the setting in the initial RecView display, in
the Measures parameter (in this case 2)
4
When you have finished recording the first track, stop the recording with START/STOP. The Track will still be in record mode,
allowing you to add new events by starting again with Start/Stop. The default setting of the Record mode will be Overdubb.
Other record mode settings can be selected. Stop the recording of additional note with Start/Stop
5
Confirm the recorded track with the corresponding function button. The Record icon will change to the SEQ-PLAY icon
6
10. Select another track to record and repeat the procedure for other tracks until you have recorded all the riffs you want
for your Style. Remember to confirm each track you record before selecting another one, otherwise you will record your new
track and add the same events to the track already recorded
7
Once finished, press the RECORD button to escape Record mode. The LED on the RECORD button goes off and the display
shows the new Style window
8