第 4 页 共 16 页
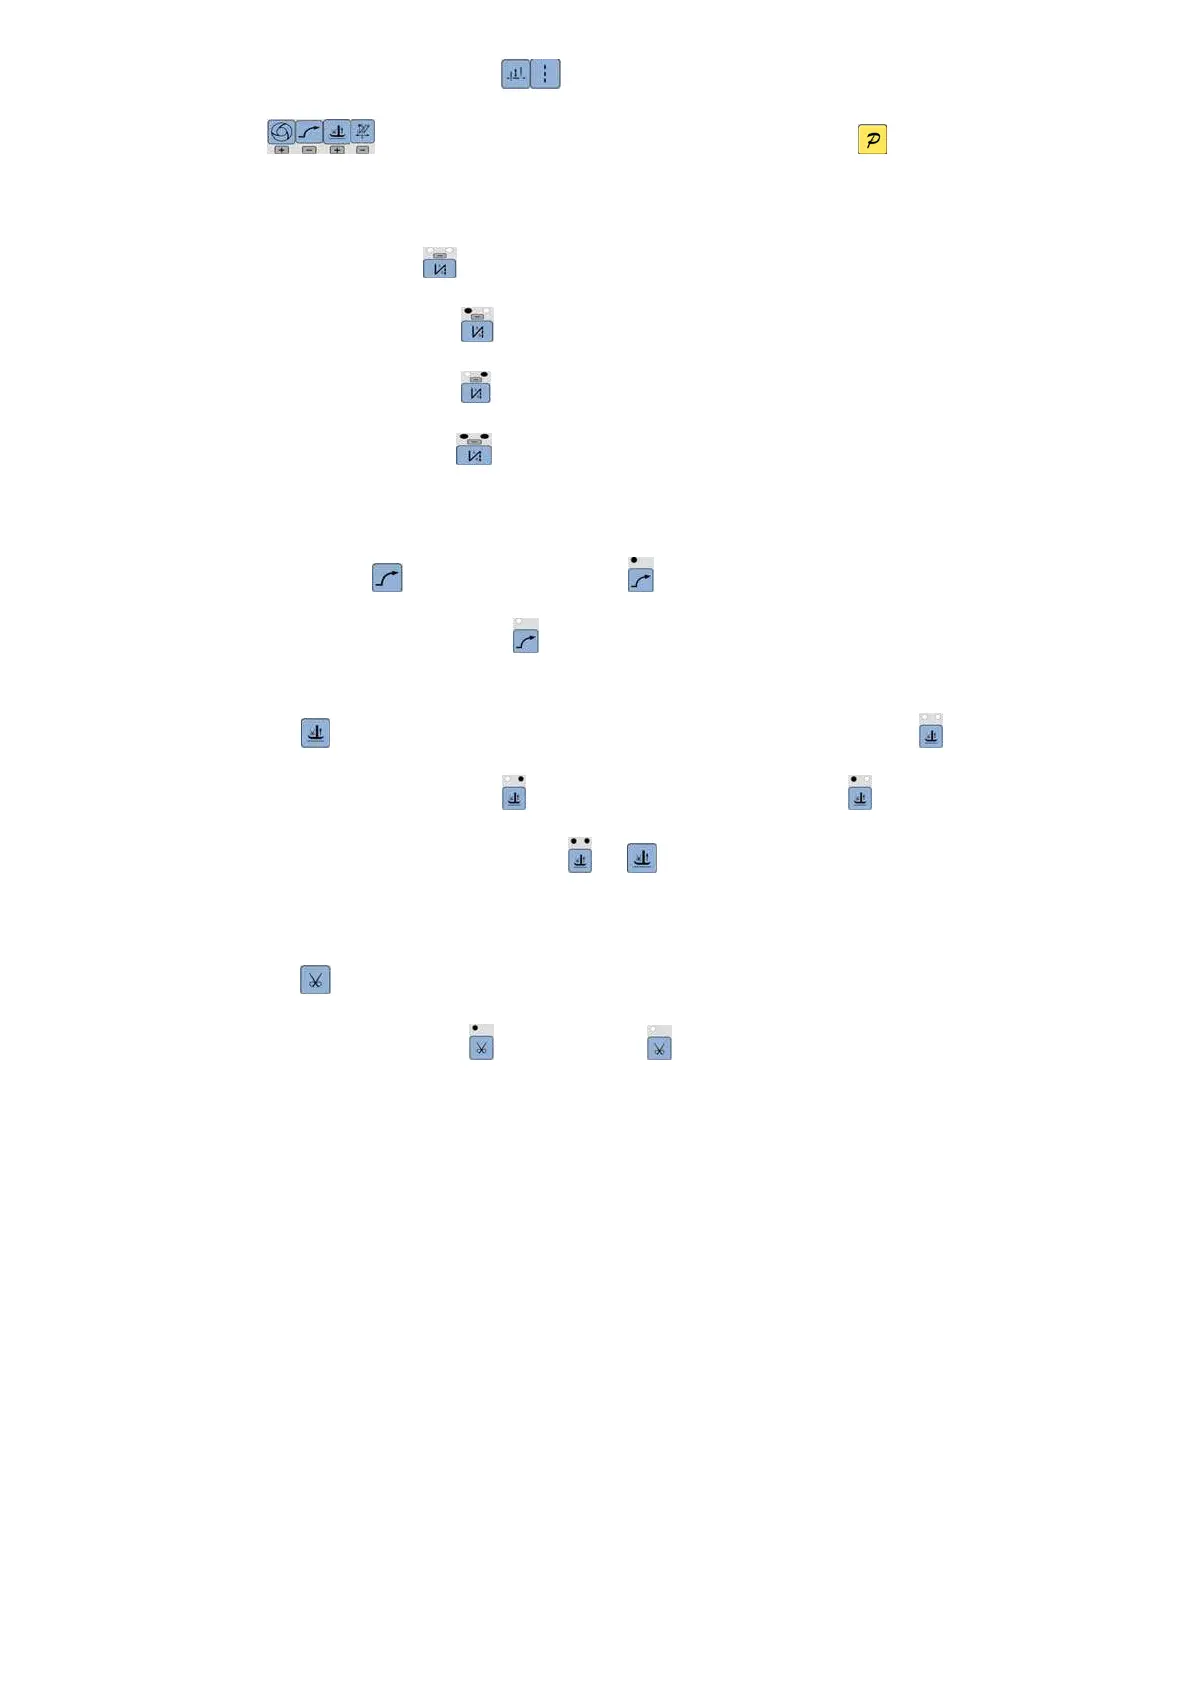
end back tacking(Fig omit).Press (6、10)key to choice A、B or C、D segment,and
use (9、13、8、12)to choice stitches of each segment. After confirmation, press key, LCD
display will come back to idle, and two Lends on start back tacking key and end back tacking key will light
to show the status accordingly.
When two LED on key switch off, it means no back tacking;
When LED on top left of key is on, and on top right off, it means single back tacking;
When LED on top left of key is off, and on top right light, it means double back tacking;
When the two LED on key are all lit, it means quad back tacking;
Note: We supply only start back tacking, same with end back tacking key
2.1.3 Soft start setup:
Press soft 13 key, entry into soft start status, the key of LED on top left will be lit active. Press
this key again to exit soft start status, the key of LED on top left will be off。
2.1.4 Press foot lifting key:
Use 8 key : select foot lifting status, there are four different status, no automatic foot lifting, as ;
automatic foot lifting after trimming, as ; automatic foot lifting if stop during sewing, as ; automatic
foot lifting if trimming and stop during sewing, as . Use key to choice and LED on the top will show
the status accordingly.
2.1.5 Trimming key:
Use key: select/non-select automatic trimming. LED on top left side of the trimming key will be lit if
automatic trimming is selected, as , otherwise, LED off, as .