Zenith10/20 GNSS Series - 5 -
Installation Guide
© 2011 GeoMax AG, Widnau, Switzerland
3 PREPARATION OF THE GNSS RECEIVER
3.1 INSTALLATION OF GEOMAX ASSISTANT
Locate the GeoMax Assistant software from Geomax Downloads, in the Zenith10_20
folder and save to your PC. Run the Geomaxsetup.msi file and follow the steps of
the setup wizard to install the software. An icon named GeoMax Assistant will be
created onto the Windows desktop. During the installation process, the required
device drivers are also copied onto the PC. Do not start Assistant before connecting
the receiver as described below.
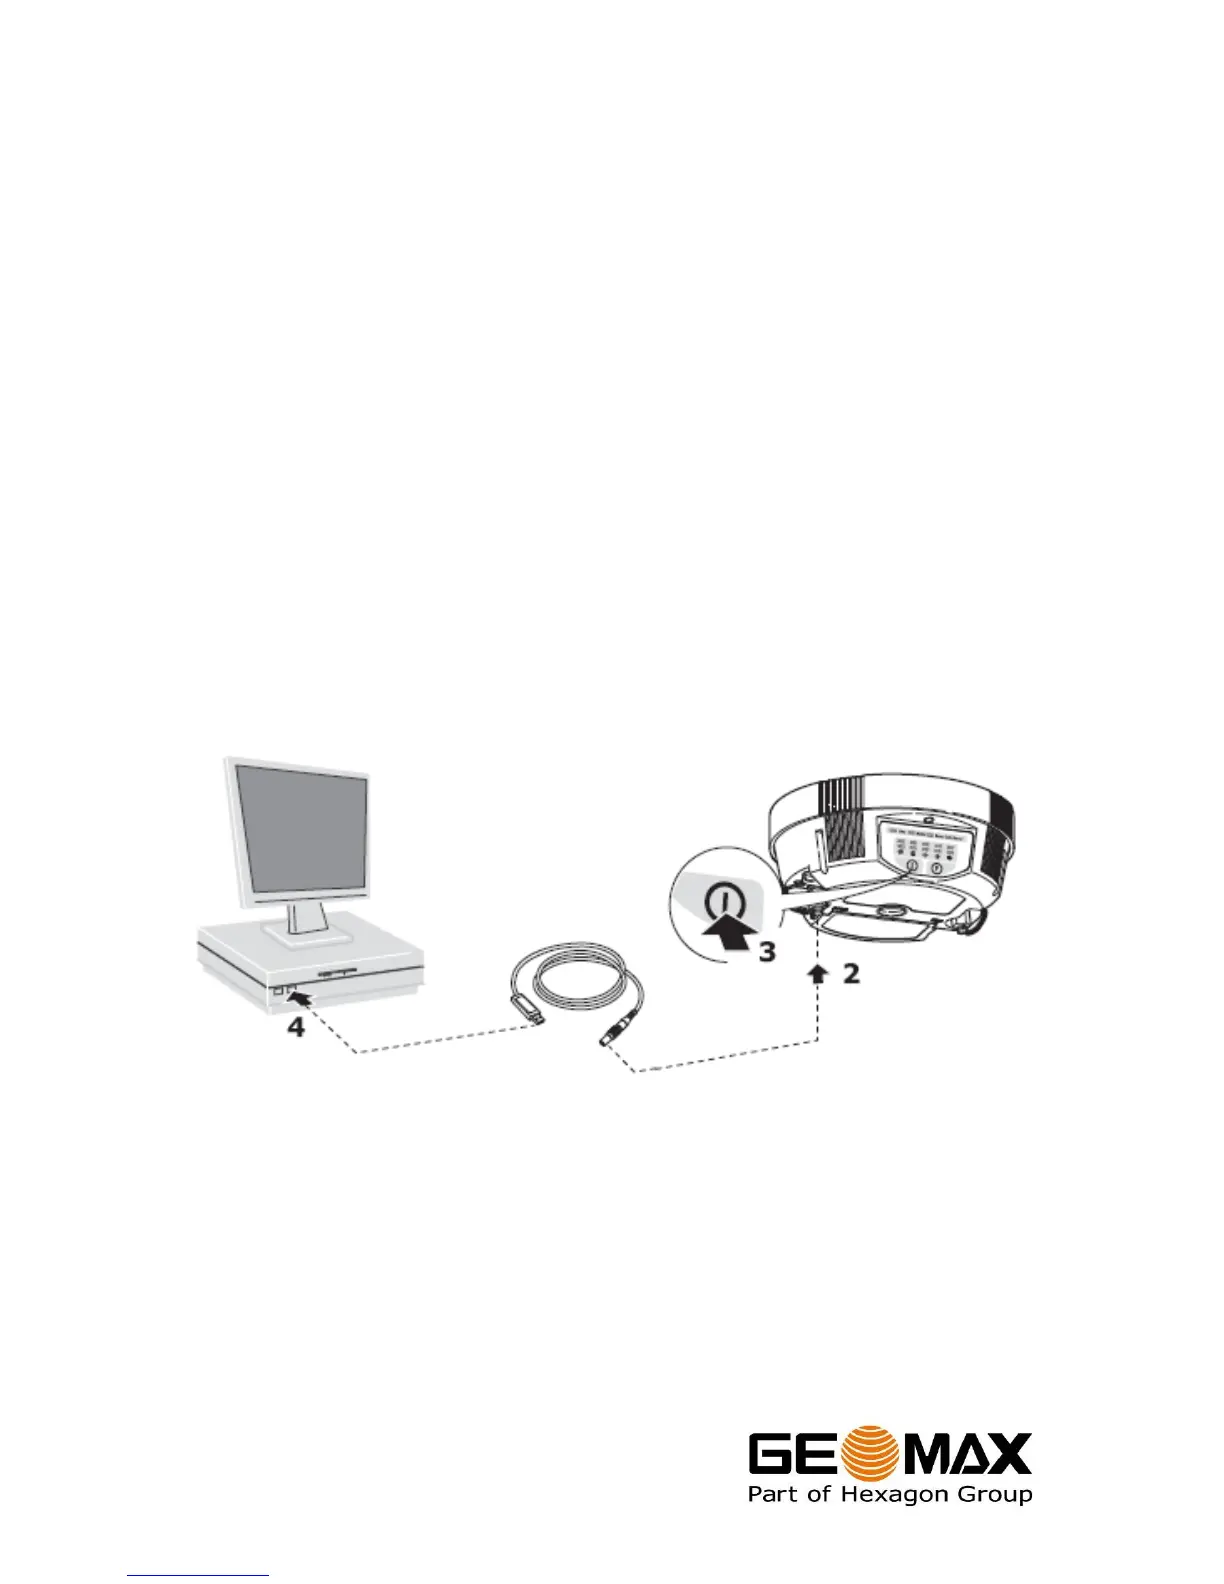
3.2 CONNECTING TO THE PC
Insert a fully charged battery into the GNSS receiver and switch it on. Connect the
supplied ZDC222 USB cable to the 4-pin Lemo port of the receiver (at the GPRS
antenna connection). When connecting to the USB port of the PC, the cable drivers
will automatically be installed. If the Windows Found New Hardware Wizard starts,
click the Close button.
3.3 RECEIVER CONNECTION WITH GEOMAX ASSISTANT
With the receiver connected to the PC, start Assistant by selecting the icon on the
Windows desktop. From the menu bar, select File…Connect. The receiver COM port
is automatically shown. Select by clicking the OK button. After a few seconds, the
device information of the receiver will be shown.
 Loading...