7.5 Maintenance from above with the top plate off
Remove the top plate by loosening the four screws that hold it in
place, see 7.4 Removing cover panels.
Figure 20. Remove the top plate
7.5.1
Door switch
Removal
• Unscrew the bracket that is held in place with two screws at
the back edge of the beam.
• Then the contact breaker is removed from its mount where it
is attached with two nuts.
Assembly
• Screw the contact breaker into the mount and then screw the
console into the beam again.
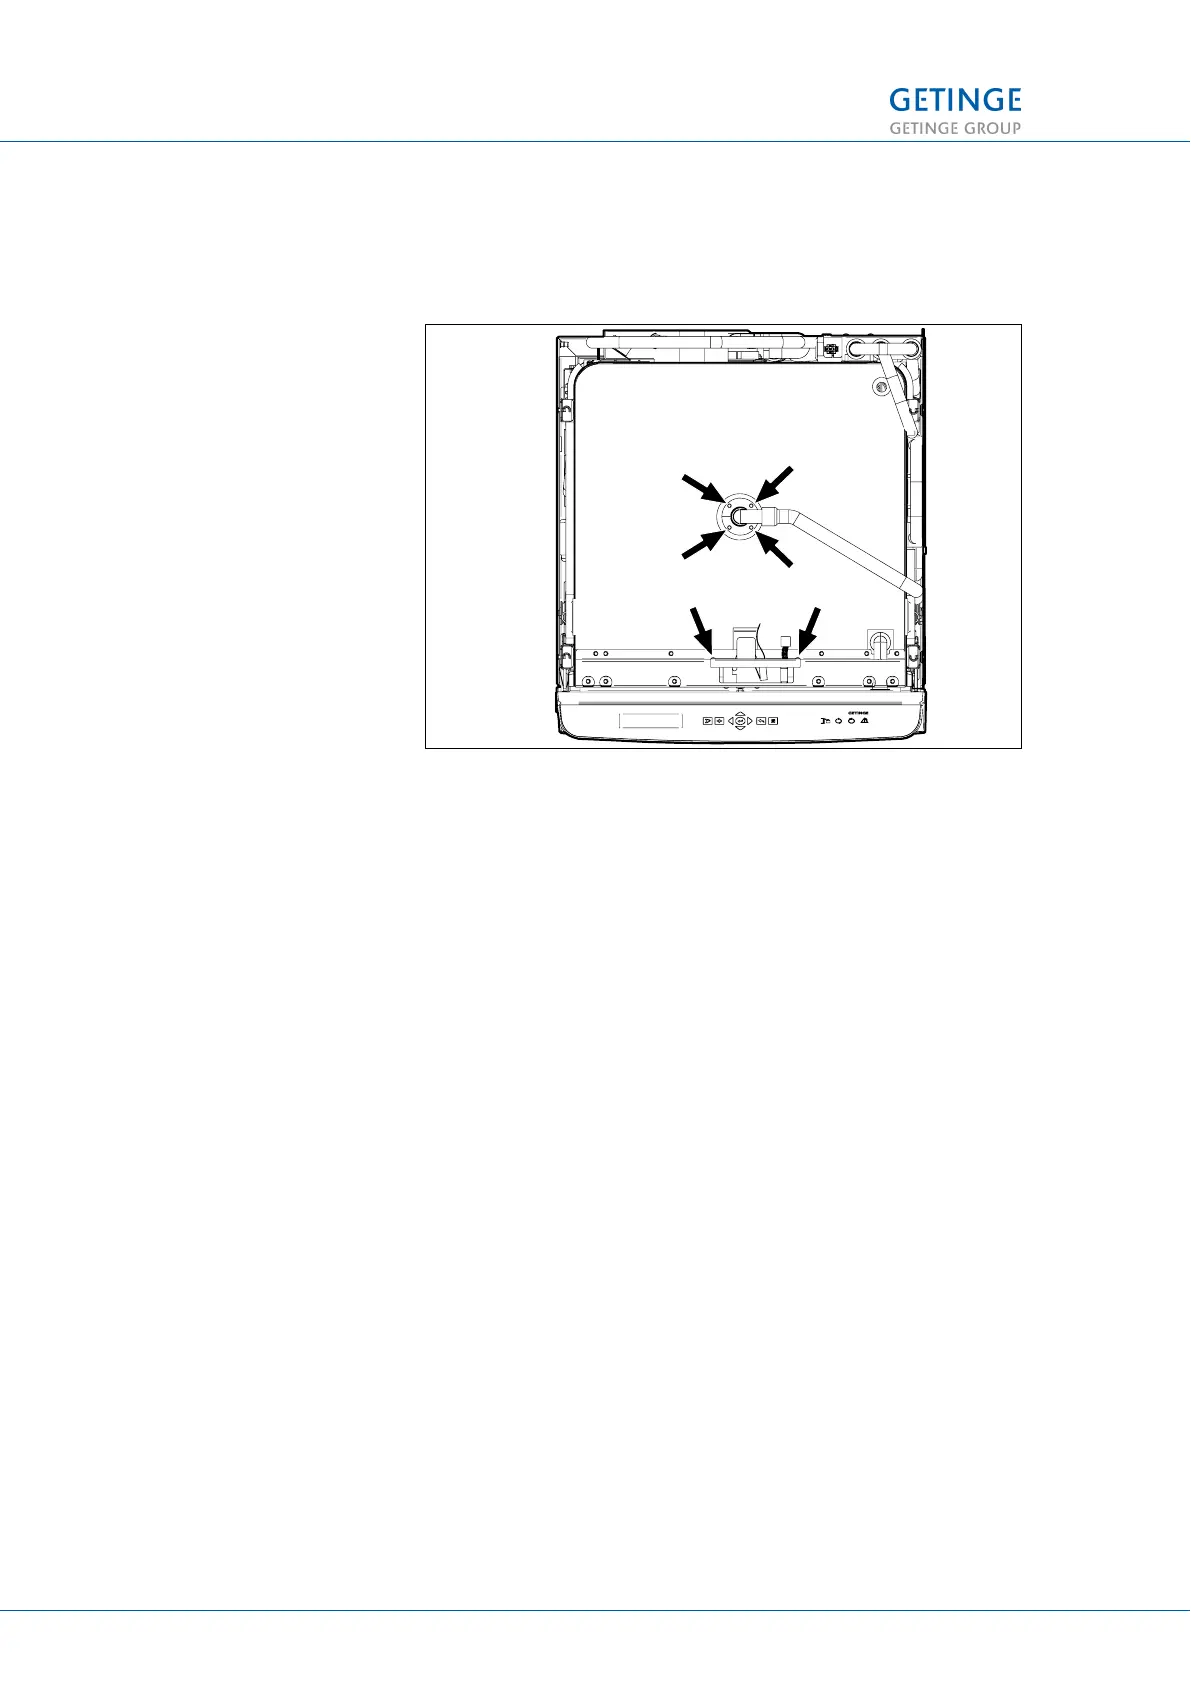
7.5.2
Spray arm tap at top
Removal
• Remove the four nuts that hold the tap in place in the top and
the hose clamp.
Assembly
• Attach the hose to the tap and screw in the hose clamp.
• Then screw in the four nuts.
• Make sure that the nuts go straight on the threads before they
are tightened to reduce the risk that the nuts cut the threads.
7 REPAIRS AND ADJUSTMENT
86 (128) TECHNICAL MANUAL GETINGE WD15 CLARO
<Doc_TEC><Doc_6001396902><Rev.I><Lang_en>
 Loading...