
S
Sara BarnesAug 5, 2025
How to reset emergency stop on GIESEN Kitchen Appliances?
- BBrian BoydAug 5, 2025
To reset the emergency stop, pull the emergency stop button and then push the blue reset button.
How to reset emergency stop on GIESEN Kitchen Appliances?
To reset the emergency stop, pull the emergency stop button and then push the blue reset button.
What to do if burner fails in GIESEN Kitchen Appliances?
If the burner fails, press the on-screen triangle for 5 seconds to reset the machine.
What to do if thermal overload occurs in the drum of GIESEN Kitchen Appliances?
If there is a thermal overload in the drum, press the blue reset button.
What to do if thermal overload occurs in the stirrer of GIESEN Kitchen Appliances?
If a thermal overload happens in the stirrer, press the blue reset button.
What to do if drum pressure is low in GIESEN Kitchen Appliances?
If the drum pressure is low, check if all doors and valves are closed and ensure the chimney is clean.
What to do if fan speed is too high in GIESEN Kitchen Appliances?
If the fan speed is too high, check if all doors and valves are closed.
Emphasizes the importance of following manual instructions to prevent damage or accidents.
Provides safety guidelines for lifting and transporting the machine using appropriate equipment.
Details requirements for specialist installation, location, and connections.
Lists general safety warnings, including maintenance, usage, and area clearance.
Highlights dangers of high voltage, proper circuit breakers, and disconnection during maintenance.
Warns about improper gas connection causing fire or explosions, requiring qualified installers.
Advises caution regarding hot pipes and surfaces that can cause severe burns.
Warns about fire risk if beans are not released timely and advises temperature limits.
Specifies ambient temperature, ventilation requirements, and proper installation location.
Provides a step-by-step guide for safely shutting down the coffee roaster.
States that electric drawings are supplied with the manual and located in the control panel.
Details Giesen's commitment to service and recommends periodic check-ups by certified mechanics.
Specifies that only coffee beans are to be processed to avoid hazardous situations.
Lists the items included with the Giesen Coffee Roaster, including tools and accessories.
Outlines the necessary equipment for unloading and setting up the roaster, such as a forklift.
Provides guidelines for selecting a suitable location, considering floor, accessibility, ventilation, and safety.
Advises on the proper use of a forklift for unloading, emphasizing trained operators.
Details the initial steps of removing the roaster from its crate using tools.
Specifies that only authorized skilled persons should perform electrical connections.
Recommends using an RCCB for protection and adhering to local regulations for electrical connection.
Details requirements for ventilation connection, pipe types, and exhaust specifications.
Emphasizes qualified personnel for gas connection and adherence to codes, listing USA/Canada specific statements.
Details how to connect electrical connectors and the grounding point on the roaster.
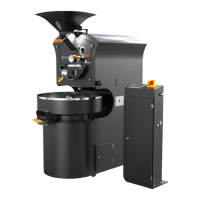
Identifies key components of the Giesen coffee roaster with numbered labels and dimensions.
Guides on connecting power, resetting the machine, and starting the roaster via the control panel.
Explains how to adjust temperature, release beans, and continue roasting based on color.
Details starting the stirrer/fan, releasing beans, and the automatic cooling down process.
Explains the functions and displays of the F1, F2, F3, and F4 screens for machine operation.
Provides in-depth explanations of console displays, icons, and settings like burner, drum, and units.
Outlines the cleaning plan overview with intervals for daily, weekly, and every 12 roasts.
Details the step-by-step procedure for daily cleaning of the coffee roaster.
Explains the 'Cleaning mode' function for in-between roasts, detailing its activation and operation.
Provides instructions on adjusting the drum bearing based on sounds or performance issues.
Presents a maintenance plan detailing tasks and recommendations based on operating hours.
Details the weekly lubrication procedure for the front release valve hinges.
Explains how to lubricate the front bearing by removing the cover and applying grease.
Describes the procedure for lubricating the back bearing using a grease pump.
Lists the two types of grease available for machine lubrication and their applications.
Provides a comprehensive list of alarms, their meanings, and recommended solutions for troubleshooting.
Outlines immediate actions to take in case of a fire in the drum, including shutdown and extinguishing.
Details emergency procedures for a fire on top of the cooling sieve.
Provides steps to manage a fire in the chaff cabinet or dust bin area.
Offers precautions for roasting small batches and warns about fire danger at higher temperatures.
Lists fundamental specifications of the roaster, including weight, dimensions, and batch sizes.
Details electrical parameters such as voltage, frequency, power consumption, and fusing.
Provides data on air productivity, static pressure, and exhaust temperature for ventilation.
Details control panel temperature, underpressure, RPM, gas inlet, and frame specifications.
Provides gas types, injector sizes, burner pressure, and heat input for different gas categories.
| Type | Coffee Roaster |
|---|---|
| Capacity | 6 kg |
| Material | Stainless Steel |
| Roasting Time | 12-15 minutes |
| Power | 3000 W |
| Batch Capacity | 1 kg |
| Heat Source | Electric |