Operation
Manual 21568, Rev. F, March 2008
mode, the display may show MEAS* with the asterisk lines rotating as each measurement is
made.
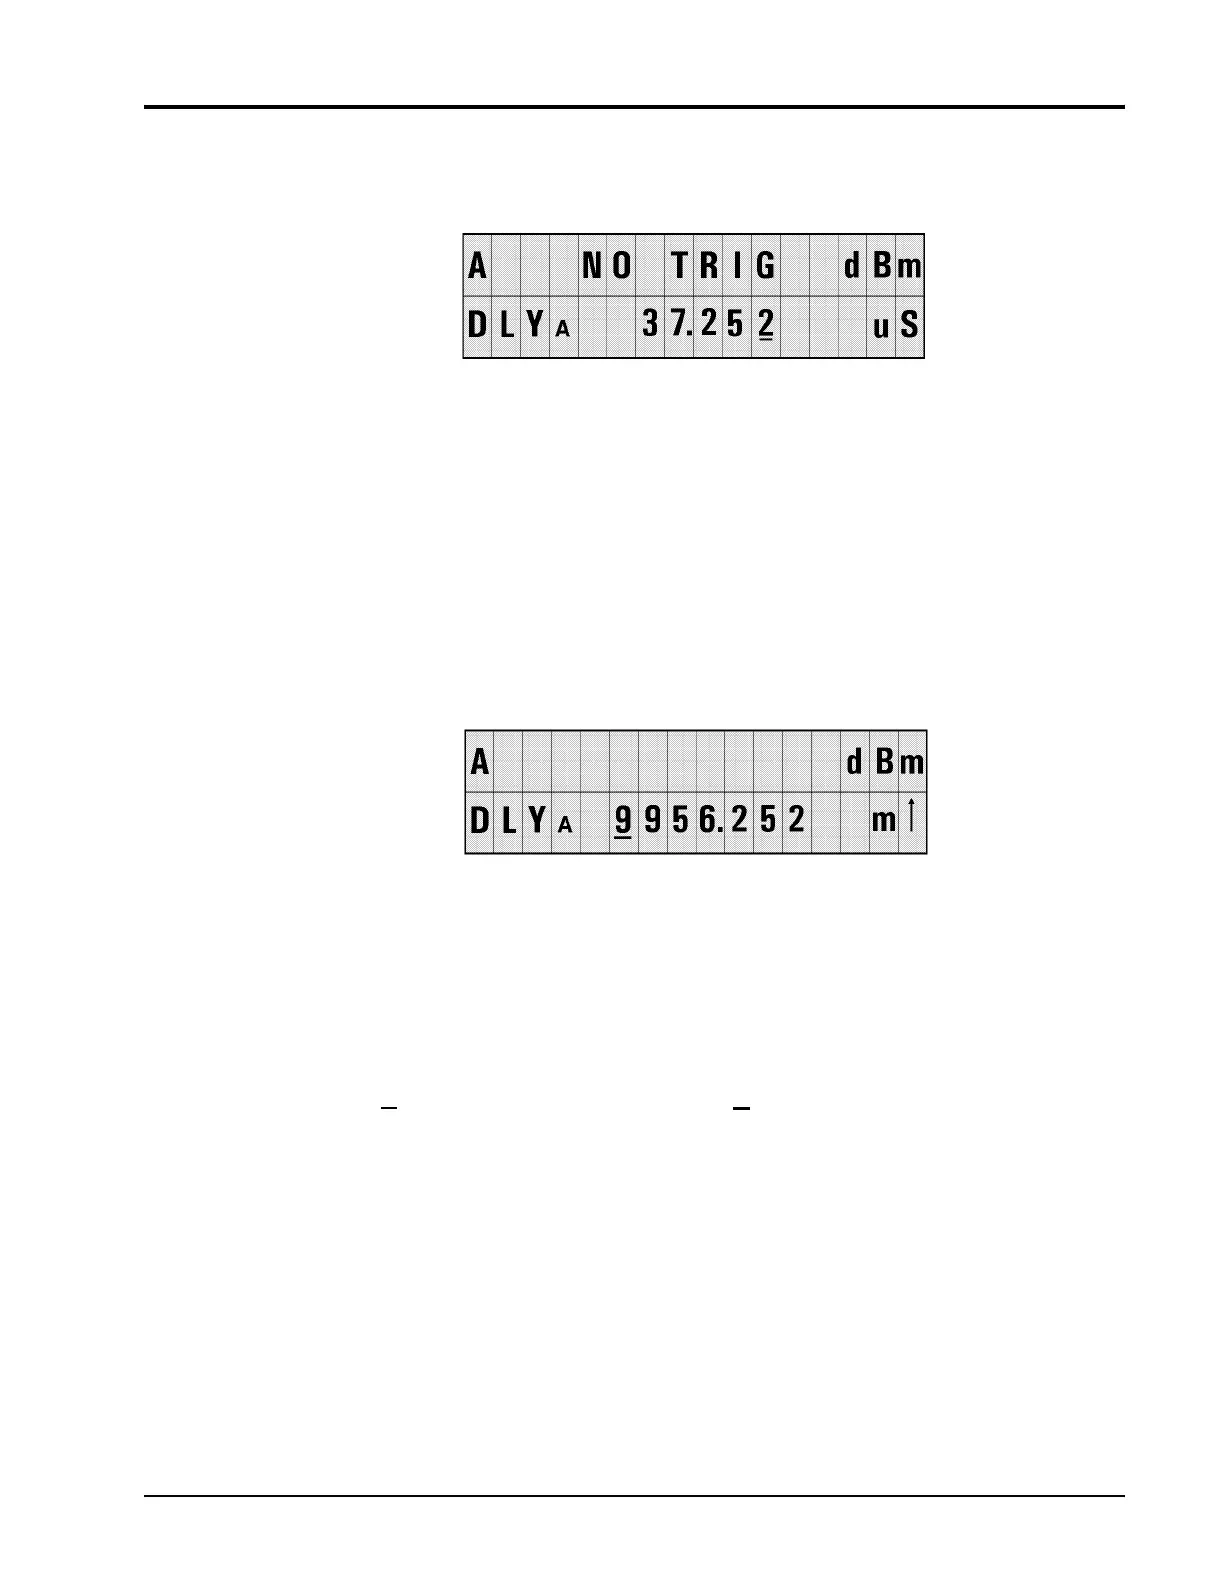
Figure 2-9: Sample Delay with No Trigger Display
The GPIB will return numerical data in the No Trig state, depending on the GPIB measurement
mode. See the GPIB Commands in Section
2.4 for more details on Trigger Modes.
2.3.3 Sample Delay Limits
There is no automatic units scaling for the sample display. You can enter any number up to
9999.999 and then set the units, with the exception of the nS range, which allows only one digit
to the right of the decimal. If the sample delay plus the offset exceed the range of the attached
sensor, the
S at the end of the line will be replaced with an arrow indicating a range error (see
Figure
2-10). An up arrow indicates that a delay is too high, a down arrow indicates that a delay
is too low.
Figure 2-10: Sample Dely Over-Range Indication
When the arrow keys are used to change the units, the digits in the display will simply use the
new units. The only exception is going from µS to nS. The digits to the right of the decimal point
will be reduced to one digit, and that last digit will be either 0 or 5 as shown in the following
example:
Starting Display Action Resulting Display
15.678 uS ↓ 15.5 nS
Setting Delay from the Default Display
A cursor will be displayed on the sample delay in the default display. When you change the
sample delay by pressing an up or down arrow key, the associated sensor will be immediately
programmed with the new delay. The power display may be replaced with NO TRIG until a new
power measurement can be made with the new sample delay.
If an over-range sample delay is entered, no measurement will be made until the over-range
condition is corrected (over-range includes delay plus offset).
If there is more than one delay display line, the left and right arrows will move the cursor off the
end of one display line and onto the next.
 Loading...