19
Girard Systems © 2005
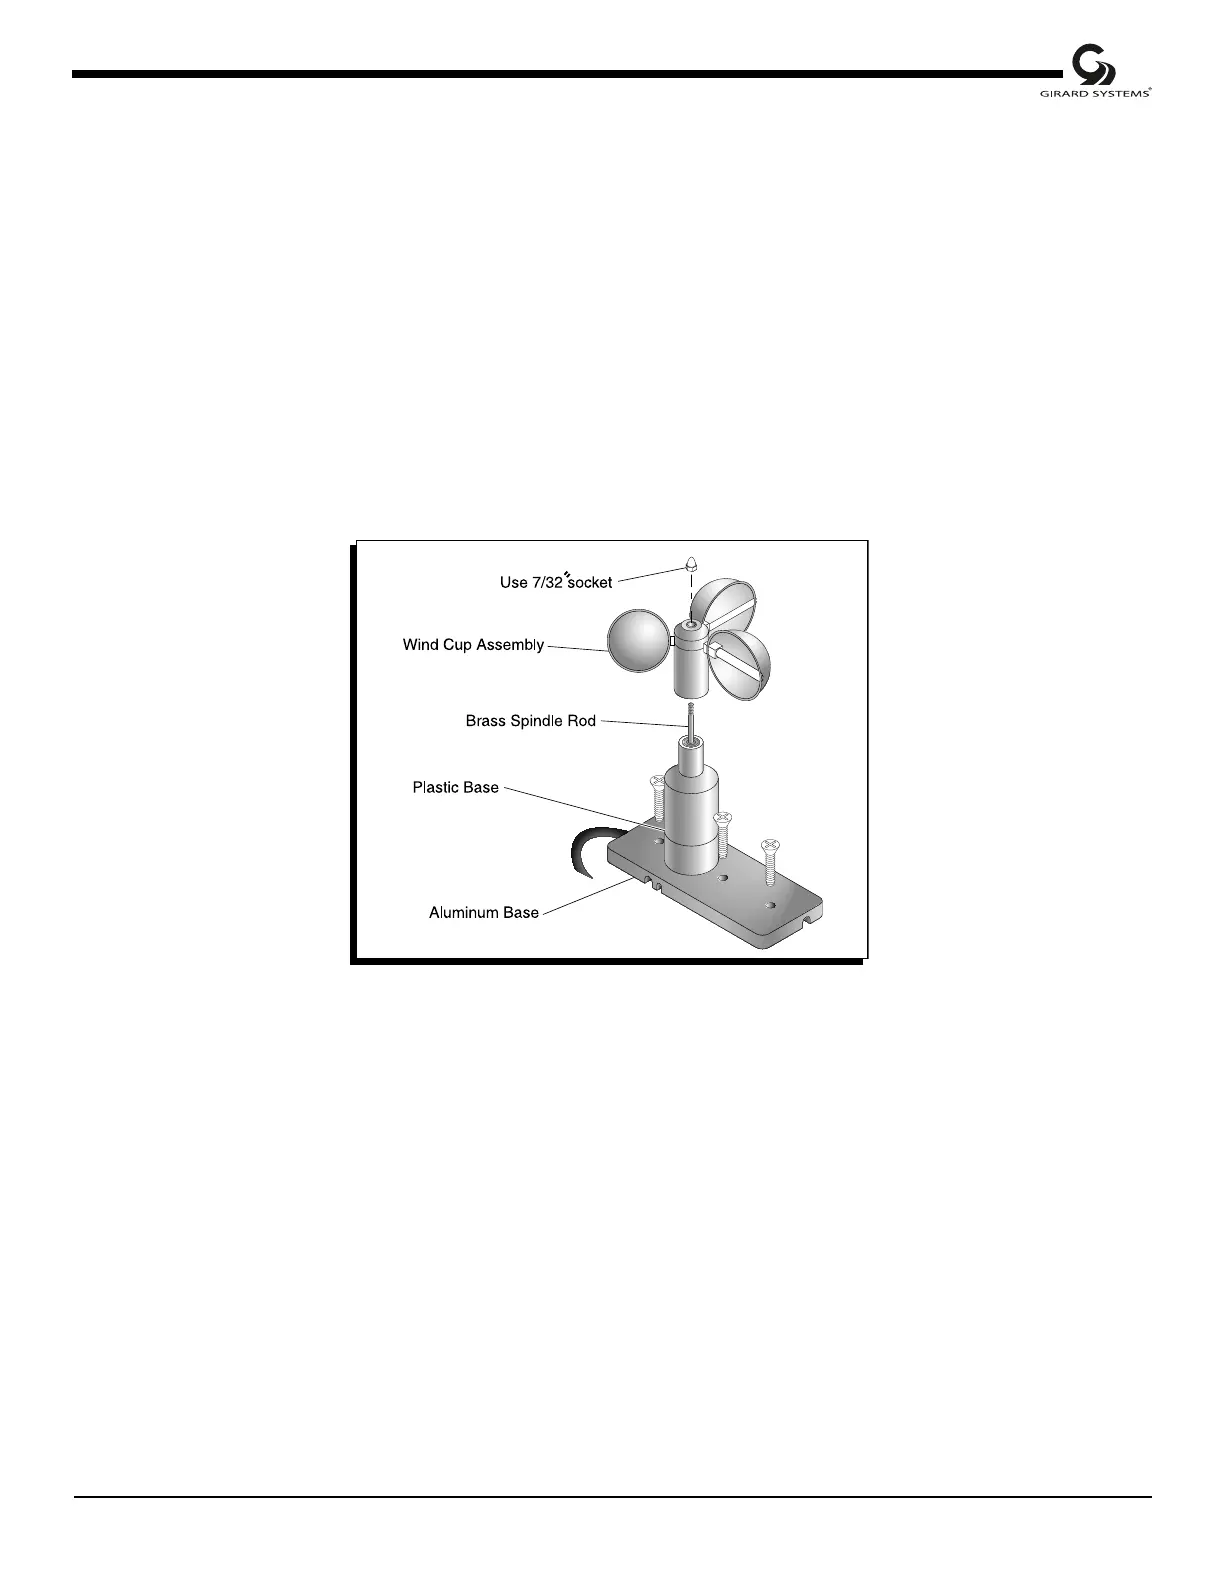
G. Anemometer Disassembly
(NOTE: This is only for new style anemometer)
1) Remove Anemometer from aluminum base following reverse of installation instructions.
2) Holding cylindrical plastic base of anemometer use fingers to hold wind cups steady.
3) Use 7/32 socket wrench or open end wrench to remove plastic nut from top of anemometer.
4) Using gentle force pull wind cup assembly straight up off of anemometer base (See Figure 11).
CAUTION: be careful not to bend or damage brass spindle rod as this would render the
anemometer useless.
5) Reassemble anemometer in reverse order using new wind cup assembly in conjunction with old
plastic anemometer base.
6) Reinstall anemometer to aluminum base.
7) Recalibrate anemometer using steps described in the installation instructions.
Figure 11
ANEMOMETER DISASSEMBLY
H. Instructions for replacing a motor
Procedures may vary from one vehicle to the next, for the removal and replacement of motors on the
G-2000 awning. This variation, in part, is a result of different factory installation methods and
preferences on different vehicles. It may also be a result of the placement of the awning on the
vehicle, i.e. accessibility of the motor. This variation primarily affects the initial accessing of the
motor. Subsequent replacement operations are basically the same. These instructions address the
‘accessing the motor’ as a separate category for clarification purposes. Additionally, variations in the
motor style exist. The procedures are intended to be universal and inclusive of all motor types and
installations.