24
Girard Systems © 2005
I. Fabric replacement
Recessed awnings:
This fabric changing procedure is recommended for use on G-2000 Awnings in which the
awning has been ‘recessed’ into the vehicle sidewall. This is typical with both ‘Beaver’ and ‘Safari’
Motor Coach installations. If the awning has not been recessed and has been ‘surface’ or ‘flush’
mounted onto the vehicle side, please see ‘Fabric Replacement Method #2, Surface mounted
awnings.’ In either case, the old awning fabric can be removed without the need to remove the
complete awning, or the awning roller tube. All awning hardware will remain in position.
NOTE: this procedure requires the use of the awning manual crank. If no manual crank is
available, the motor limit switches must be used to create the settings. If this case, refer to
‘Adjusting Motor Limit Switches”.
Removing the old fabric:
1) Open the awning fully until the arms ‘click’ into place. Using the manual crank, (use the
motor limit switches and adjust, if no crank is available) continue to rotate the roller tube
until all the fabric is unrolled and the ‘C’ groove of the roller tube is accessible.
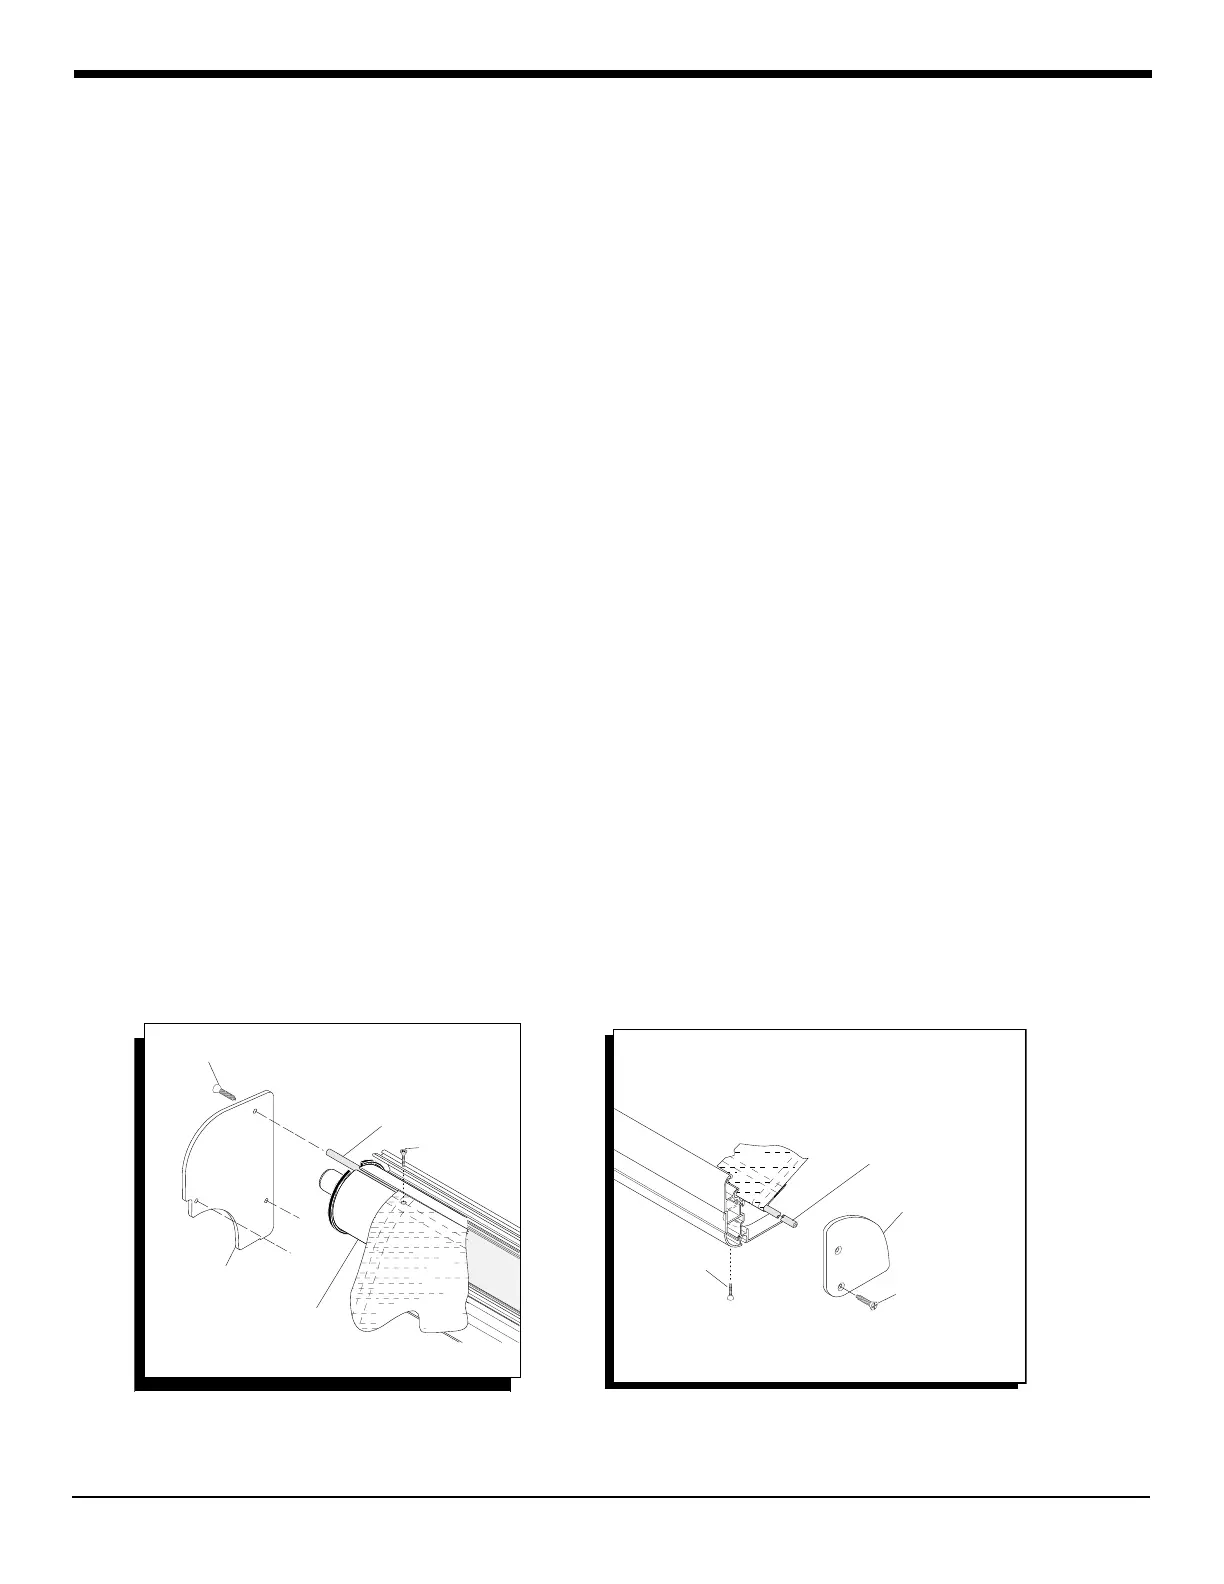
2) Remove the (4) four fabric set screws (two are located on the lead rail and two are located on
the roller tube. see Figure 14 & 15)
3) Remove the left hand lead rail end cap. Shift the fabric from the roller tube ‘C’ groove by
sliding it along to the left hand end of the tube. At this point the white poly rope should be
accessible from the end of the fabric and roller tube.
4) Using a screwdriver, bend the Poly rope down and outward such that it can be gripped with
a pair of pliers. Pull the poly rope completely out of the roller tube.
5) The remaining fabric will now be free and fall from the roller tube.
6) Slide the old fabric out of the left hand side of the lead rail.
7) Preserve the Poly rope that was removed from the fabric at the roller tube.
Poly Rope
Main Housing
End Plate
Screw For
End Plate
Roller Tube
Some pieces not shown for clarity
Fabric Set Screw
End Plate For
Lead Rail
Screw For End Plate
Poly Rope
Fabric Set Screw
Some pieces not shown for clarity
Figure 14 Figure 15
Removal of end plate (lfeft Side) Removal of Face plate and poly rope
 Loading...